Gluing

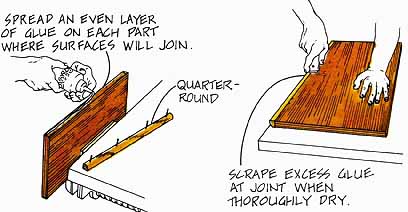
Use household white glue or an aliphatic resin
glue. Both plywood edges and the end grain of lumber drink it. Quench the
thirst by putting on a pre-coat of glue a few minutes before spreading an
even layer of glue on each part where surfaces will join. A little glue should
squeeze out of the joint as it seats; experience will quickly teach you how
much to use. Over-gluing the joint doesn’t make it stronger—it just makes
cleaning up harder. Let all excess glue dry, then remove it carefully with
a scraper.
Clamping

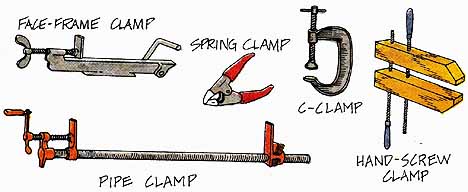
Clamps are essential. At nearly every stage of
your project’s construction, you’ll want to put a clamp to work.
Assembly

Prev.: Drilling and Fastening
Next: Doors and Drawers
ALL ARTICLES in this Guide:
DIY and Custom-Made Storage Solutions: Components You Can Build for Home, Office ... as a Hobby or for Sale (Profit, earn Income)
