How to lay and cut bricks. How to mix, pour and finish concrete. How to build steps and paving blocks. Choosing alternative pavings: flagstone, planks, log rounds, wood blocks, wood beams, bark chips. How to build edgings, retaining walls and plank walls. A guide to garden paving materials.
All too often, homes simply have backyards and nothing resembling a patio. Or at best, the so-called patio may be a big square of concrete just beyond the back door.
But the yard -- behind the house or in front , for that matter -- can be turned into an attractive patio garden that can change the whole feeling of your house and how you use it. A patio, like a deck, should be an extension of the house, a smooth transition that adds to your living spaces. Then in the patio itself there should be more transitions in the form of walkways, open spaces and shrubs that please the eye.
The patio should be planned around the uses you have in mind for it, how much activity will go on there, how much openness and how much privacy is desired.
It would be nice to say that changing an ordinary backyard into a delightful patio garden is a fairly easy task.
Unfortunately, it requires work and sometimes lots of it, depending on your own expectations and how difficult an area you have to work with.
But in the end it will be worth it, not only for your satisfaction but because you will have significantly raised the value of your property.
In planning the patio, you'll want to study several basic questions.
What type of paving materials you want in the garden will be one of the first considerations, for that will help set the tone of the whole area. It may be brick laid on sand, irregular pat terns of textured concrete, or blocks of redwood laid like bricks on sand.
The surface you choose will be determined in part by what activities you plan there. A family with young and active children may want a combination of concrete and grass as play areas year round. Others may want small nooks where they can relax in peace and quiet.
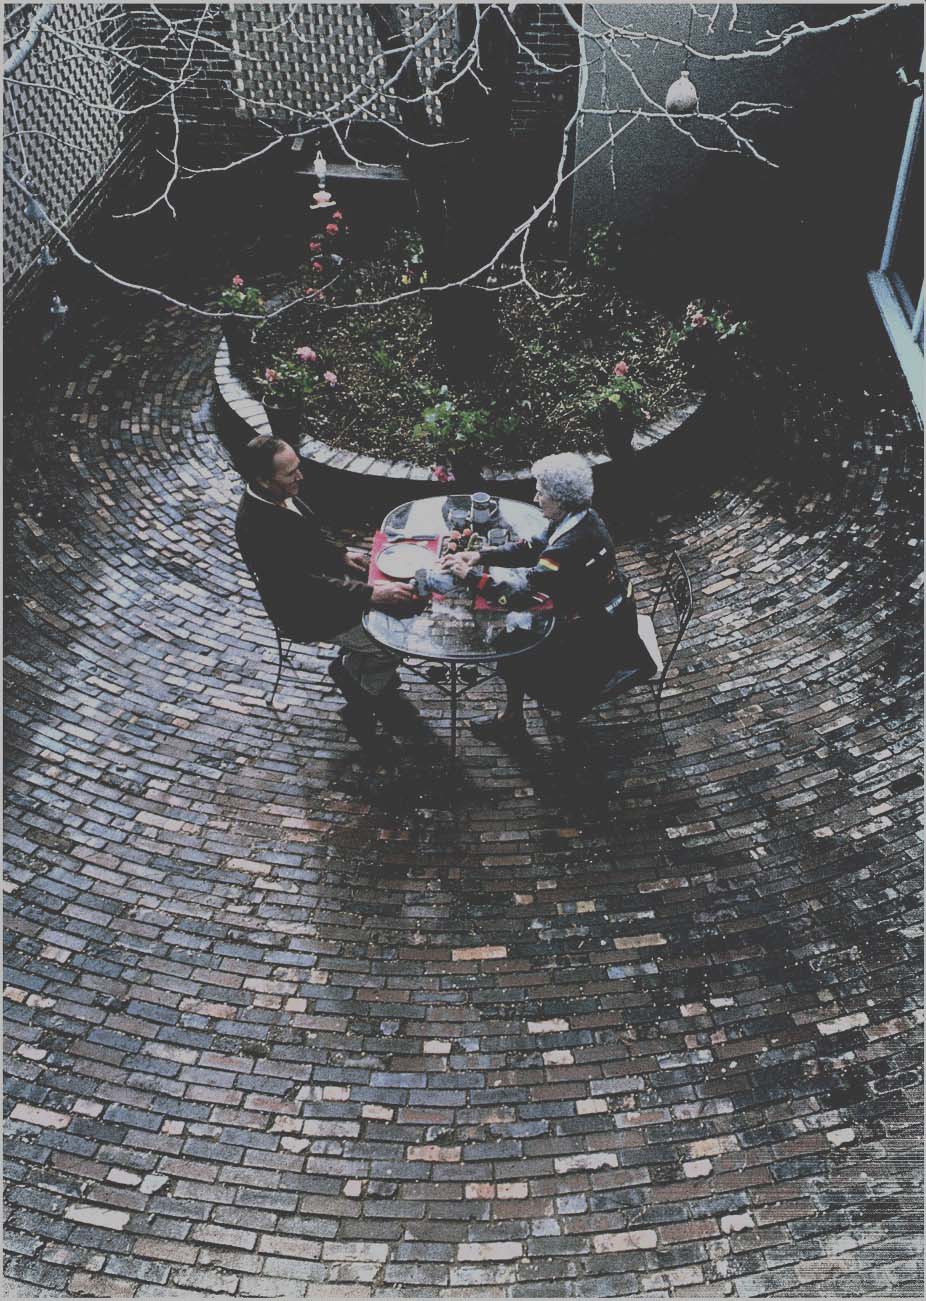
--------- A circular brick pattern with a tree at the eye of
the hurricane, creates dynamic motion within an enclosed space.
-------------
Another consideration is ease of maintenance. That will be partially determined by how much time you have to work in and around the patio, and how much work you want to do. A patterned concrete patio, while difficult to install , is virtually maintenance free.
Bricks on sand, however, require occasional repair as bricks crack or sink out of line in the sand.
Apart from regular maintenance, there is the question of just how much work you can do initially to alter your property. It's wisest to build the patio to harmonize with the existing terrain.
If you have a steep slope in your yard, plan on altering that with terraces which will give you level spaces to walk or garden, rather than trying to grade all the ground absolutely flat. Conversely, an uninteresting flat yard can be altered by raising the ground one or two levels with fill dirt.
Also, keep in mind the location of your planned patio in relation to the sun and prevailing winds. If you are going to need lots of shade in the summer, include existing shade trees in your layout, or plan on planting shade trees.
If wind is a problem, design the patio so there will be areas of calm.
Privacy is another consideration.
You don't want to have a patio where everyone walking or driving past the house will be able to watch your activities. If this seems unavoidable at your house, screen the street with a fast-growing hedge, or a fence just high enough to block the view in with out hemming you in.
The cost of your patio is a final consideration, but don't let it deter you from having what you want. A poor compromise on your part will leave you with a patio that you find less than pleasant and therefore won't use much.
If you can do most of the work yourself -- and that is what this section is aimed at -- consider all you save in labor costs, and put that toward buying exactly the type of materials you want.
You can do it. It's just a matter of making the decision and the first move.
-----------
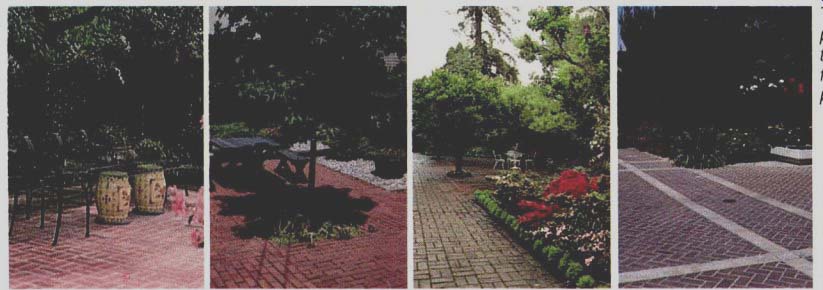
------ Different brick patterns delineate areas, separating circulation
from use spaces.
-----------
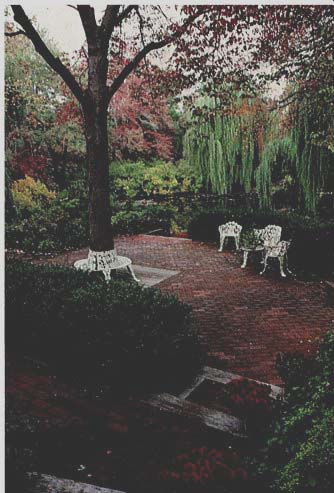
----- The earthly quality of brick patterns provides an esthetic
counterpoint to the flowers, trees and bedding plants on any patio.
The wonders of brick: In planning a patio, many people find that brick is the best solution. Bricks come in a variety of rich , warm colors, are relatively inexpensive and not difficult to put down for terraces or walks.
They can be placed flat or on edge, can be set in dry sand or mortared in place, and they can be laid in a great variety of eye-catching patterns.
There is also a wide variety of styles to choose from.
The common brick, also called the building brick, can be found virtually everywhere throughout the country.
The common bricks often found in garden construction are divided into three main categories. The most common are wire-cut bricks with straight , rough sides. Sand mold bricks are smoother, with tapered sides that make them easier to remove from the molds. Clinker bricks are hard baked, tough and smooth, and often show patches of black oven burns.
Bricks are also available in a variety of textures that should be carefully considered in planning your patio.
A very smoothly finished brick may be slippery when wet and reflect too much glare in the summer. Particularly irregular bricks - such as stippled or water-struck bricks - are sometimes considered too rough for comfortable walking in the patio, particularly for women in high-heeled shoes.
A good choice are the sand-finished bricks; they provide good traction with a minimum of glare.
Some of the different styles of bricks include the standard, engineer, economy, Roman, and utility.
In addition, bricks are also rated for durability. "NW" stands for no weather resistance. "MW" bricks have moderate weather resistance and "SW" bricks can stand severe weather. SW should be the first choice for patio bricks, particularly if you live in an area with harsh winters.
And finally, there are fire bricks that are able to withstand very high temperatures. These, along with fire clay in your mortar mix, should be used to line a fire pit or barbecue.
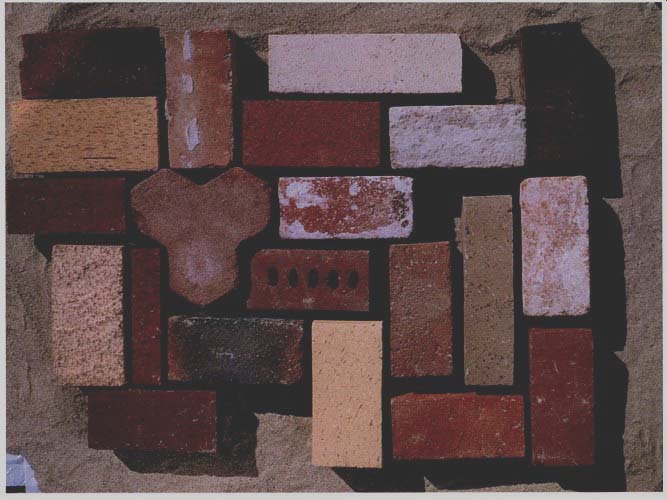
----------- Patio bricks can be purchased in a variety of textures,
from smoothly finished types (which can be slippery when wet) to coarser
kinds. Bricks also come in more than one size and shape.
Brick patterns: Bricks can be laid in several basic patterns which can in turn be altered and combined to produce an almost infinite variety of patterns.
The eight patterns shown here are among the most widely used, and all except the herringbone are simple to install. Herringbone requires a great deal of cutting to fit along the edges.
From the illustrations you can see how the basic styles have been combined into a great variety of patterns. However, such combinations should be consistent and not so complicated that they bewilder the onlooker.
Cutting a brick: The type of pattern you choose will determine how many bricks you have to cut. But even on the simplest arrangement, you sometimes have to cut bricks to make the last row fit.
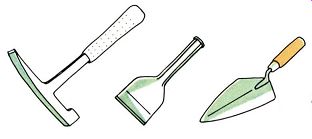
A special broad cold chisel, called a brick set, is used to cut bricks. For the cleanest cut , first score the brick on both sides with moderate taps, then make the final cut with one sharp blow.
If your brick set has a beveled edge, face that away from you.
It's nearly impossible to get a smooth, clean cut with a brick set. The edges must be smoothed afterwards with a chipping action. If a great many bricks are to be cut, it will save time to rent a power cutter that gives smooth, exact cuts.
Estimating needs: Standard bricks are 8 inches long, 3 3/4 inches wide and 2v.. inches thick. In making your estimate, allow 5 bricks per square foot for bricks laid flat. The extra bricks will al low for some breakage, which is al most inevitable. Calculate the square footage in your planned patio by multiplying the width times the length in feet. For patios with triangular, circular, or irregular outlines, see the illustrated graph on page 77 to aid you in calculating the area.
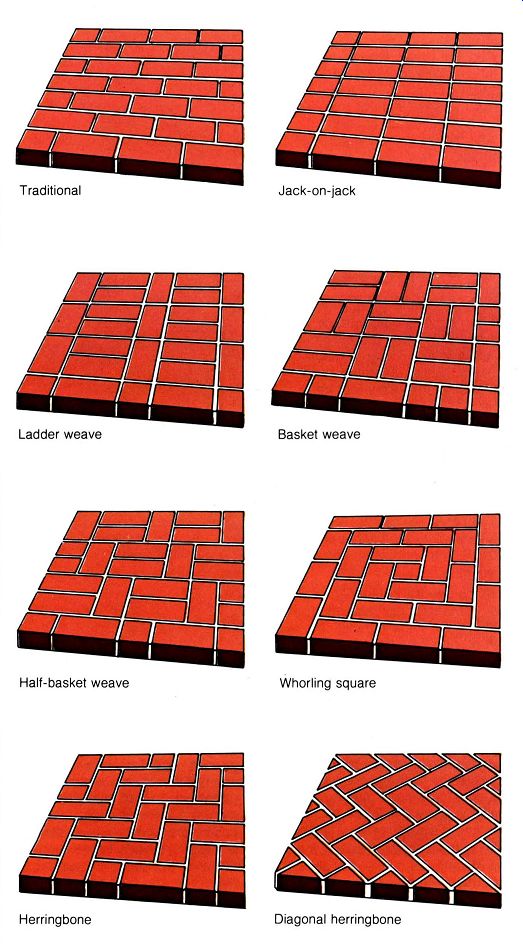
------- Common brick patterns: Jack-on-jack; Ladder weave; Basket
weave; Half-basket; Half-basket weave; Whorling square; Herringbone;
Diagonal herringbone
----------------

------- Screed
Laying the brick: One of the great advantages of laying brick in sand is that you can do as much in a day as you feel like without worrying about mortar setting up too fast.
The first step is to outline the area to be bricked. Drive stakes at each corner and then connect them with string. Remove any sod or weeds in the area with a straight-edged shovel.
Cut the edges under the outline straight up and down. Remove the sod and dirt to a depth equal to the thickness of the brick plus two more inches for the sand base.
Before laying in the sand, spray the ground with a grass retardant. Or you can cover it with black polyethylene to keep weeds from growing through.
When using plastic, cut holes about an inch in diameter every foot for drainage.
If the ground is clay and doesn't drain well, first put down a 2-inch layer of pea gravel to handle the runoff. If the ground is soft and spongy, per haps because of loose fill dirt, it must be compacted before putting down the sand. If you don't, the ground will settle unevenly under the weight of bricks and people, and you will be constantly re-setting loose bricks.
To compact loose dirt, either rent a power compactor or make one from a length of 4 by 4. For handles, screw a length of 2 by 2 on top, or shove a length of pipe through a hole drilled near the top, or screw on some large handles.
Once the area is cleared and compacted, place redwood or cedar 2 by 4s around the edges (other kinds of 2 by 4 should be pressure-treated). These should be flush with the lawn, if there is one, for ease in mowing. Hold the edging in place with 2 by 4 or 2 by 2 stakes on the outside every 4 feet.
Fill the bed with approximately the amount of sand needed - 2 inches is a good base - and spread it with a shovel. Spray the sand until thoroughly damp.
The sand is now smoothed and leveled to the precise depth with a screed. It can be cut from any straight length of 2 by 4. The desired depth is achieved either by nailing on "ears" or notching the ends to fit over the edging.
In screeding large areas, make temporary edging boards in the middle with 2 by 4s set into the sand and leveled.
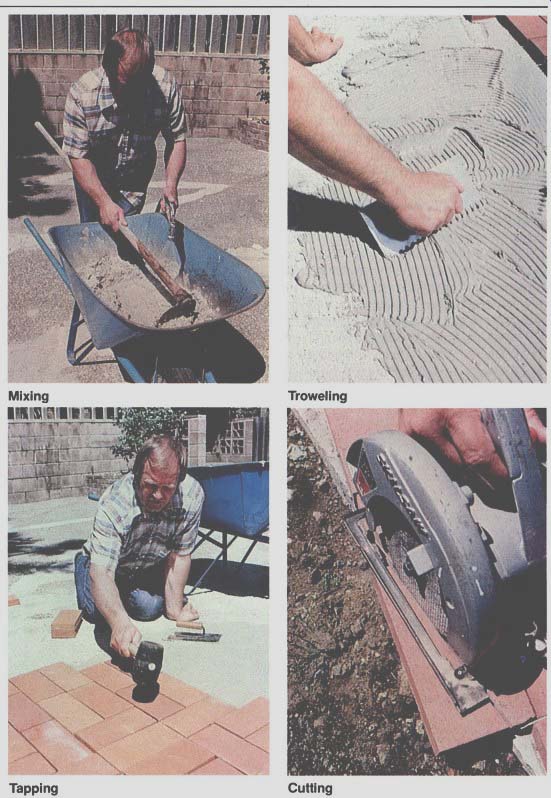
--------- Mixing , Tapping , Troweling ,
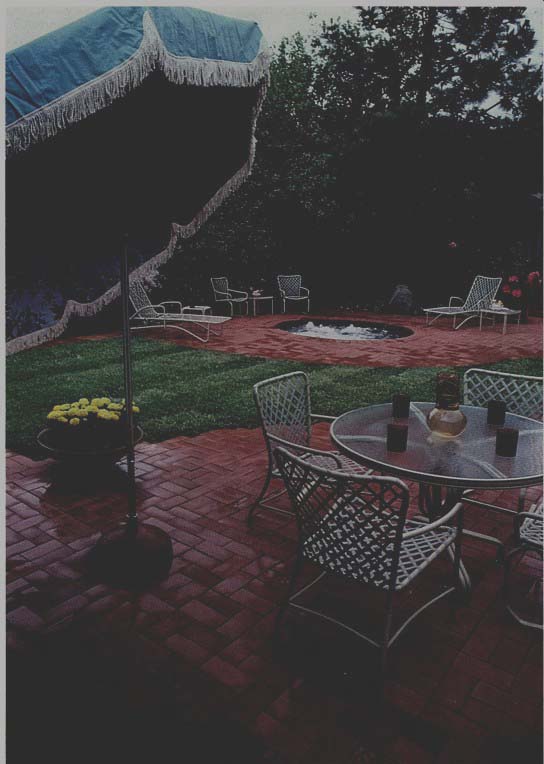
--------- The contrast between red brick and green lawn Is dramatic
and pleasing.
Cutting
Starting from one corner, begin laying the rows of bricks. Press them tightly together; the sand later spread on top will work its way into these joints and bind the brick firmly in place.
As you progress, work in the sand, screeding as you go. Don't kneel on the bricks for that will dislodge them.
After each row is finished, lay a short length of 2 by 4 across the bricks and tap it to level them. For any stubborn bricks, use a rubber mallet. Check your work with a level after each row.
When all bricks are in place, spread a layer of fine, dry sand over them.
With a long-handled push broom, sweep the sand back and forth across
the bricks to fill the cracks. Sweep at an angle so you don't sweep sand back out of some cracks.
Bricks in mortar: Although bricks set in sand provide a firm patio, some people prefer them set in mortar for a more finished appearance and more stability.
An easy way of binding brick with mortar uses dry concrete mix. With this method, lay the bricks out on sand as previously described but space each one '14 inch - use a 'I. -inch piece of plywood as your guide.
Thoroughly mix one part portland cement to three parts completely dry fine sand. Spread the mix over the bricks and gently sweep it back and forth until spaces between are filled.
Now, using a fine spray attachment on a hose, soak the entire area. Wait 15 minutes and then repeat the pro cess to make sure that the water has penetrated to the bottom of the mix.
After the bricks have dried, sweep in another layer of the mix if necessary to fill any settled areas. Give a final soaking to the new mix.
Mortaring bricks: Bricks individually mortared in place are more permanent - and more difficult -than bricks on sand. They must also be laid on a concrete base.
If you already have a concrete pad or sidewalk you want to cover with brick, you can do it with bricks cut as thin as 1/2 inch. These can be put down with a special epoxy that is available at hardware stores or per haps where you buy the bricks. The epoxy is spread in a thin layer with a trowel and each brick pressed into place like tiles. Be careful that the epoxy does not become stuck to the top of the brick; it's difficult and time consuming to clean off . If you don't want to use the epoxy method, full-size bricks are needed.
Work only a medium-size area at a time so the mortar doesn't harden too rapidly on you. Wet the concrete slab so it doesn't draw too much moisture from the mortar, then spread a 3/8-inch layer of mortar over the slab. Then press the bricks - which also should be dampened - into place. Space each one 1/2 inch, using a piece of 1/2 -inch plywood as a guide.
As each brick is placed, give it a light rap in the center to settle it into the mortar. As each row is completed, place a level across it and adjust any brick that's out of line. For wide areas, place the level on top of a straight 2 by 4.
When all the bricks have been placed, let them firm up overnight be fore filling the spaces with mortar. If you must kneel on the bricks, put a sheet of 0.25-inch plywood over them so your weight is distributed.
Fill the spaces with a mortar made from 1 part masonry cement and 3 1/2 parts fine sand. Color can be added to the mortar, to blend or to contrast with the brick color.
The mix is most easily placed by using a grout bag, available at most hardware stores. Squeeze the mix into the joints and then finish with a jointing tool.
After 24 hours the brick surface can be cleaned of mortar stains with a mix ture of 1 part muriatic acid to 10 parts water. Scrub the bricks with a large, heavy-duty sponge or a burlap sack.
Concrete - multi-textured surprise: A concrete patio need not be a massive, unadorned slab that dominates your backyard. Concrete can be worked in a great variety of ways that are both practical and at tractive. It is relatively cheap and it goes in place quickly. One disadvantage is that it is heavy work to mix and finish your own, but that can be reduced if you have a ready-mix truck deliver it for you.
Concrete can be colored, curved to any shape, inlaid with stones, stamped to resemble cobblestones or finished for a smooth shuffleboard court . It makes a fine, lasting patio surface.
Making good concrete: Good concrete comes from a proper mixture of cement , sand and gravel, plus water. When cement combines with water, a chemical change starts that binds the sand and gravel into the familiar concrete.
Portland cement - which is a type of cement and not a trade name - is the most common cement used in construction. There are several different grades but for quality assurance, the bag should be marked with the letters ASTM (American Society for Testing Materials). When storing cement, always keep it off the floor and dry. If it gets damp, solid lumps will form and it will no longer be usable.
Masonry cement is even finer than portland and is commonly used when making mortar alone.
Sand is considered a fine aggregate and is essential to a concrete mix.
Sand must be clean and free of dirt or vegetation. If you are digging your own sand, test for silt content by putting 2 inches of sand in a quart jar and filling 3/4 full with water. Shake for one minute and let settle. If more than a 3/16-inch layer of silt lies on top of the sand, it is too dirty to use.
A reminder: never use sand from the seashore since the salts therein will prevent the concrete from curing properly.
Gravel, or coarse aggregate, usually ranges from 1/2. to 1 1/2 inches in size.
Generally, no gravel should be greater in diameter than % the thickness of the concrete slab.
Water is a particularly critical element in good concrete. It must be clean, free of any salts, oils or acids. As a rule of thumb, it should be clean enough to drink. The amount of water used makes the difference between weak and strong concrete.

-----------
Useful tools: A lot of good concrete work can be done with just a trowel and strikeoff board, but a few more tools make life easier.
Gloves: Working in concrete quickly wears away the skin and leaves it cracked and bleeding. Protect your hands with good work gloves.
Rubber boots: You need these be cause on many projects you are forced to work in the middle of the concrete.
Trowel: Buy the best you can afford since it takes a beating in smoothing, cutting, scraping and chipping concrete.
Strikeoff board: This is usually just a straight 2 by 4 used to level off the concrete after it's been poured.
Steel finishing trowel: This gives a smooth, almost glassy finish to concrete.
Edger: Similar to a finishing trowel but has one curved side to cut a rounded edge between the concrete and form.
Groover: This is necessary to cut smooth, straight control joints in concrete to prevent cracking.
Level: This is a must tool to check your poured forms, both vertical and horizontal. When longer reaches are necessary, place it on a straight 2 by 4.
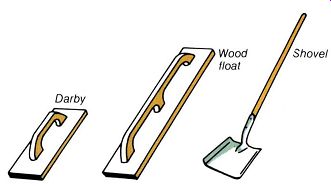
Bull float: This long-handled float smooths out any depressions or ridges after the concrete has been roughly leveled with a strikeoff board.
Wood float: This gives a rougher finish to concrete than the steel trowel, but that is often desired on driveways or walkways where traction is needed.
Darby: This is used over smaller areas in the same manner as a bull float.
Square-edged shovel: This shovel is essential for being able to cleanly pick up the concrete mix or smooth out the work site.
Estimating concrete needs: You want to estimate the amount of concrete needed before you begin a project. A correct estimate will save you time and money.
If you are having the concrete de livered or are using bags of ready-mix, you need only calculate the cubic feet or yards involved. If you are mixing your own, you need to estimate how much cement , sand and gravel to order.
To find cubic feet , multiply the length by the width in feet , multiply that by the thickness in inches, and divide that by 12. For instance, a patio 12 feet wide, 20 feet long and 4 inches thick requires 80 cubic feet of concrete (20 X 12 X 4 = 960, divided by 12 = 80 cubic feet) . Concrete ready-mix in a 90 lb. bag contains 3/8 of a cubic foot. The job above would therefore require 121 bags (80 divided by 0.66 = 121.2). In this case, it would be better to order it by the truck, if possible. Since truck-delivered concrete is always sold by the cubic yard (usually the minimum delivery) , you must turn cubic feet into cubic yards. Since there are 27 cubic feet in a cubic yard, you need 2.96 cubic yards of concrete (80 divided by 27 = 2.96). Here's a ready-reference guide on mixing your own concrete in a proportion of 1 part cement, 2V. parts sand and 3 parts gravel (1 1/2 inch diameter), which is excellent for a patio surface.
For 100 square feet of concrete of varying thicknesses:
Ingredient. Concrete thickness (in.)
3 4 5
Cement (sacks) 5.8 7.8 9.8
Sand (cu. ft.) 12.9 17.3 21 .7
Gravel (cu. ft.) 17.5 23.6 29.6
For each sack of cement, use 5 gallons of water.
Aggregates are sold by the ton or by the cubic yard. Convert from pounds to cubic yards, by assuming a weight per cubic foot of 90 pounds for sand and 100 pounds for gravel.
---------------
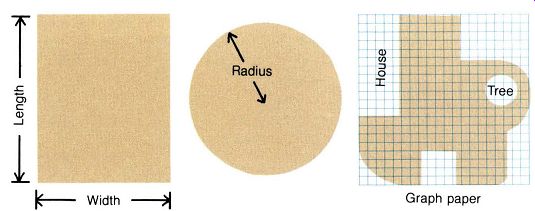
------------- Calculating concrete areas: To estimate how much
concrete to buy, you need to know two things: the area of the patio
in square feet and the thickness you want the concrete in inches.
To figure the square feet of rectangular or circular areas use the formulas you learned in the 7th grade: length multiplied by width; or 3.14 multiplied by the radius squared. Complex shapes can be figured by drawing them on graph paper with each square equaling one square foot - count all the squares that are over half within the area.
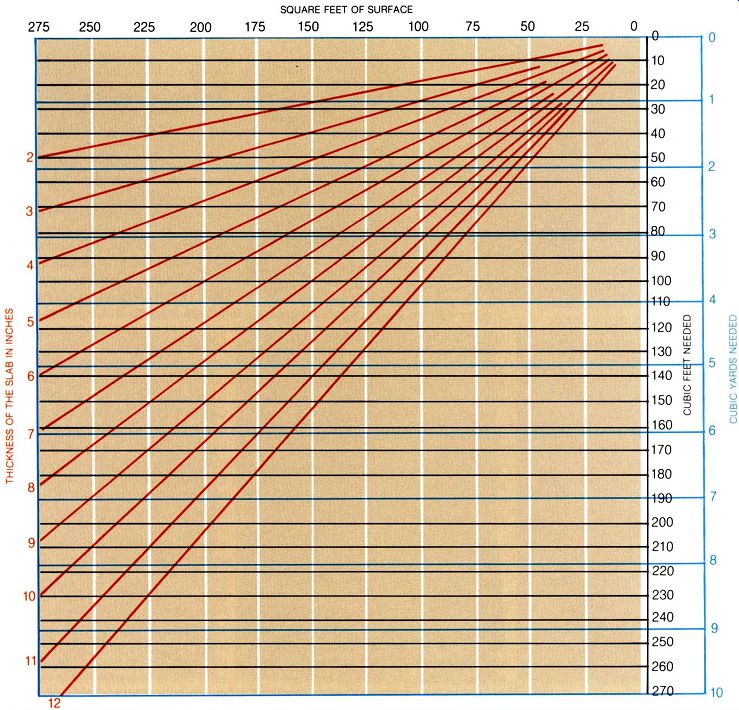
-------------- Calculating volume of concrete
Find where a vertical line from the number of square feet you have crosses the red line for the thickness you want . From that point, follow a horizontal line to the scale at the right for the amount of concrete.
A proper mix: Good concrete is the proper combination of cement , sand, gravel and water.
A proven mixture for patios, walk ways or driveways is 1 part cement , 2'14 parts sand, and 3 parts gravel.
For each sack of cement , allow 5 gallons of water. This works out to about 1/2 part of water to 1 part sand, or roughly 3 quarts to 1 shovelful of sand.
Before you start , however, make a test batch. How much water you use will be influenced by the water content in your sand.
Sand is always sold wet. Pick up a handful and squeeze it. If it tends to crumble, it is only damp and relatively more water will be needed in the mix; if it compacts smoothly without visible water in your hand, it is wet , or aver age, sand; if it forms a ball and leaves your hand soaked, it is very wet and less water will be used.
The key thing to remember is that the mixture should be plastic, almost smooth and creamy. It should not be soupy and it should not be crumbly and dry in appearance. To avoid soupy mixes, which weaken the concrete, add water very carefully when you think the mix is almost wet enough.
Mixing in a wheelbarrow: When mixing by hand, a deep contractor's wheelbarrow is best. It holds about 1 cubic foot and the mix is then easily moved to the dumping site.
After you have made a successful test batch, you can double or triple your proportions depending on the size of the wheelbarrow and your own strength.
Start by shoveling in the sand and cement and mixing with a flat bottomed shovel until the color is uniform.
Add the gravel and turn the mix a few more times before adding about half the required water. Mix thoroughly.
Be careful to scrape the sides and bottom of the wheelbarrow in order not to leave pockets of cement out of the mix.
As the mixture becomes increasingly wet , be careful how much water you add near the end. It now takes only a little to turn the mixture soupy. If you go too far, add a little more sand and gravel, but never add more cement for it will drastically alter the combination.
Mixing in a wheelbarrow is facilitated by a large hoe, or better, a cement, hoe with holes in it .
Mixing on the ground: For small jobs, you can mix concrete on a sheet of plywood or heavy plastic near the work site.
Start by placing the sand in the middle of the board and then add the cement. Mix these until a uniform color.
Flatten out the pile and add the gravel on top. Turn all three elements over at least three times and then spread into a mound with a depression in the center.
Begin adding the water here, mixing all the while from the outer edge to ward the middle. Continue mixing until all the ingredients have been thoroughly combined. When about right, smooth the top and then jab it a few times with the shovel. A proper mix will leave clearly defined cuts, neither soupy nor crumbling.
Machine mixing: When doing a concrete job of any size, save your back and time by renting a mixer. Set it up beside the piles of sand, gravel and bags of cement with a hose near by. Mixers range from 1/2 to 6 cubic feet in capacity but never put in more than 3/8 the capacity for a good mix.
With the mixer stopped, first add the gravel and half the amount of water.
Start the mixer and then add the sand, cement and the remaining amount of water. Mix at least 2 or 3 minutes before pouring.
If the mix must sit an hour or more in the mixer and grows stiff, turning it over a few more times may restore its workability. However, never add water to loosen it up.
At the end of the day, be sure to hose out the mixer carefully.
Air-entrained concrete: If you live in an area subject to freezing in the winter, you should use air entrained concrete. It contains billions of tiny air pockets that contract and expand with severe temperature fluctuations and prevent the concrete from cracking. It also protects concrete that is subjected to de-icing salts in the winter.
Air-entrained concrete can be made either by buying portland cement or by purchasing an air-entraining agent and adding it to your mix. Since there are different air-entraining agents, follow the instructions on the bag .
Mixing by hand is not vigorous enough to make air-entrained concrete.
It must be done in a power mixer. Once poured, however, the mix should be worked as little as possible.
Concrete finishes: The plasticity of wet concrete has long been utilized for a wide range of finishes, both mechanical (broom, brush, trowel) and chemical (salt, dyes). Recent techno logical developments have expanded this versatility to a dazzling array of possibilities. Some of the more sophisticated techniques are as yet available only through franchised contractors.
One example is Bowmanite, a patented process in which a cast-in-place concrete slab is colored and imprinted with a pattern. The finished appearance can closely resemble a wide variety of surfaces, including many brick and tile patterns, cobblestone, quarried limestone, flagstone, and river rock-all offered in a range of colors.
Custom patterns and colors are also available. While most often a monolithic structural slab on grade, 4 inches thick or more, thin-set capabilities allow a Bowmanite topping as thin as one half inch to be bonded to most existing slabs. Cost is midway between standard concrete surfacing and masonry work. While the specific Bowmanite process is not something you can do yourself , it is a testament to the increasing versatility of concrete.
Perhaps you wish to experiment with impressed patterns in concrete, constructing your own molds. If so, keep the pattern simple and the area limit ed. For the creative home craftsman, Bowmanite can be an inspiration.
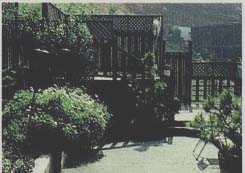
-------- A broomed finish on concrete provides an easy maintenance
surface.
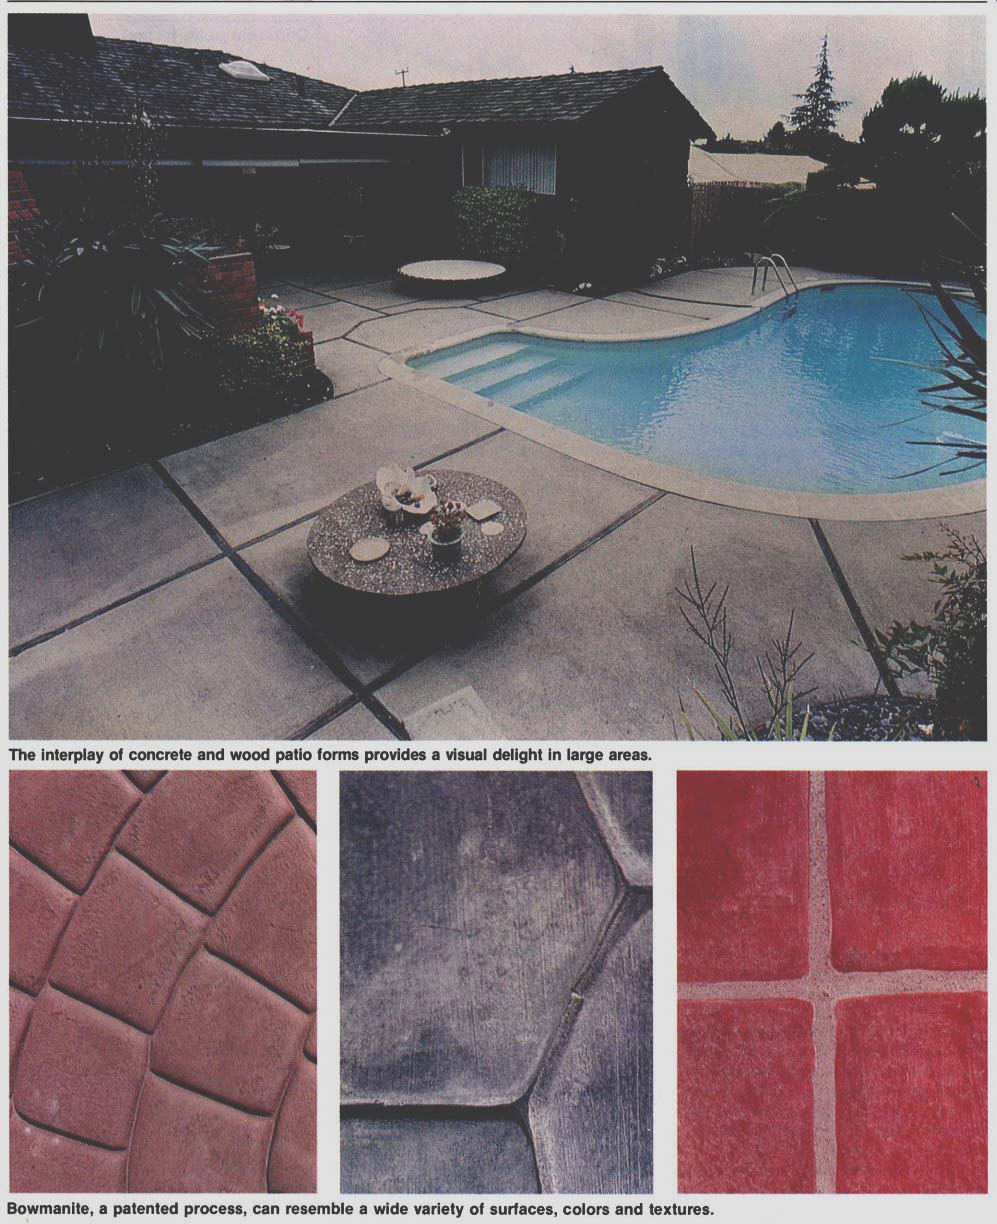
------- The Interplay of concrete and wood patio forms provides
a visual delight In large areas.
------- Bowmanite, a patented process, can resemble a wide variety of surfaces, colors and textures.
Preparing the site and in stalling the forms: Unless you have a very good design reason for doing otherwise, it is good to make patios and walkways flush with the ground to prevent people from tripping over raised edges and to facilitate mowing and edging. This generally means you are going to have to do some excavating.
Start by driving stakes at each corner of the area and pull string taut around them. Divide large areas into smaller and more manageable sections.
Remove any grass or vegetation with a straight-edge shovel. If your ground is firm - not boggy or heavy clay that will not drain well -- you can put the concrete directly on it. Other wise, put down 2 inches of sand and tamp it firm. For real problem areas, first put down 3. inches of pea gravel topped by 2 inches of sand as a drain age base under the concrete. A sand and gravel base is also advisable in severe winter areas.
Patios adjoining the house should be graded so water runs away from the building. A slope of Vs inch per foot (1 inch per 8 feet) is recommended for smooth, hard surfaces, V. inch for rough surfaces.
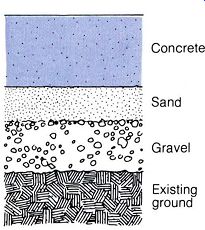
-------- Base for concrete: Concrete; Sand; Existing ground
Forms: Concrete Is extremely heavy and must be contained by well-braced forms. For patios and walks, excellent forms can be made of 2 by 4s. If these are to remain in the concrete, use redwood or cedar.
Before starting to pour, cover the top edges of the wood with masking tape to prevent concrete stains.
Hold the forms with 2 by 4 stakes driven every 4 feet or less. If leaving the forms in place, use redwood or cedar stakes and drive them about 1 inch below the surface so they can be covered with sod later.
As the forms are placed, check them with a level to make sure the proper grade is maintained.
To curve your forms, cut saw kerfs about every inch halfway through 2 by 4s and then bend them so the kerfs close. For gentle curves, you can also use 1 by 4s and stake them every 2 feet to hold firmly in place.
For tight curves, use 3/8-inch plywood or redwood bender boards. Put 2 or 3 bender boards together against the stakes and nail in place.
In building walkways or patios, re member that concrete expands and contracts with the temperature. Unless there is room for this movement, the concrete will crack. In walks, place control joints (or crack lines) every 4 to 5 feet ; in patios, every 8 or 10 feet.
Use either lengths of redwood or cedar left in place, or cut expansion joints with a groover after the concrete has begun to set up.
In building a patio, keep in mind also that once you start to pour concrete, you cannot stop until that section is completed. This means leveling, floating, edging, grooving and finishing. Thus, when working alone, divide your project into easily manageable sections, preferably in accord with your design for parts of the patio.
In working alongside a wall or the edge of a house where you can only work from one side, break your forms into sections and fill every other one first. When these are firm, you can walk on them while filling and finishing the other areas.

---------- Concrete patio forms Make a curved form by cutting
saw kerfs halfway through a 2 x 4 or using a sandwich of bender boards
or 3fe" plywood.
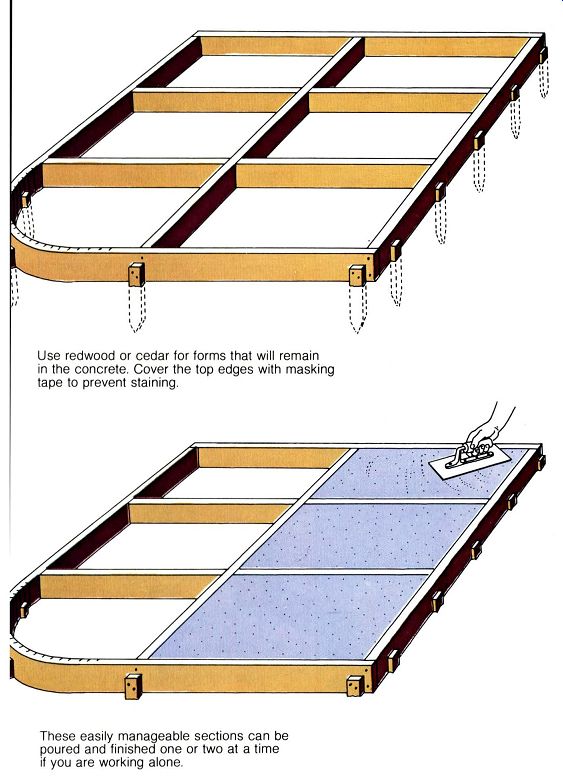
------- Use redwood or cedar for forms that will remain in the
concrete. Cover the top edges with masking tape to prevent staining.
These easily manageable sections can be poured and finished one or two at a time if you are working alone.
Pouring and finishing: If you are having the concrete delivered, It Is essential that you have two or three helpers to speed the process and save you expensive overtime charges.
1. As the concrete is poured, shovel and rake it evenly throughout the form area. Do this with as little agitation as possible, which causes the gravel to sink. Bring the concrete up about 1/2 inch above the forms to allow for settling.
2. Smooth and level the concrete by pulling a strikeoff board across the top in a sawing motion. If working alone, stand in the mix and pull the board toward you, sawing back and forth as you move.
3. Immediately after the strikeoff, use the bull float (or darby for small areas) to further level and fill in any depressions. Push the bull float away from you with the front edge slightly raised, then draw it back to you in a sawing motion.
4. Run the tip of a trowel around the edges between the form and concrete to cut the spill over. Make the cut about 1 inch deep and scrape clean the form tops.
5. With bull floating completed, you are ready to start finish work but you must wait until the water sheen on top of the concrete has evaporated.
Depending on temperature, that may take a few minutes to several hours.
6. Once the water sheen is gone and the mix has stiffened, work your way around the forms with the edger. Be careful not to push concrete ahead of you. A final edging can be done after the final texturing is completed.
7. Cut grooves, or control joints, with a groover every 4 to 5 feet in walks and every 8 to 10 feet in patios, or as designed. Place a 1 by 10 board on the concrete to serve as a guide and to distribute your weight so you won't mar the concrete.
8. Floating further pushes down the aggregate and adds to the finish of concrete. A wood float gives it a rather rough finish. Moving it in sweeping
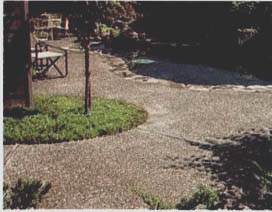
------- Exposed aggregate finish, broken by expansion joints, allows
free form.
curves will give a distinct pattern. For air-entrained concrete, use an aluminum or magnesium float.
9. For a smooth, almost polished finish, use a steel float. Keep the leading edge up and move in long sweeping strokes. Do the troweling immediately after the floating. Additional troweling will provide a harder, smoother surface.
Exposed aggregate:
10. In spreading the concrete, disturb it as little as possible to keep the gravel near the top. When the sheen has left the concrete, brush away the top layer of concrete with a soft bristled broom to just expose the gravel.
11. After the concrete has firmed up a little more, continue the brooming. If stones are dislodged, the concrete has not hardened enough.
12. In final sweeping, combine the brooming with a fine spray of water.
Sweep away enough concrete to ex pose nearly half the large stones on top. Timing is critical in this procedure.
If you wait too long, you will not be able to broom away the concrete.
Curing concrete: All your work in building a concrete patio or walkway may be for naught if the concrete isn't cured properly. During this period, concrete must be kept warm and damp to gain its strength. In warm weather, allow 5 days for curing; in cold weather, allow 7 days.
The following are good methods for curing. The key is constant dampness.
1. Cover the top and the edges with plastic sheeting. This traps the moisture inside and permits a slow, steady curing rate. Weight the edges of the plastic so dry air can' t blow in.
2. Cover the area with wet burlap.
New burlap should be washed first and old burlap should not have stains that will transfer to the concrete. Burlap must be kept constantly wet.
3. Ponding is recommended for areas small enough to be flooded and where the water ca n be held on top of the concrete. Alternatively, a sprinkler can be left on during the day while burlap holds the moisture at night.
4. There are curing agents you can spray on, but coverage must be complete and they are not considered as effective as the above methods.
Building steps: Concrete steps are often made half again as wide as the walkway leading up to them. Footings are required for steps and should be 2 feet deep in undisturbed soil, and 6 inches thick -- or more to reach below the frost line.
Build the form from 2 by 6s as shown. The sides and risers in front must be braced with great care. Enormous pressure is exerted here.
The risers ca n be angled back to provide more tread room.
The forms should be coated with engine oil so they will easily separate from the concrete.
After the forms are built , fill the in side with large rocks, broken concrete or bricks so you will not have so much concrete to pour. Keep the fill away from the top and edges so it won 't be exposed.
Make the concrete with a 1 :2 1/4:3 mix and use gravel no larger than 1 inch in diameter.
Begin placing the concrete in the bottom step and work your way up.
Trowel the mix down along the edges of the form so no air pockets will be left there.
Float off each step as it is filled.
When the top step is filled, strike it off and then darby it.
Texture the steps with a broom to provide a non-skid surface.
Forms can be removed in not less than two hours, and then the steps wrapped in plastic to cure.
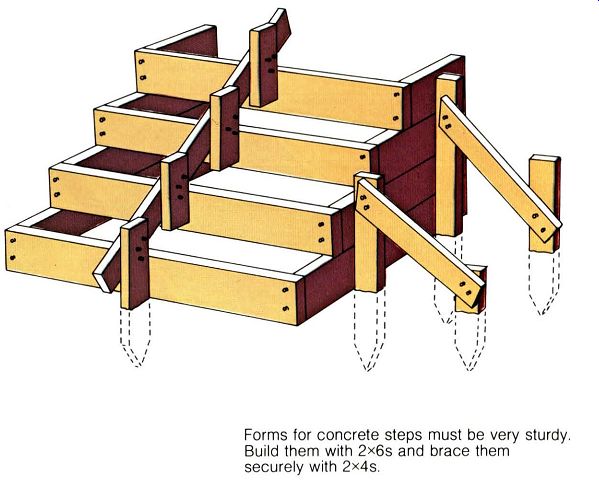
---------- Concrete step forms
Forms for concrete steps must be very sturdy.
Build them with 2x6s and brace them securely with 2x4s.
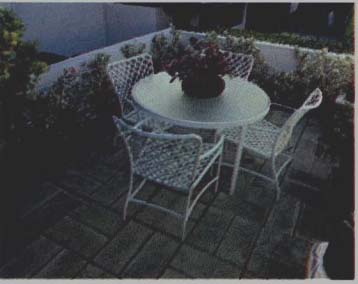
------------- Interesting patterns can be created when paving
blocks draw attention to the floor.
Paving block construction:
Paving blocks can be made in almost any design and make excellent walkways or patios. Precast concrete pavers are available in many sizes, shapes and finishes. But you may want to make your own.
To do so, lay out forms to your design, made from 2 by 4s. The paving blocks need be only 2 inches thick, so the forms may be either embedded in sand to the proper level or marked on the sides. Check them with a level after they're in place.
Forms can be constructed in several ways. For large projects, build a form with 2 by 4s and stake it every 4 feet.
Screed the sand in the form smooth and to the proper level, then pour the concrete.
Strikeoff the mix and float as previously described. After the water sheen has left the surface, lay a 12 inch wide board across the surface to disperse your weight. and cut the concrete into squares with a trowel.
Finish the concrete in whatever style you wish.
Alternatively you can make smaller forms with a variety of patterns built in.
Oil the sides of the form with engine oil and after the concrete has firmed up, lift away the form and proceed with the next batch. Repeat this procedure until you've completed the total amount of pavers required to pave the entire area.
Another simple and efficient way to make stepping stones in frost-free areas is to cast them directly into the ground. Dig out the pattern you desire-- making them larger rather than smaller - and space them 8 to 15 inches apart. Dig the holes about 2 inches deep and fill with a 1 :2.25: 3 mix of concrete. Finish by brooming the top for a non-skid surface or, more attractively, expose the aggregate.
Precast slabs can be very effectively laid in sand. Follow the same procedure as detailed for bricks earlier.
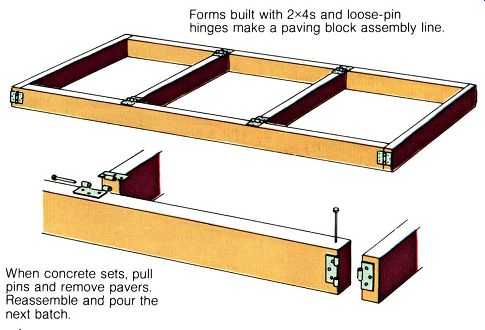
------- Paving block forms: Forms built with 2x4s and loose-pin hinges
make a paving block assembly line. When concrete sets, pull pins and remove
pavers. Reassemble and pour the next batch.

-------- Tile pavers make a good patio surface. Be careful of glazed
tiles, however, for they may be slippery and dangerous if wet.
Flagstone paving: Paving with flagstones is similar to paving with brick but they go down faster, are usually durable and their natural rock look will highlight any patio.
One key difference between flagstone and brick is that flagstone must be either mortared in place or the cracks between filled with sod.
Because of the greater spacing, sand alone will not hold the stones in place.
Because flagstone is irregular in shape and thickness, it must be seated in at least 2 inches of sand.
Cutting flagstone: Flagstone is cut in a manner similar to brick. Use a broad chisel or a brick set and hammer.
Wear protective goggles because small chips of stone will almost certainly fly at you.
Mark where you're going to cut by scratching a line with the chisel and then score it deeply. Repeat on the opposite side.
Now place the stone with the scored line just over the edge of a 2 by 4.
Place the brick set on the line and give it a sharp rap. Use the chisel to trim up the cut.
If you need more precise cuts, stone yards have special saws and will do the cutting for a price.
Putting down flagstone: Prepare the ground for flagstone as you would for a brick or concrete patio by marking out the area with stakes and string, and then clearing and leveling the site.
Lay in 2 inches of sand.
A border must be placed around the site to hold the flagstone and mortar in place. Make the border and flag stones flush with the ground for ease of mowing.
After screeding the sand level , lay all the flagstones out in order to judge their final appearance. Stones should be placed 2 to 3 inches apart for mortar, further apart if you are going to fill with soil and grass.
Flagstones can be most conveniently cemented in place with a dry mortar mix of 1 part portland cement and 3 parts sand. Mix this in a wheelbarrow until a uniform color.
Spray the site until the flagstones and sand base are thoroughly wetted.
Let the stones dry and then spread the dry mix over the area, filling all the spaces. Sweep with a broom to smooth and level the dry mix.
Spray with a fine nozzle from the hose until completely soaked. After 15 minutes, repeat the process to ensure the water has penetrated the dry mix.
Add more dry mix in areas that have settled.
After 24 hours, the stones can be cleaned of any mortar stains with a mixture of 1 part muriatic acid to 10 parts water. Keep the area constantly damp to cure properly for at least 5 days.
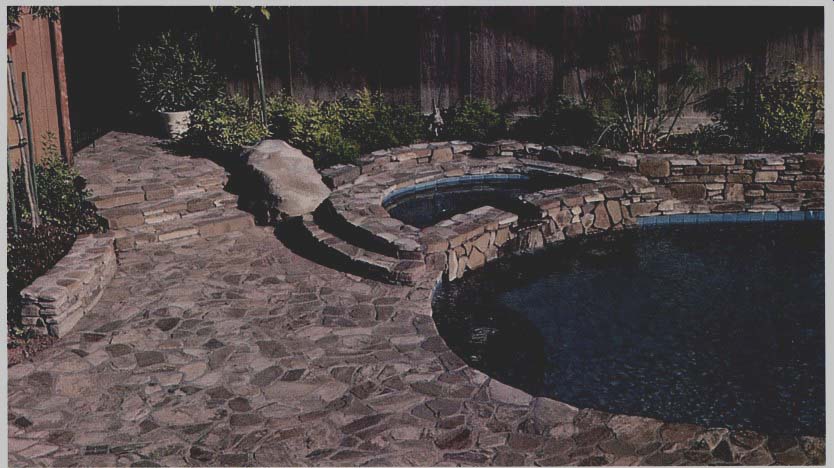
------- Stone paving end flagstone paving can add textural complexity
end durability. Watch out, though, for rough surfaces where bare feet or
bodies are apt to be, as at pool side. Large rocks, in such instances,
can blend well with smaller ones to soften edges.
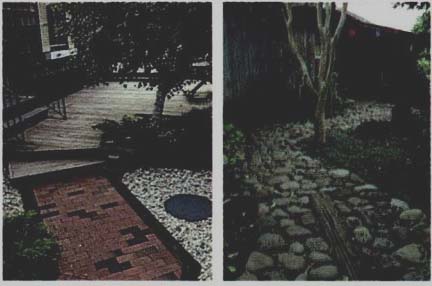
-------- Paving patterns can be come too busy, with a visual overload
of materials and textures. Simple textural contrasts are often stronger
than complex ones and demonstrate that less is often better.
If you prefer to fill the spaces with soil , tamp in the fill with the end of a 1 by 4 to pack it tightly around the stones. Then you can lightly rake in grass seed or encourage moss to grow between the stones.
Flagstones can also be placed directly in the ground by cutting around their outline with a trowel and digging out the soil beneath. Even then, the flag stones must be placed on a bed of sand to stabilize them in the ground.
Alternative pavings: although brick, concrete and flagstone are widely favored as surfaces for patios and walkways, a host of other materials can work well and look good.
Here are a few choices for you to consider.
Planks on stringers: For an informal, woodsy effect, simply layout 4 by 4 redwood heartwood or pressure treated wood on the ground. Place them 3 feet apart and then cover with 2 by 6s.
These sections can be combined to make either walkways or patio-or a kind of deck. For best results, the 4 by 4s should be laid on a 2-inch gravel bed so they will seat themselves firmly and there will be drainage underneath.
Space the decking boards the width of a 16-penny nail, the size they should be nailed in place with.
To keep grass and weeds from growing through the boards, spray the area with a non-selective weed killer, and then cover the ground underneath with a sheet of black polyethylene. This can be hidden by covering the ex posed edges with bark chips or gravel.
Log rounds: If you can cut your own log ends, you can make walkways or small patio areas yourself quite cheaply. Otherwise, these rounds are sometimes difficult to find and often expensive.
Like bricks, they can be laid on a sand base and the spaces filled with sand, which provides good drainage, or with bark chips.
While these rounds have a warm and natural character, they cannot be considered permanent , even if you are able to use redwood or cedar. However, even pine or fir should last several years. They are easy to replace if they split or break.
Wood blocks: These lend an inviting and natural appearance to a patio and work well because they fit snugly together.
Cut the blocks from 4 by 4s or larger timber about 3 inches or perhaps longer. Soak them in wood preservative.
When dry, place them on a 2-inch bed of sand close together. They must be held in by a border frame. When in place, sweep dry sand back and forth over them until all the spaces are filled, as you would on a brick patio.
Wood beams: These larger pieces of lumber make attractive and effective walkways or small patios. Railroad ties are particularly effective. Lay them on sand and space just an inch or so apart. Fill the gaps with sand, white gravel or bark chips to accent the beams. Remember that the creosote on railroad ties can be toxic to nearby plants.
Bark chips: Generally russet in color, they provide a pleasing contrast to surrounding green grass or shrubbery.
Bark chips must be laid between borders to keep them from being scattered. As they decompose, just add more.
One problem: if bark chips are put where lots of small leaves fall in the winter, it is very difficult to remove the leaves without removing half the bark at the same time.
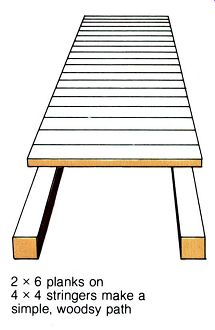
------ Wooden walk: 2 x 6 planks on 4 x 4 stringers make a simple,
woodsy path
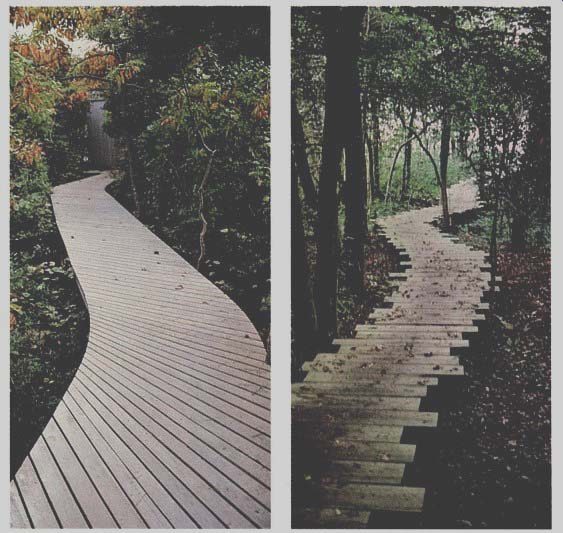
--------- Boardwalks reflect the structural support system of
Joists, and can create fanciful routes from here to there and lead the
eye beyond.
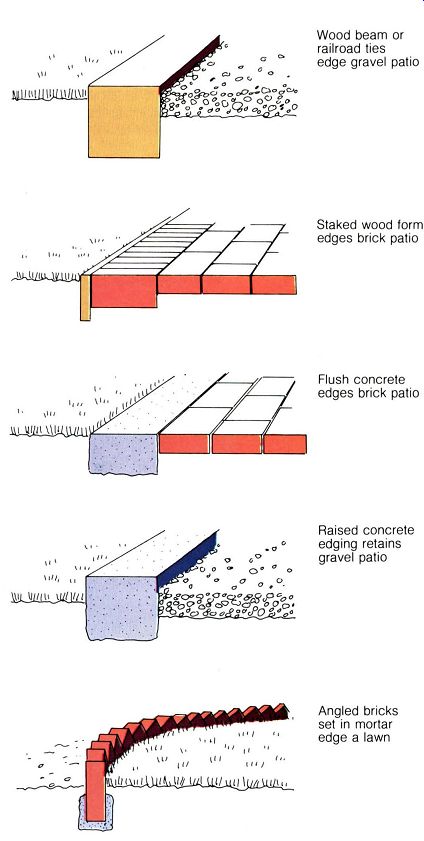
Constructing edgings: Edgings are essential to defining a flush-with-the-ground patio and to hold in place any loose material. They can range from functional concrete to bold brick and wood beams.
Here's a step-by-step process for putting in basic edgings.
1. With stakes and string, layout the precise outline of the patio, where the edging will be located.
2. With a straight-edge shovel, cut the sod on each side of the string. Keep the cuts vertical. Make the trench the width of the shovel and the depth of the form - in this case, a redwood 2 by 4.
3. Place the form in the trench, check that it is level, and support it with 2 by 4 stakes every 4 feet along the out side. Use 2 stakes on each side of connecting boards.
4. Nail the form into the stakes with a 16-penny nail. Steady the stake with a crowbar or a length of 2 by 4 behind it while you hammer.
5. Stakes should be driven well below the top of a form so they will not interfere with re-sodding. Fill in the back side of the trench flush with the top of the form and reseed if necessary.
6. Against this form, stand the first row of bricks on end as the visible edging.
The 2 by 4 form is essential to keep the brick edging from working loose and falling over. Against the edging, begin laying bricks on sand.
7. Alternatively, a ditch is dug and leveled, and the concrete poured directly into it. After the concrete has cured, remove the soil to the proper level in the patio site.
8. For a raised concrete edging, dig the ditch the desired width. Along the top edge, stake 2 by 4 forms in place with support stakes every 3 feet. Pour concrete to the top of the forms, strike off and float , and let cure a week.
9. If an unadorned concrete edging is unattractive to you, cap it with a layer of bricks after the patio is in place.
---------
Edgings
Wood beam or railroad ties edge gravel patio
Staked wood form edges brick patio
Flush concrete edges brick patio
Raised concrete edging retains gravel patio
Angled bricks set in mortar edge a lawn
---------------------------
------------ trowel ,etc.
Bricks on edge: Bricks placed in the ground make attractive edgings along lawns. But to keep them from working loose, they must be placed in mortar.
After outlining the area for the brick edging with stakes and string, dig a narrow trench about half the length of the brick deep. Keep the trench as wide as the brick.
Sod and dirt removed from the ditch should be loaded directly into a wheel barrow.
Replace the string on the stakes to use as a guide when you begin placing the brick. Place the bricks either upright or angled for a different effect.
Bricks are set in a mortar made from 1 part cement to 3 parts sand.
Fill the ditch on both sides of the brick to within 1/2 inch of the top - to leave room for re-sodding flush with the bricks.
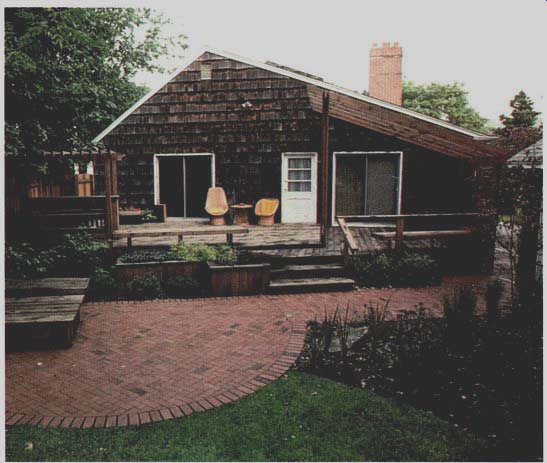
--------- Bricks can create a strong sense of perimeter.
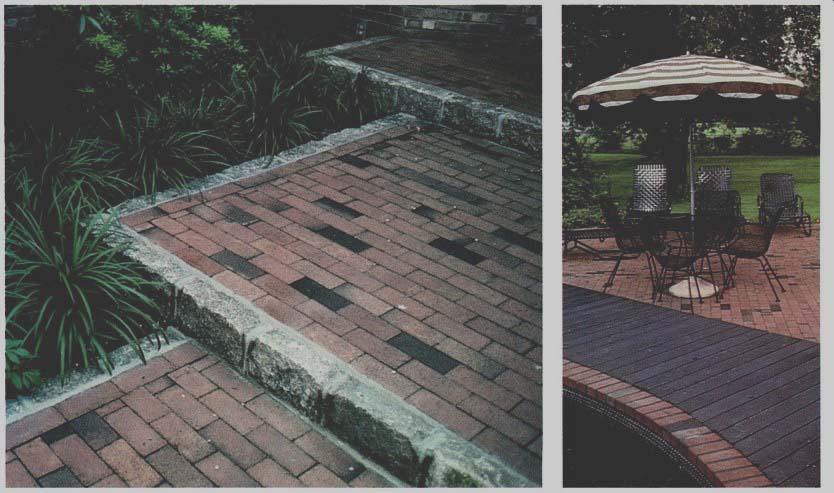
--------- Turned on their sides, coarse, rough bricks or cobbles
accent level changes In patio stairs and give them a strong, natural edging.
Bricks laid in various patterns present pleasing contrasts.
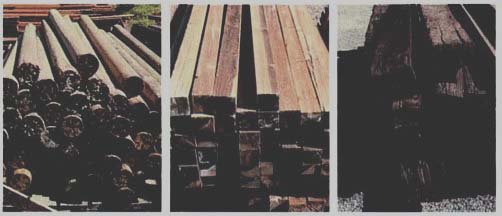
----------- Bold wood edgings can be constructed from railroad
ties, telephone poles, 4 by 4's, round logs or other heavy timbers.
Bold wood edgings: If you want strong and clearly defined edgings, consider using heavy timbers. Railroad ties are excellent but increasingly difficult to find. Alternatives include sections of old telephone poles or small pressure treated poles. Any wood laid on the ground should be treated with preservatives. Painting on a preservative is not particularly effective; soaking is better. Where timbers are butted together as edgings, cut the corners at a 45 degree angle for a more finished appearance and better drainage. Use a big crosscut or chain saw for rail road ties.
Round logs used as edgings can be kept from rocking and moving about by drilling a hole near each end and driving a 2 foot length of 1/2 -inch galvanized pipe through it and into the ground. Hide the pipe tops with plastic wood.
For curved effects with wood borders, 2 by 4s or 2 by 6s can be kerfed-- cut with a saw - to give them flexibility. Make the kerfs about 2 inches apart for gentle curves, closer for tighter curves. Cut no more than halfway through the board.
Easier to shape are redwood bender boards that can be laminated by nailing them together for greater strength after they are in place. Supporting stakes can be hidden with soil.
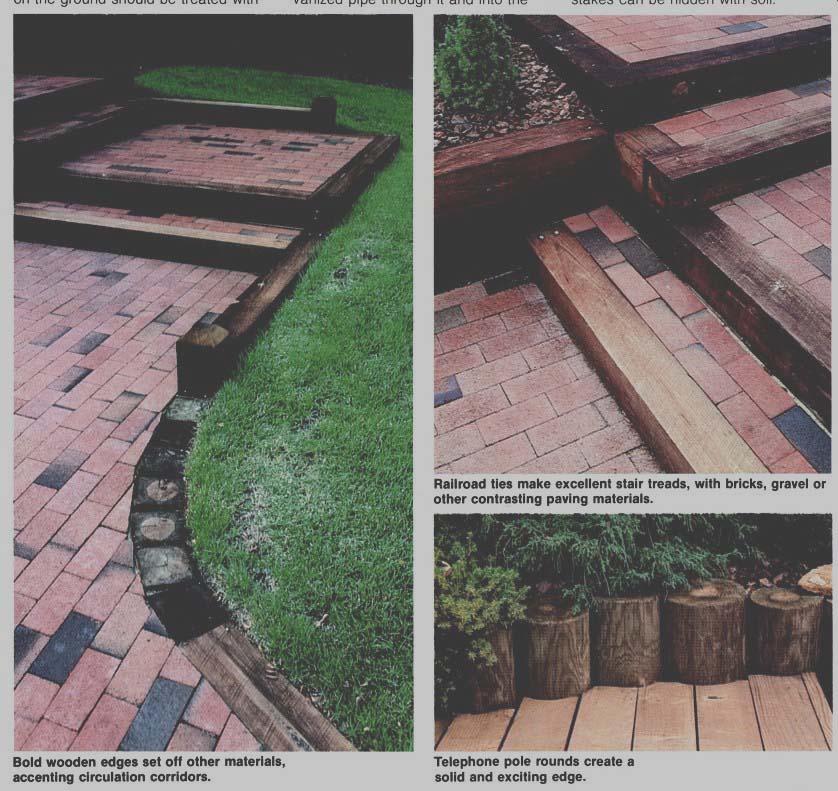
---------- Bold wooden edges set off other materials, accenting
circulation corridors.
Railroad ties make excellent stair treads, with bricks, gravel or other contrasting paving materials.
Telephone pole rounds create a solid and exciting edge.
Tree wells: If you are planning on raising the level of your patio with fill dirt, but there is a lovely tree there, you cannot simply bring the dirt up around the tree without killing it. To circumvent this , build a tree well . One simple solution is to bring the fill up to grade around the tree and then sculpt it back away in a sweeping "cup." The bottom should be level with the original grade.
The interior can now be filled with large boulders. This brings the interior up to grade but still allows the tree to breathe and not be choked off by the surrounding dirt. (But you should know that some trees can't take this weight of fill over their root zones. Check this in regard to your own tree.) For a more elaborate well , the cup could be lined with bricks on sand.
This would be porous enough to let water drain through.
For deeper wells, construct a red wood box around the tree -- something like a planter box set in the ground. Be sure to leave lots of room for the tree to move in the wind, and to grow. Use heartwood redwood for best resistance against decay. Topped with a 2 by 6 cap, it makes a comfort able garden seat.
Be careful to construct a tree well that will drain well. Otherwise the tree will stand in a pool of water most of the winter, and soon drown.
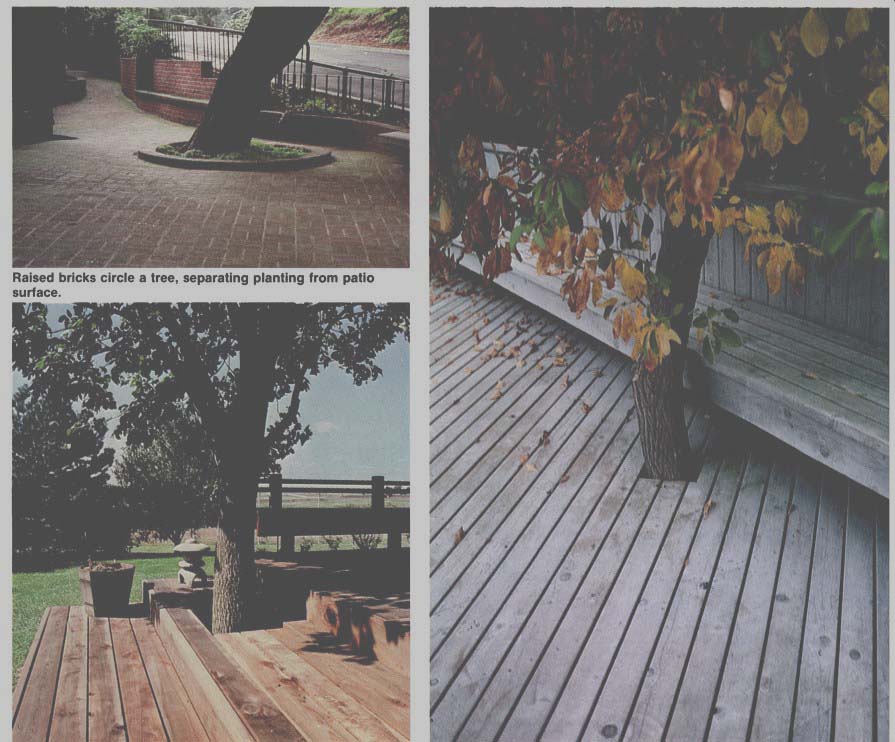
--------- Cutouts In the decking allow trees to grow through and
cover part of the deck. Care must be taken to allow a big enough hole for
growth and wind sway. Never attach a deck directly to a tree, unless It's
a tree house deck and Is unattached to anything else.
-------------- Non-mortared drywall and concrete formwork wall
enclose planting and define spaces.
Retaining walls: It you live with sloping ground around your house, you can transform it from just a hill -- often unused -- into an attractive series of terraces with retaining walls. The walls can be made largely from what ever is at hand: rocks, broken pieces of concrete, 4 by 4s, lengths of tele phone poles or railroad ties: whatever your imagination allows.
Most retaining walls are built with open construction, which means water from the banked earth will easily drain through and you do not have to install drain pipes or "weep holes."
Because of loose construction, the walls will shift slightly without cracking or breaking. If some part of it does come loose, it can be replaced without much trouble. In this same vein, deep footings do not have to be prepared even in areas with severe ground frost because a little movement of an un mortared wall will not harm it.
Rock walls: Perhaps the most attractive and rugged retaining wall is one built from large rocks. If your property is plagued with rocks, put them to good use in retaining walls.
Nearby rivers or streams are other good sources of rocks. As a last resort, buy them.
Start the construction by outlining the base of the wall with string stretched over stakes. Remove any sod and set the largest boulders you have about half their depth into the ground. These are the " footings" for the rest of the wall.
Fill in the space behind this first row with dirt and add more soil along the top to cushion the next row. The soil , acting as a type of mortar, can also be planted with flowers or ivy. The roots will further bind the wall in place.
As the wall proceeds, check your work with a simple angle guide you can make for yourself to keep your wall tilted, or battered, back at least 1 inch for every 24 inches of rise. A 1 inch batter for every 12 inches makes an even more secure wall. Do not let an unmortared wall exceed 3 feet in height - 4 feet at most. Rocks coming loose from that could hurt someone.
Besides, it may not be allowed under local codes.
With each layer of rock on the wall , move more dirt down from the hill and tamp it firmly in place. By the time you reach the desired height of the wall , you will have flattened a patio area ranging from several feet to several yards wide into the slope. If terracing, start another wall on the next level down.
Broken concrete walls: This initially sounds unattractive but it's not.
The only concrete exposed generally is the rough, pebble-filled broken ends which give the wall an attractive, rough-hewn appearance. Moreover, broken concrete is one of the few building materials around that is still free. Check construction or demolition sites. Contractors will normally be glad to have you haul it away.
Broken concrete wall s go up just as rock walls, with the biggest pieces laid down first as footings, and dirt tamped between each layer. The layers of soil are particularly useful in these walls because plants and flowers will soften the appearance.
Because the flat pieces fit together better than do rocks, they can be raised vertically if only going up two or three feet . Higher than that , however, they should be battered back 1 inch every 24 inches of height, for safety.
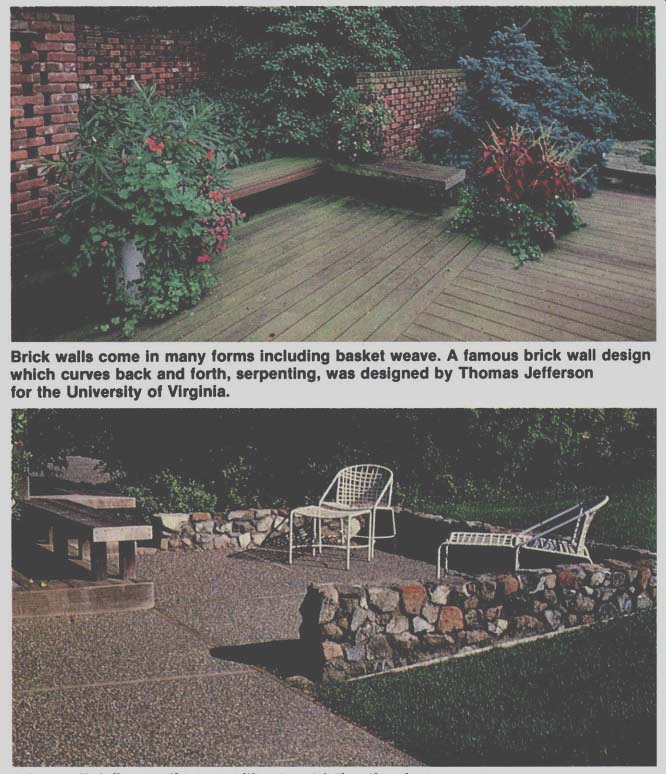
------ Brick walls come in many forms Including basket weave. A famous
brick wall design which curves back and forth, serpentine, was designed
by Thomas Jefferson for the University of Virginia.
A low wall defines patio area without restricting the view.
------ Railroad lie walls create raised planters as sculptural
elements in patios and gardens.
Plank walls: Walls made from wood must be decay resistant -- such as redwood, cedar, cypress or black locust planks, or other wood pressure-treated with preservative.
The supports are 4 by 4 posts set every 4 feet and sunk about 30 inches into the ground. Build the retaining wall with 2-inch thick planks 6 to 12 inches wide. Place them inside the posts and begin backfilling from the hill above to create the terrace. Space each plank 3/16 inch or the width of a 16-penny nail to allow seepage.
Before you start to fill , you can give this wall considerable support with a "deadman." This is an anchor buried in the hill and attached to the wall.
One way is to bolt a length of redwood from the inside of the wall to a stake driven deep in the soil some 3 to 5 feet back in the bank. The stakes and supports will be covered by the fill.
For a finished look and a garden perch, top the wall with a 2 by 6 cap.
Walls with timbers: Heavy timbers or pressure treated poles also make attractive retaining walls.
With timbers, such as railroad ties, put the bottom layer three to four inches in the ground to prevent any slippage.
When stacking timbers, and at corners, be sure to offset them as you would bricks so one holds the other in place.
For a wall that will rise more than 3 or 4 feet, the timbers must be firmly braced.
The bottom one should be drilled so you can drive a 1/2-inch pipe through it and 2 feet into the ground.
Each successive layer then must be drilled and joined to the one below with a length of pipe or reinforcing rod.
Round logs can be drilled and stacked in the same manner, or held with a "deadman." For a log deadman, notch the retaining-wall logs every 4 feet in height and about 10 feet apart and fit in another log that extends at right angles some 4 feet back into the slope. Angle the deadman down and bolt on a 4 by 4 length at the end to key into the dirt when the fill is packed around and over it.
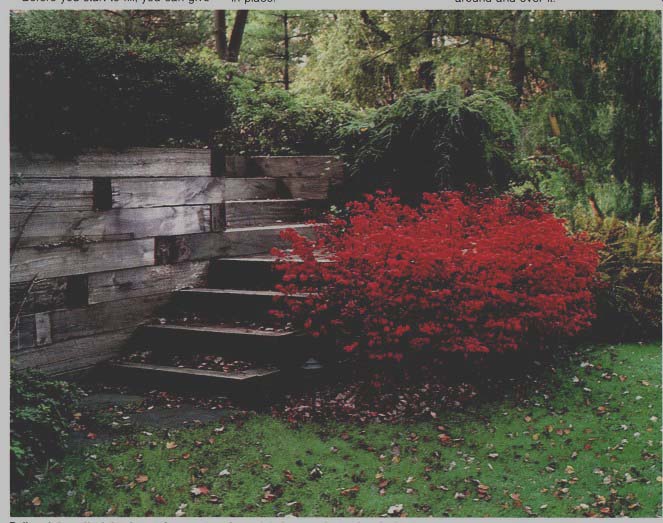
------------ Railroad tie walls, Joined to stairs, create substantial
elements In garden designs.
Mortaring a rock wall: Unlike a wall made from loose stone, a mortared rock wall requires a footing and a drain system, since any earth movement can crack the mortar and loosen the rocks.
Mark off the base of the wall location with stake and string, and dig a straight-sided trench at least 12 inches wide and down several inches below the frost level. Using a 1 :2:3 mix of concrete, fill the ditch to within 3 inches of the ground level. If the ditch is quite deep, you can partially fill it with rocks so you use less concrete.
While the footing is still wet, place the largest rocks as the first layer. For the mortar between layers, use a mix ture of 2 parts portland cement , 6 parts sand and 1 part fireclay to make the concrete more flexible and more adherent to the rocks.
Mortaring a rock wall takes a great deal of cement and it is quite difficult to estimate how much you will need for the job. You can see how much is used for the first layer or two and then make a rough guess based on how many layers you will have.
If you live in an area of heavy rain fall or if there will be seepage from the hill behind the wall , put in a drain sys tem behind the wall after the first row or two (see page 93) . The wall , if going up 3 to 4 feet high, should be battered 1 inch for every 24 inches. A wall 2 feet or less need not be battered.
At the bottom and every 12 inches up the wall , about 4 feet apart, place small drain holes. These can be short lengths of PVC pipe or small tin cans embedded in the mortar and set back deeply so they won't be visible.
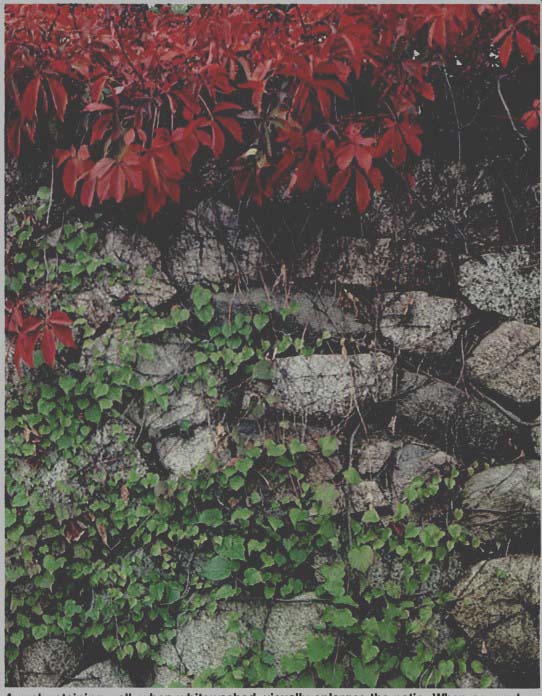
----------- A rock retaining wall, when whitewashed, visually
enlarges the patio. When covered with vines, It encloses the space.
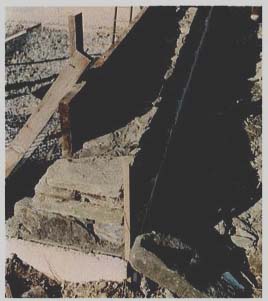
------------ Formwork for a concrete wall must be sturdy and can
be three-dimensional.
A living wall: A wall that seems alive with flowers or vegetables can be made with hollow-core pumice blocks normally used in buildings.
After putting down a footing as de scribed for mortared rock walls, mortar the pumice blocks in place on their sides with the openings facing out.
Lay the first row of blocks so the openings are slightly tipped up, and then continue with the wall. The slight upward angle will not only better hold the dirt fill behind but will better hold the soil in the openings. Plant your choice of flowers or such trailing vegetables as snow peas or string beans.
Drainage problems: In building a retaining wall, water that collects in the soil behind the wall during the rainy months must go somewhere. If it can't move through or around the wall , it will move the wall.
To be safe, you should build in a drainage system when pulling up more than a foot or two of retaining wall.
Place a few layers of newspaper or some straw between the drain and the dirt fill. This keeps dirt from washing in and plugging the drain system.
Rubble fill: An effective drain can be made simply by filling an area 3 or 4 inches wide directly behind the wall , down to the base of the footing, with gravel. This allows the water to flow freely toward the ends rather than building up against the wall.
Drain pipes: Water can be directed more efficiently by placing leach line pipes along the base of the wall.
These are inexpensive 10 foot sections of pipe with a perforated top.
Place them at the base of the wall and slope them down 1 inch for every 10 feet . Cover with four inches of gravel topped with newspaper before covering with fill dirt.
Dry wells: At the end of the drains, if there is no place for the runoff to go, install dry wells. These are holes dug 3 to 6 feet deep, usually 3 feet in diameter, and filled with rocks or large gravel.
Excellent retainers for the dry wells can be made from 55-gallon drums with both ends cut out with a cold chisel. If necessary, install 2 or 3 dry wells.
Buying stone: It is not always possible to collect your own stone for a retaining wall and you must, alas, buy it.
Stoneyards sell rock in three different grades: Dressed stone: This has been cut with nearly square sides, often to your specifications. It is easy to work with because of its regular form, but it's the most expensive.
Semi-dressed stone: Here the stone has only been chiseled away into a generally regular outline. It is cheaper than dressed stone and still easy to work with because of its generally uniform size.
Undressed stone: This is the cheapest and is simply stone with no work done to it. It is sometimes also called rubble.
Also available in most stoneyards is rock irregular in outline but cut flat on top and bottom. This is easily done because it is taken from stratified layers of stone. It is known as ashlar and makes particularly handsome walls.
And finally, there is artificial stone that is made in a wide variety of sizes and colors. It is light and therefore easy to handle. It is commonly seen in " rock " fireplaces.
Stone is sold either by the ton or by the cubic yard. To estimate how much you need, give the stonemason the cubic dimensions of your wall (height , length and width) and he will estimate your needs based on the type of stone you buy.
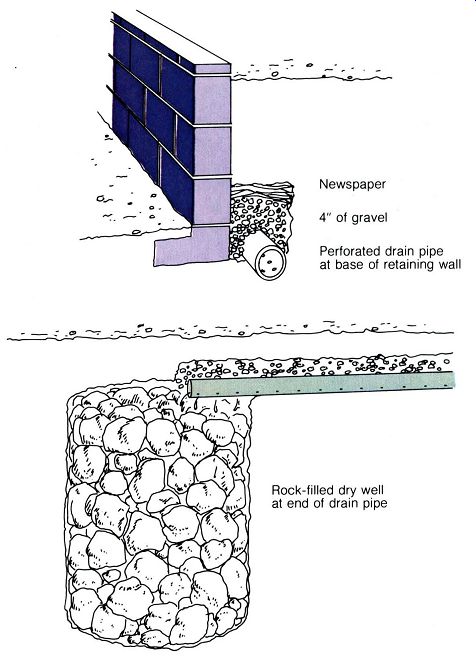
---- Drainage -- Newspaper 4" of gravel Perforated drain pipe
at base of retaining wall
Rock- filled dry well at end of drain pipe
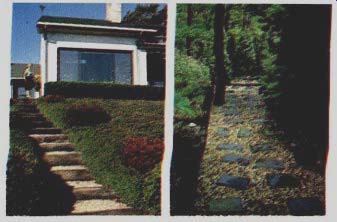
---------- Steps linking patios and formed to the topography are
pleasing.
Patio steps: In a raised or terraced patio, steps are not simply a means to get from one level to another.
Their style should be clearly defined and dramatic. They should be broad and inviting for those strolling through the garden, and they should lead the eye smoothly between the separate but related levels in the patio or gar den. They can also serve as seats, planter areas, or small terraces.
At the same time, steps must be comfortable and safe for walking. The tread areas must be wide and stable underfoot, and the risers not so high that it is an effort to move up or down.
Risers must also be of equal height to prevent tripping. Risers should not be less than 4 inches or more than 7 inches in height for safety and comfort.
As described further in Section 6, one way to calculate the riser-tread relationship is to follow this formula: twice the riser height plus the tread width equals about 26. Thus, a step with a 6-inch riser would have a 14 inch tread (2 X 6 + 14 = 26) . Another rule is: the lower the riser the wider the tread, both for the sake of comfort in walking and appeal to the eye.
In planning the number of steps required down an embankment, you should first calculate the angle of the slope.
Start by driving a stake where the top step will be and directly below that another stake where the bottom step will be. From the top stake, stretch a length of string held perfectly level (check with a line level) over the bottom stake. Measure the distance from the ground up to the string and measure the length of the string. This gives you the change in grade.
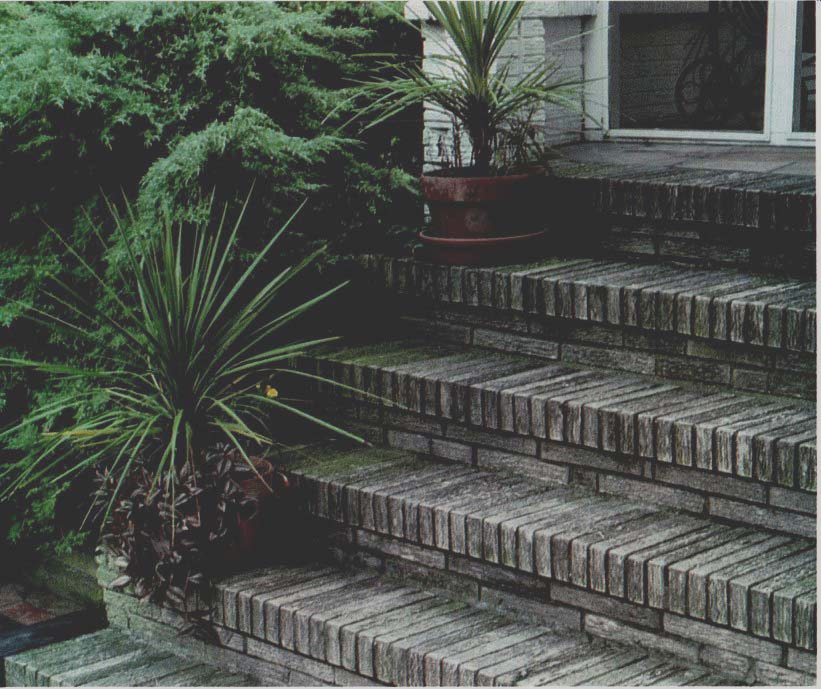
---------- Patio and deck steps should have uniform treads and risers,
and be grouped at least two per set. Single steps are hard to see and
may be dangerous whether or not they are shallow or deep.
If, for instance, the vertical rise is 3 feet and the horizontal distance is 12 feet, you know your steps must rise 3 feet within the space of 12 feet.
Draw these calculations on graph paper, showing 1 foot or 6 inches per square. Work out the tread-riser relationship you want in your patio and draw it in.
If your particular embankment is so steep that you must have risers more than 7 inches high, then study the possibility of turning the steps so they run up the slope at a long, low angle, or zig-zag from one landing to the other.
For building wooden stairs with stringers, see page 65.
It will depend on your own design and your particular site, but many people feel that outdoor steps should be a minimum of 4 feet wide for com fort and safety. Some people consider even that too narrow. Stairs 5 feet wide allow a pair of people to walk together, and stairs 8 feet wide lend a sense of spaciousness and graciousness to the entire patio or garden area.
Step materials: Steps should be a part of the whole patio design and not clash with the mood you have created. Thus, if you have a rustic or sylvan patio area, you would not want a broad run of smoothly finished concrete steps. Instead, use cedar logs, railroad ties or flagstone to maintain the rustic sense.
Here are some ideas to adapt to your own patio.
1. Railroad ties
2. Logs
3. Flagstone
4. Redwood and brick
5. Concrete rounds
6. Exposed aggregate
7. Patterned brick
8. Railroad tie risers and brick-on sand treads
9. Decomposed granite contained in 2 by 1 0 risers
10. Paving tiles and 6 by 6 redwood beams
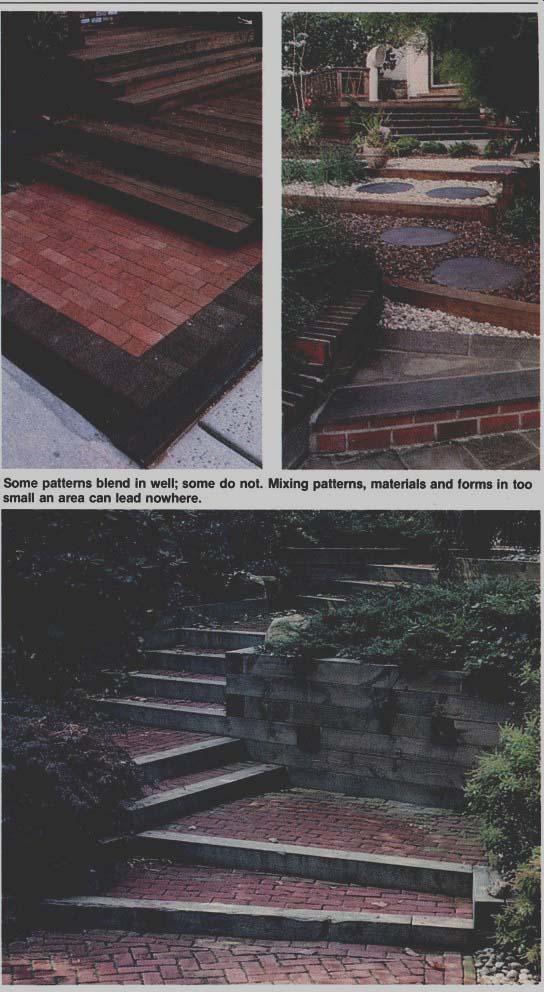
--------- Some patterns blend In well; some do not. Mixing patterns,
materials and forms In too small an area can lead nowhere.
Brick and railroad tie stairs. The retaining wall blends well with the ties, and adds a rustic wooden touch to the garden.
Patio benches: Finishing touches that are both practical and attractive for patios are the benches.
They can range from the very simple to the complex, but they should remain in character with your entire design. Some may be set permanently in place while others can be moved about, depending on your patio.
Outdoor benches are usually made from wood because it is the easiest material to work with. It also doesn't rust. Redwood and cedar are commonly used because of their natural weather resistant properties, but Douglas fir and pine or cypress will also work well , especially if soaked in a water repellent before construction.
Portable bench: Cut the end pieces from 2 by 12 stock 1 4 inches long. Use a waterproof glue, such as epoxy resin, and clamp overnight . Put the 6-foot center brace in position flush with the top of the legs and centered. Fasten it with epoxy resin and three No. 16 4-inch long screws in each end. Countersink the screws and cap holes with wooden "buttons." Build the top from four pieces of 2 by 6 of 8-foot length, which allows a 1 foot overhang at each end. Hold each 2 by 6 in place with two No. 10 screws 4 inches long. Countersink and fill the holes with plastic wood.
Curved bench: Curved benches are normally permanently fixed in the ground because of the considerable stress exerted on the wood.
How much curve you can get will be determined by what lumber you use. A 2 by 2 will bend more easily than a 2 by 4 on edge, but will not be quite as strong.
The wood selected for this must be clear of knots, which create weak points in the structures.
Put the supports in place in the ground, using clear heartwood red wood or pressure-treated wood. Make sure all posts are the same height . Put the cross-supports on with two % by 4-inch lag-screws.
Now, toenail one end of the top rails in place and, while someone holds and bends the wood, work your way around and nail each rail to a support . Use 1/ 2 -inch spacers between the top pieces, toenailing them in place.
Bench around a tree: This bench requires inner and outer rings of support. These support forms are made from three 2 by 6s held together with cleats on the inside. Cut them to your required lengths.
The outer ring of supports should be spaced 2 feet from the inner ring. Top them with 2 by 4s spaced the width of a 16-penny nail for drainage. Trim the ends to conform with the base, allowing a 2-inch overhang.
Low tree bench: Cut all the sup ports in this case from rough 2 by 12 redwood. Note the cross-supports needed for any patterned decking.
Cover with 2 by 4s or 2 by 6s.
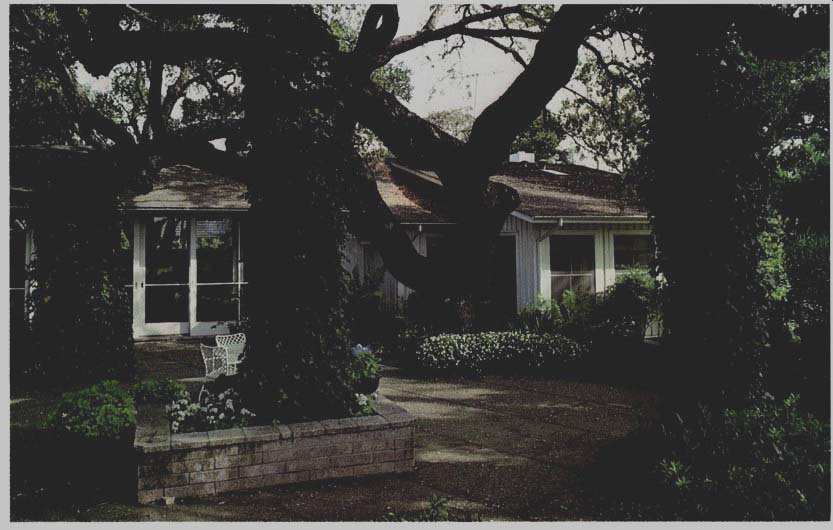
------- Unusual benches, when the materials and design are carefully
chosen, can provide a special atmosphere, as in this stone bench.
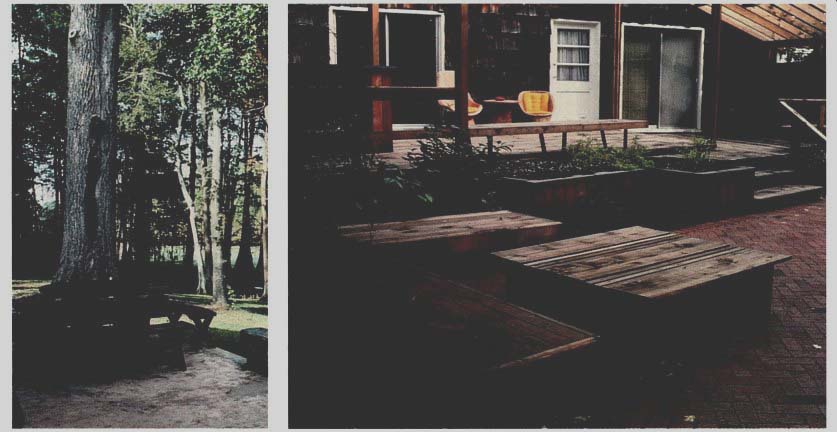
----- Curved benches enforce table design in coordinated furnishing
scheme.
Built-In wooden benches can complement brick paving and shingled house wall.
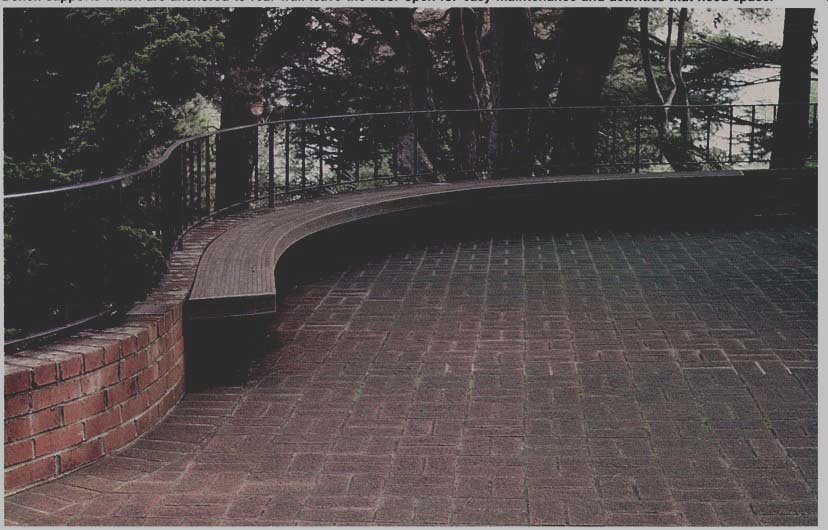
--------- Bench supports which are anchored to rear wall leave
the floor open for easy maintenance and activities that need space.
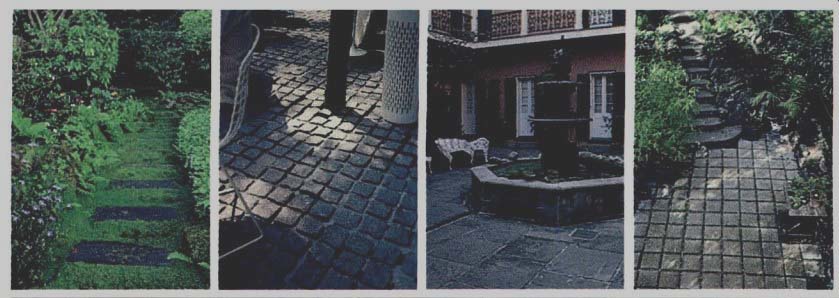
----------- Stones, cobbles and paving tiles make interesting patio
surfaces when used in strong, simple patterns.
==============
A guide to garden paving materials
------- Type Concrete Natural Color Salt-Finish Exposed Aggregate Impressed Light-weight Topping Fine Aggregate Coating Acid Stain Latex Coating Paint 2" to 6" Sub-base Steel Reinforcing 2x4 Dividers Vinyl Strips Brick Laid on Sand Laid on Concrete Used Bricks Hot-Mixed Asphaltic Concrete Seal Coat Paint Soli Cement Flagstone Laid on Sand or Soil Laid on Concrete
Tile Laid on Sand Laid on Concrete Adobe Blocks
Pre-Cast Concrete Pavers Soft Pavings Decomposed Granite Brick Dust Crushed Gravel Rounded Stone Bark Products Pecan and Walnut Shells
--------- Description and Comment.
Practical , durable, many surface treatments.
Gray tends to be cold-appearing and glaring. Steel trowel finish is slippery when wet. "Sweat" or "swirl " and broom finishes are non-skid and texture helps break glare.
Earth tones harmonize with plants. Use others with caution. Integral color mixed throughout concrete is easier than sprinkle-on which can be splotchy.
Travertine-like pitted surface derived from rock salt. Coarseness of salt determines the size of the pits.
Can be used with colored concrete.
Pebbly texture goes well with plants and wood, and softens glare. Uneven surface collects dirt and makes furniture wobble. Rounded stones best.
Patented process impresses brick, cobblestone and tile patterns into soft concrete. Mortar can be used to fill the joints for a smoother surface.
Troweled-on concrete topping that stays cool, even when in direct sun. Can be textured for added interest.
Franchised method consists of a thin layer of tiny pebbles in an epoxy mix applied over existing concrete.
Can be applied to new or old concrete, after thoroughly cured. Will not rub off.
Another way to salvage a drab appearing slab of concrete. Tough enough for normal wear.
High quality concrete paints hold quite well under proper conditions. Periodic repainting is necessary.
To minimize cracking in expansive soil or where soil freezes.
Wire mesh or steel rods as an added protection against cracking where soil conditions are unstable or heavy loads are anticipated.
Permanent strips of redwood or other decay-resistant wood serve as expansion joints and add interest to large areas. Helpful for amateur in setting up grades and leveling concrete when pouring.
Attractive expansion joints available in white, black, gray and tan.
Old favorite for garden surfacing. Excellent for homeowner to install. Available in reds, buffs, yellows and other colors. Soft types less expensive, but use harder pavers for heavy traffic and cold winter areas.
Easy to do, casual appearance, mistakes or movement easily repaired. Outside edge should be set in mortar or lined with a permanent border. Sweep sand into tight joints.
Less subject to movement , can be kept cleaner. Joints are usually mortared. Laying over existing concrete saves cost of a new slab.
Informal effect with rougher surface than new bricks. Joints are usually mortared to fill in irregularities.
Inexpensive salvage source can reduce cost.
Best use is for driveways and parking. Because of heavy equipment needed, minimum installation is for 1000 square feet with good access. Cost increases for walks and small areas. Contractor normally includes 2" base with 2" mix over, weed killer and permanent wood borders.
Bituminous or epoxy solutions applied over existing asphalt to seal pores and enhance appearance.
Must be specifically manufactured for application over asphalt. Follow directions carefully.
Mixture of cement and existing granular soil for a casual appearing, reasonably durable surfacing.
Good do-it-yourself method.
Natural sandstones, granites and slates in ½” to 4" thick slabs. Source of stone determines cost. Thin types excellent for laying over existing concrete.
Best for natural setting with lawn or groundcover grown in open joints.
Better surface for furniture, easier to keep clean, when joints are mortared.
Informal appearing types best for garden use. Available in squares, rectangles and geometric shapes, and several sizes.
Use only strong tiles and make sure base is firm and level , or cracking will occur. Sweep sand into tight joints. Needs a permanent edge to hold in place.
Preferred method, with mortar joints. Good material to dress up an existing concrete entrance.
Appropriate with southwestern architecture. Laid on a sand base with mortared or planted joints.
Availability is limited to certain regions.
Wide choice of colors, sizes, shapes and surfaces. Can be laid on sand base with sand joints or over concrete with mortar joints. Patterned types are good substitute for more expensive clay and stone products.
Materials that can be walked on and cost less than solid surfaces, yet don't have to be cared for like a lawn or groundcover. A permanent edging of some type is optional. Buying in bulk is much less expensive than sacks.
Granular material that looks a little like coarse sand. Packs well, and easy to rake leaves off. Usually tan or brown. Good for garden paths, can be used for driveways and parking.
Similar to decomposed granite except red.
Includes roofing gravel of various sizes and colors. Displaces easily and not comfortable to walk on.
¾” mixed stays in place fairly well and is walkable. Brownish tones are attractive, but not always available.
Looks well and also serves as a mulch for plants. Shredded types form a safety cushion under play equipment. Chips can float away in a rainstorm. Eventually decomposes.
Lasts longer than bark. Limited availability.
=================
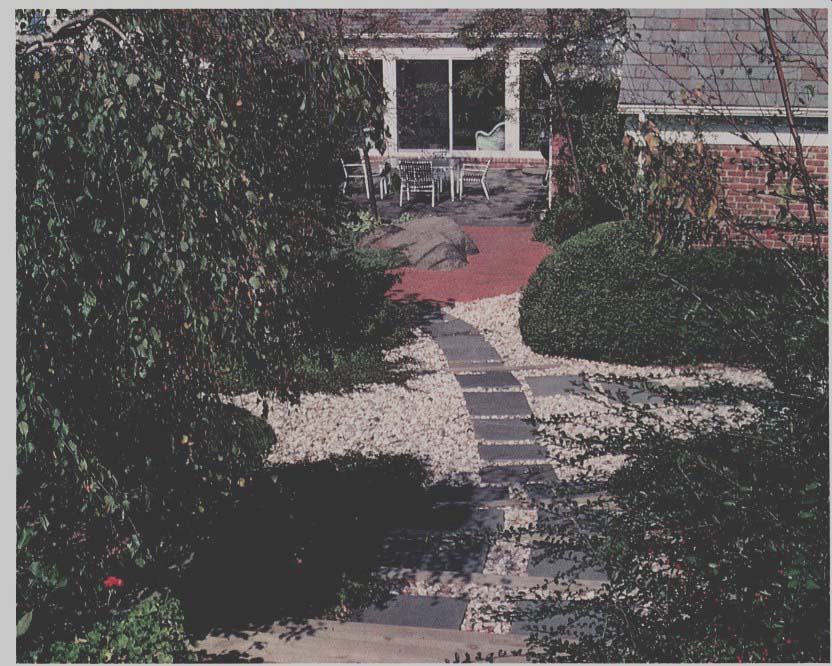
------- Paving materials can be used to separate areas within
the designed space.