The completed plan includes building permits, balancing load factors, and a variety of special optional features like ramps, gates, benches, planter boxes, even storage spaces.
The plans you will now make can be called working drawings because you will be able to work directly from them when you come to build your deck or patio. They will graphically indicate what kind, what size and how many of each item of material you will need. They will also show how you intend to put the materials together to make the deck or patio level and solid.
With your tracing overlay on your final concept plan, you are now ready to begin the working drawing. Measure and write on the edge of the overlay the dimensions of the spaces. Be exact in your drawing. Whenever possible, incorporate standard sizes of the materials you plan to use. Although this may mean slightly different dimensions from those in your concept plan, using standard sizes of building materials will save you money by reducing waste.
For instance, if you conceived of a rectangular deck 9 feet wide, change it to 8 feet if possible, because that is a standard lumber length. These minor adjustments as you start the working drawing will save you lots of time when you actually build the structure.
Zoning variances: Most local planning agencies have zoning regulations that require setbacks (areas a certain number of feet from the property line that can't be built upon) , lot coverage limitations (a set percentage of the lot to be open space or planting) , height limitations (no building above certain heights, to keep views open) , and lots of other specifics.
If your concept design proposes improvements that turn out to be in conflict with an existing zoning requirement, you may request a zoning variance.
Variances are intended to provide flexibility to hard-and- fast rules. If your proposal is reasonable and does not interfere with the neighbors' interests, the local planning board will probably give you approval to go ahead. In order to apply for approval , however, you will need a plan that shows clearly what you propose, and thus how it may conflict with a zoning regulation.
The authorities will probably need two copies of your final working drawing plan. However, the concept plan which you have just finished may be enough to obtain a building permit and indicate any potential need for a zoning variance.
Check on procedures with your local building department.

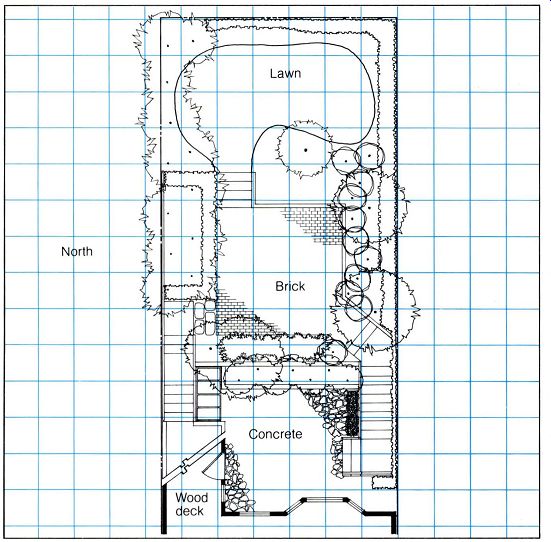
----------- 102 The plan (above) of the photo patio (top) Illustrates
the relationship between plan-drawn spaces and built reality. Working
drawings are the ultimate refinement and notation of how you plan to build
something, based upon your concept design.
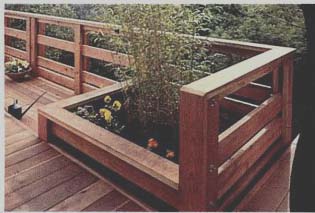
------ Dead load is the weight of the structure and its
permanent fillings. Live toad is you, the wind, snow and al/ other temporary
pressures upon the structure.
Balancing loads: Everything on earth is subject to the pull of gravity. People, trees and even decks fall to the ground when gravity sufficiently overpowers forces that resist it. Every part of every structure must be built out of materials strong enough to support one another.
Downward forces are divided into live and dead loads. Dead load is the weight of the components of the structure. Live load is a non-permanent weight which is added to this dead load. Typical live loads are furnishings, snow, rain water and even wind.
The building materials industry has established load allowances for different sizes and types of lumber, bolts, nails, metal fasteners, bricks, and so on. These are based on tests that determine their actual breaking point.
Most building codes set the residential live load at 40 pounds per square foot for normal usage. If you are building a structure that will have heavier than usual loads - for in stance, a waterbed, or a meeting area where people will congregate - it 's wise to increase the live load allowance in choosing materials.
Heating and water: Before getting into the detail design of your deck or patio, you may want to consider also whether you’ll need heat or water there.
Nighttime heating on decks and patios is often taken care of by heat that is naturally stored and radiates from the building materials themselves.
When the nights get colder, though, there are a number of artificial means of heating the space.
From a Franklin stove mounted outside to elaborate concrete and stone fire wells, the enclosure of fire adds cheery warmth to outdoor decks and patios and can extend the useful season for the spaces.
A fire pit is the most primitive but enduringly popular source of heat in outdoor rooms, and if firewood is reasonably available, it will probably be the most economical. Fire pits can be designed into the space to serve other functions when not supplying heat, and there are numerous forms and materials that can be used.
It is important in designing fire pits to be sure that smoke is vented out of the use area or that the pit is placed downwind from the areas you want to be in. Consider groupings of furniture in designing the pit , and remember fire safety by being sure flammables and wood decking and structures will be placed at least 3 feet from the open flame. Design the fire pit out of brick or stone as you would a brick or paved surface, as described in Section 5. Be sure that it slopes to drain and will not puddle, And, of course, use only materials guaranteed fire resistant when you build it.
A freestanding or hanging gas or propane reflecting heater can be fueled from tanks for permanent installation. Because of the complexity and potential hazards of these systems, we recommend that you contact an architect if you think you want to use such a heater, If you want to have planters on your deck or patio, you may want to consider running a water pipe to provide them with either sprinkler or drip irrigation, PVC pipe is very easy to install , and when tied into one of the many automatic timers available on the market today, a simple system can supply your plants with the correct amount of water on a regular schedule.
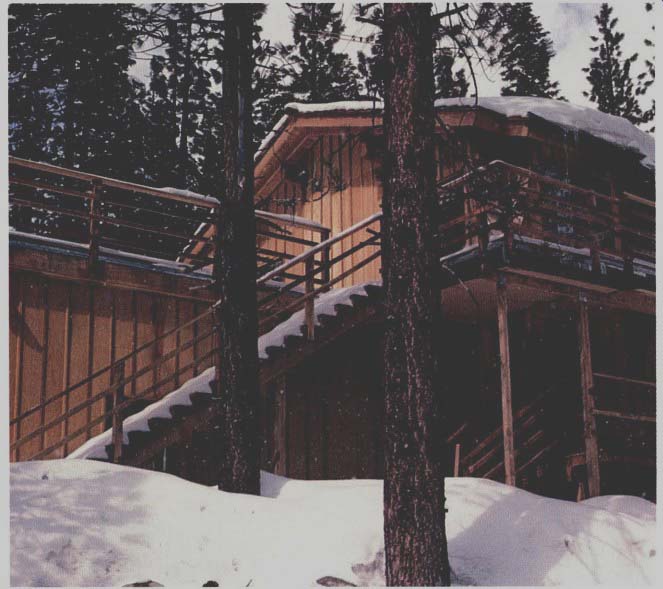
-------- An important consideration when designing a deck is
balancing loads. This is especially true in areas of heavy snowfall
.
Even if you are planning just to use the garden hose, a cold water tap on or near the deck or patio may be a great convenience and should be included in your working drawing .
Decks: In designing the structure of a deck, the objective is to choose the correct size (and, accordingly, strength) of lumber for the various components to be safely within the load allowances. For any particular part of the deck, you want to use a piece of lumber that will be strong enough to withstand both the expected live and the dead load requirements, but not one that will be needlessly bigger and more expensive than required.
As you choose the lumber in the design process and put it together in the building process, the objective is to create a structure that will not only be able to withstand the loads exerted upon it , but will also be firm. You don't want it to wiggle or seem cushiony as people walk and move around on it.
It should be as solid as the ground you are building on.
The beginnings of a solid deck are concrete footings dug into sol id undisturbed soil.
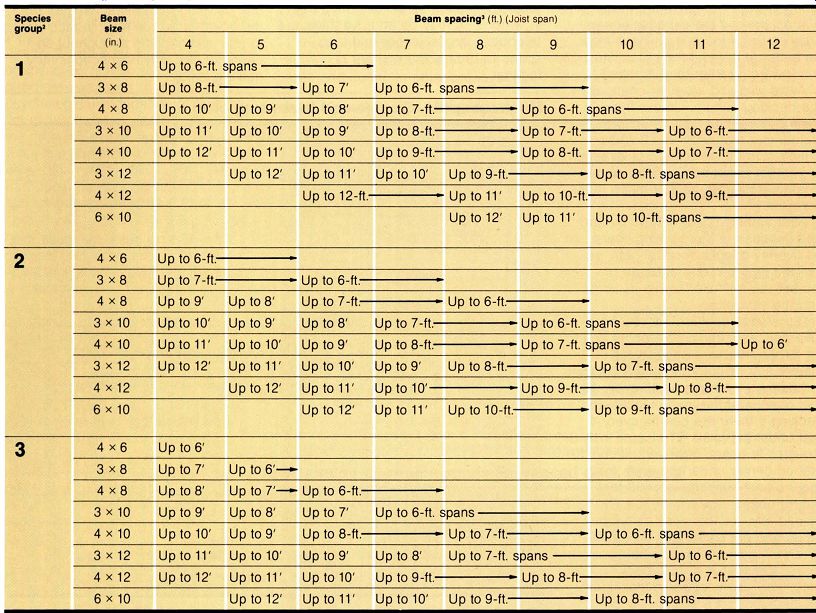
--------- Beam sizes (joist spans):
1. Beams are on edge. Spans are center to center distances between posts or supports. (Based on 40 p.s.f. deck live load plus 10 p.s.f . dead load. Grade is No. 2 or Better; No. 2, medium grain southern pine.) 2 Group 1 - Douglas fir-larch and southern pine; Group 2 - Hem-fir and Douglas-fir south; Group 3 - Western pines and cedars, redwood, and spruces.
3 Example: If the beams are 9' 8" apart and the species is Group 2, use the 10-11. column; 3 x 10 up to 6-11. spans, 4 x 10 up to 7 -ft ., etc.
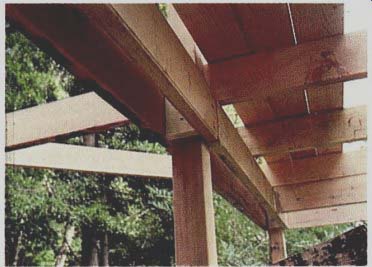
Rising from the footings will be posts fastened to beams which, in turn, will be fastened to joists which, in turn , will be overlaid with the actual decking material. If the posts are more than a few feet high, they will be tied together with diagonal braces.
Railings, benches, stairs and walls will be fastened by various means to the structure. If part of the deck is along a house wall, a joist or beam may be come a ledger - a member bolted directly into the house structure. Posts are thus not required on that side.
With the information about construction from Section 4, you are ready to work through the structural design of the deck. On the tracing overlay of your concept plan, sketch in the pattern of decking you'd like to use.
You may think the deck will look best with boards placed parallel to the house wall , or you may prefer them running the other direction or in a herringbone or checkerboard pattern.
Because the surface is what you will see, determine this pattern before selecting joists, beams, posts and connection designs. The surface pattern may influence the placement of all of them. Another influence on wood selection is the effect of available preservatives, stains and paints.
Remember our earlier comments about textures and design simplicity.
Also, remember that decking pattern s can separate parts of the deck for specific uses. Consider how the patterns will look from the interior rooms of your house. Note that decking parallel to doors and windows can make a deck seem larger with the re ceding pattern s of crack lines making a statement of perspective. Decking at right angles to a door or window may guide the eye out along the decking boards, making the expanse seem smaller. But if there is a view it may be better featured if the crack lines run toward it rather than across it.
Avoid wild and irregular changes in the decking pattern . Unless there is a specific reason, keep it uniform.
Remember that when the decking changes from one pattern or direction to another, the support system underneath will have to be that much more complex.
After you have laid out the pattern and direction of the decking boards on an overlay of your concept plan, select the type of wood and size of lumber you will use for this decking and the structure.
Decisions about lumber require give and take, trading off longer spans for larger and more costly sizes of lumber. For instance, a 4 by 8 Douglas fir beam may require posts every 10 feet to support the load of joists and decking if there are beams every 4 feet under the joists. The same 4 by 8 Douglas fir beam, however , placed 10 feet on center under the joists may require post supports every 6 feet.
Where beams are less frequently placed and are therefore carrying more load per linear foot, the posts that hold them up have to be closer together and thus steal potentially useful space from under the deck.
Thus the selection of beams and joists is a trade-off between smaller and less expensive lumber (more frequent spacings and thus more of them) and larger and more expensive lumber (more widely spaced and thus fewer of them) . In situations where the beam and joist structure will be seen under the finished deck, you may choose to use larger lumber with less frequent spacing for esthetic reasons.
On sites where it is difficult to install footings - such as steep slopes or in water - it may be an advantage to choose larger lumber and long spans to reduce the number of footings.
Another factor to consider is the headroom. If , for instance, you want the finished elevation of the deck to be just below the door sill and there is limited space above ground, you will have to size the joists and beams to fit it , using thicker lumber. Otherwise, you would have to excavate.
Similarly, if the planned deck has a change of level, you may want to choose a long and narrow beam, per haps even a bigger one than you need for load and span, in order to avoid running a second beam for the lower elevation joists. A single beam can support more than one level of deck connected with metal joist hangers on its face. In instances where vertical space is tight , all of the joists can be hung from metal hangers on the beam face. You may, in fact, want to use joist hangers throughout be cause of the easy connections they make possible.
---------
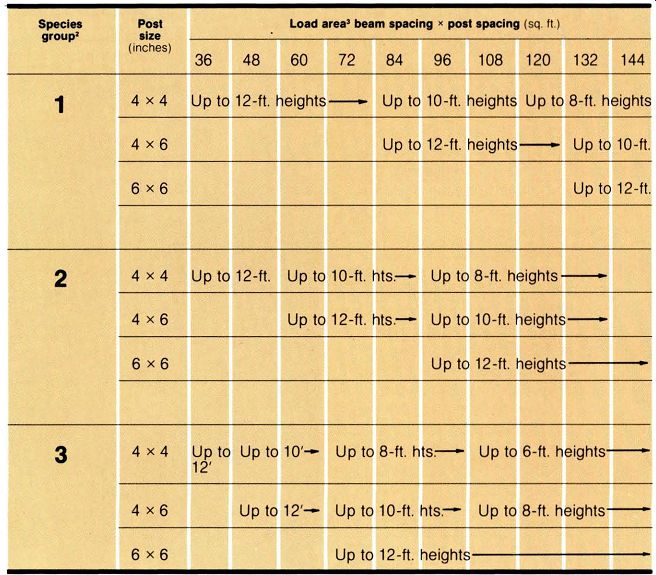
--------- Minimum post sizes' (wood beam supports)
1 Based on 40 p.s.f deck live load plus 10 p.s.f dead load. Grade is Standard and Better for 4 x 4 inch posts and No. 1 and Belter for larger sizes.
2 Group 1 - Douglas-fir-larch and southern pine; Group 2 - Hem-fir and Douglas-fir south; Group 3 - Western pines and cedars, redwood, and spruces.
3 Example: If the beam supports are spaced 8 feet, 6 inches, on center and the posts are 11 feet, 6 inches, on center, then the load area is 98. Use next larger area 108.
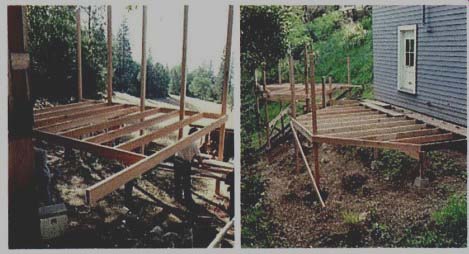
--------- Deck structures under construction.
Joist, beam and post layout: After consulting the tables, note your joist spacing on your plan overlay.
This measurement, looked at another way, is the decking span - the distance along each decking board be tween the points where it is supported by a joist. Because decks should be designed for parties where many people congregate, we recommend greatly reducing the standard allowances for joist spacing to a maximum decking span of, for example, 32 inches for 2 by 4s laid on edge or 24 inches for 2 by 4s or 2 by 6s laid flat. For 1 by 2, 1 by 3, and 1 by 4 decking, we recommend 12 inches, although you can often get away with 16 inches. The psychological importance of rocklike firmness on decks, particularly when they are more than about 4 feet above ground, makes it a poor bet to scrimp on joists. The few extra joists needed to reduce the decking span to 24 or 16 inches are well worth it.
At the edge of the deck, you may have designed a cantilever on your concept plan. In order to get this effect of a floating platform, the posts and footings must be inset from the edge of the actual decking. Depending on the use intended for the cantilevered part , the decking can extend from 6 to 24 inches beyond the joist ends. If, for instance, the cantilevered portion is beyond a railing so that it can't be walked upon, it can have a greater span because it won 't be asked to carry a load. On the other hand, a cantilever in a traffic area would be noticeably springy. In general , it is best not to exceed the length of one-half the decking span on a cantilever unsupported by joists.
On a separate piece of tracing paper, copy the joist spacing you have chosen at an appropriate scale from our tables and overlay it on your decking pattern drawing, perpendicular to the direction of the decking boards.
If you have an irregular shape that divides the decking direction, you must orient the joists for each section perpendicular or at not less than a 45 degree angle to the decking.
Copy the whole joist system off on a fresh overlay, and from our table of information, make a tentative selection of lumber size for the joists. Now note the span allowed for that size and type of joist - that is, the spacings of the beams.
Because the joists divide up the load of the accumulated decking above, they must be supported as regularly as required by this span allowance. If, for instance, your joist has an allow able span of 8 feet , you may have beams every 6 feet but you must have them at least every 8 feet. Don't stretch the span allowance because, if you do, the deck structure won't pass code, will not be solid, and may even fall down.
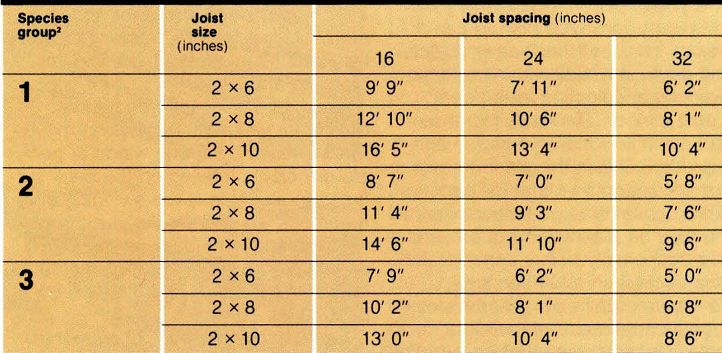
-------- Joist spacing (Decking span)
1 Joists are on edge. Spans are center to center distances between beams or supports.
Based on 40 p.s.f. deck live loads plus 10 p.s.f. dead load. Grade is No. 2 or Better; No. 2 medium grain southern pine.
2 Group 1 - Douglas-fir-larch and southern pine; Group 2 - Hem-fir and Douglas-fir south; Group 3 - Western pines and cedars, redwood, and spruces.
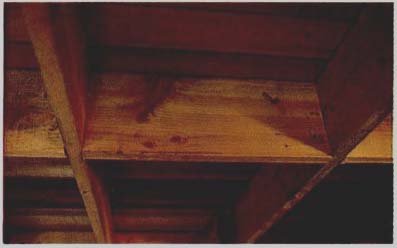
------ Maximum allowable spans for spaced deck boards. These
spans are based on the assumption that more than one floor board carries
normal loads. If concentrated loads are a rule, spans should be reduced
accordingly.
2 Group 1 - Douglas-fir-larch and southern pine; Group 2 - Hem-fir and Douglas-fir south; Group 3 - Western pines and cedars, redwood, and spruces.
3 Based on Construction grade or Better (Select Structural, Appearance, No. 1 or No. 2).
The woods most frequently used for decking in the western states are red wood and cedar. In other areas, cedar and pine are common. As prices of redwood and other preferred woods rise, formerly unavailable woods are coming on the market. Malay mahogany and Alaska cedar are both available in some areas at prices comparable to redwood, and in decking dimensions (2 by 4 and 2 by 6). Until recently, both of these were considered specialty woods and were far more expensive than redwood. In your area there may be woods with special qualities at prices that beat the commonly available woods. Check out availability before finally selecting the wood you want to use.

----- Blocking is necessary to stiffen many deck structures.
Design for rock solid ness as you work back and forth on the lumber sizing
tables. Don't cut down lumber sizes if you want to have a solid deck.
It is often desirable to use different woods for deck surface and structure.
Combinations of Douglas fir and red wood are frequent. The fir, which is stronger, is used for the joist, beam and post structure; the redwood is the decking. An additional advantage of Douglas fir joists is that they can be smaller for a given road, which in some instances is important in fitting a deck into a specific gap.
Play back and forth with the load and span information in the tables, finding the combinations of joists and beams that will work safely and most closely fit your needs. Remember that the larger the joist or beam, the more expensive it will be and the harder it will be to lift as you work with it. If you use large joists and beams, though, there will be fewer of them to buy and fasten into the structure. Structural design of decks is a matter of trying out various solutions and then choosing the best, considering the particular conditions of the job, After you have selected the joists and beams size and draw them onto your working plan in complete detail to guide the later construction. If you are using full allowable spans, your deck will be designed for a maximum load of 50 pounds per square foot - 40 pounds live load and 10 pounds dead load. If you expect to give parties with lots of guests, or if you plan to use container trees or other heavy objects on the deck, stay well within the span allowances in selecting joist, beam and post lumber. The extra expense will be worth it to insure a sturdy and strong deck. This is the place to over design for strength - and for the esthetic appeal of large timbers.
You may be planning a hot tub, spa or other especially heavy item for part of your deck. It should have a separate structure with its own beams, posts and footings because of the extra weight. To handle this problem, separate out the special use area and design the separate structure with significantly oversized lumber. It is a good idea to consult with a professional engineer if the load is great or high off the ground.
Be sure to label everything you have made a decision about, because you will forget details as you move on.
The working drawing must have all your directions to whomever will order the materials and build the deck, most likely you.
The next part of the structure to design is the footings connection to posts or beams. There are a number of different systems for connecting wood posts to concrete footings, but they all have the basic purpose of making sturdy joints above flood water and soil levels, preferably with an air gap at the bottom of the post to re duce the chance of rot. Different ways of making these connections are discussed earlier. Select the type of footing and size hole you will need and draw this on your plan with a small circle template, choosing the correct diameter. Label the dimensions of the footings and make a note about any special conditions that apply to them.
Note the type and number of metal connector you are using -- if you are -- the bolts, and where you will need flashing. This information will be helpful for cost estimating and ordering.
Blocking and bracing: You can stiffen your deck structure and distribute its live load by blocking between the joists. On your plan, draw in this blocking and label.
Bracing is used to strengthen a deck against lateral (sideways) movement caused by strong winds or people or objects moving on the deck surface: an example is the swinging of a hammock. To prevent the deck from wiggling and eventually weakening, it should be braced with cross-members in one of a number of patterns . On your plan overlay, draw in the braces using a dashed line. Then consider the detail connection of the braces. Some can be shown on your ) 1. -inch scale plan but others may need a larger scale that will show the proportions of the lumber and hardware.
Special features: Stairs, ramps, walls, railings, gates, fences, planter boxes, benches and any other special features you want to explore can be drawn as detail studies on separate sheets of tracing paper and later combined onto a single 24 by 36-inch sheet. You may want to draw them all on tracing paper to make it easier to refer to the large number of details.
You can make lots of notes on 8 1/2 by 11 -inch paper and keep them with the detail drawings as part of your working drawing plan.
Stairs and ramps: Connections be tween deck levels, house and garden are usually made with stairs. If on your concept plan you have designed their location , you can now design their actual structure.
All steps have a riser and a tread.
The riser is the height - the elevation difference from step to step - and the tread is the horizontal length or run.
Stairs with a constant tread-to-riser ratio are comfortable to climb if the ratio is correct. Generally, the lower a riser, the wider the tread must be. A standard arrangement is 6- inch risers with 12- inch treads, but different formulas have been developed to calculate tread-riser relationships. One says two times the riser height plus the tread width equals about 26 inches.

---- A steep little ramp can be very useful to the family that
bicycles a lot.
Using this system, a stair with a 6 inch riser would have a 14-inch tread [(2 X 6) + 14 = 26] . A stair with a 4-inch riser would have an 18-inch tread [ (2 X 4) + 18 = 26]. Another system of calculating riser- run relation ships says a tread times a riser should equal 72 to 75 inches. With this sys tem, a 6-inch riser would have a tread of 12 to 12 1/2 inches, and a 4-inch riser would have a tread of 18 to 18 1/2 inches.
As you can see, there is a bit of flexibility in choosing riser -to-run ratios, but it is important to be constant.
If you have several sets of stairs on your deck, keep them all uniform. Try not to have any risers less than 3 inches tall as they may become tripping blocks.
On your plan, calculate the elevation difference between levels . You may need to draw a scaled section as described earlier, based on your first elevation measurements, to figure out how big the drop is. You may even need to plan and design higher or lower levels for the deck to reduce or increase the number of stairs or the distance they need to cove r.
If you have included a ramp in your concept design, draw in a stringer plan as you would for steps, but you won't need to show the risers or fasteners. No ramp should exceed a slope of 1:5 - that is, 1 foot of rise every 5 feet of horizontal distance. If you are planning access for wheelchairs or wheeled carts, you will want to make the slope as gentle as space allows.
Battered walls: You may be planning a series of battered walls between deck levels or fences. These are very steeply inclined walls or railings, and they ca n be handsome if handled with uniformity. Be sure, however, that your battered angle is great enough to be obviously intentional. A slightly battered wall can look disconcertingly like one that is falling over.
A battered wall ca n be cleated like a ramp stringer or built out of 2 by 4s and fence or siding lumber. If you are planning such walls, show them on your plan in detail. But first , develop an actual design on another piece of tracing paper and at a large scale -- perhaps 1 inch = 1 foot. Draw the lumber to scale and detail how it will fit together. This will allow you to discover how much you will need as well as how to put it together. Study some already-built examples, if possible.
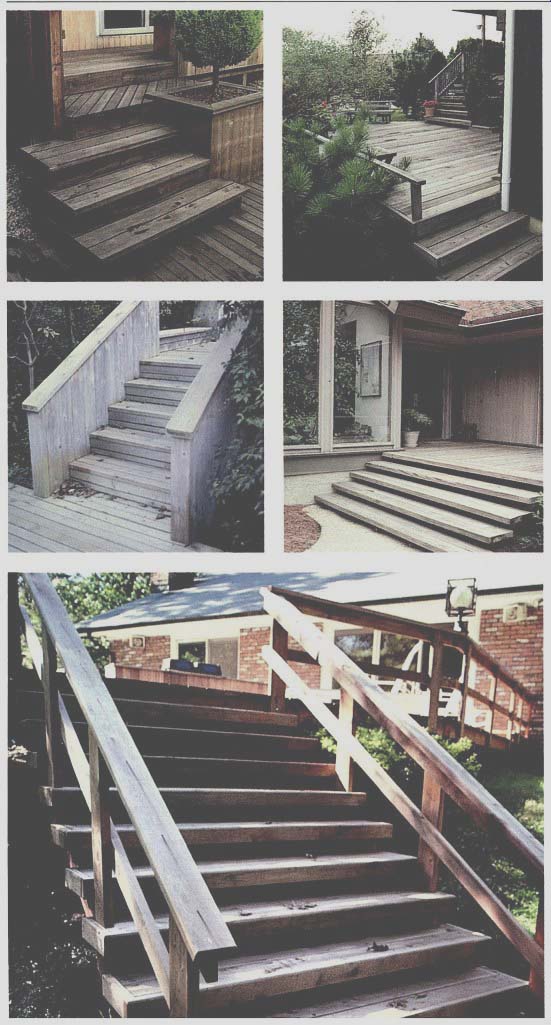
------ Stimulate your own Ideas for stair, railing and bench
design from this random selection of designs.
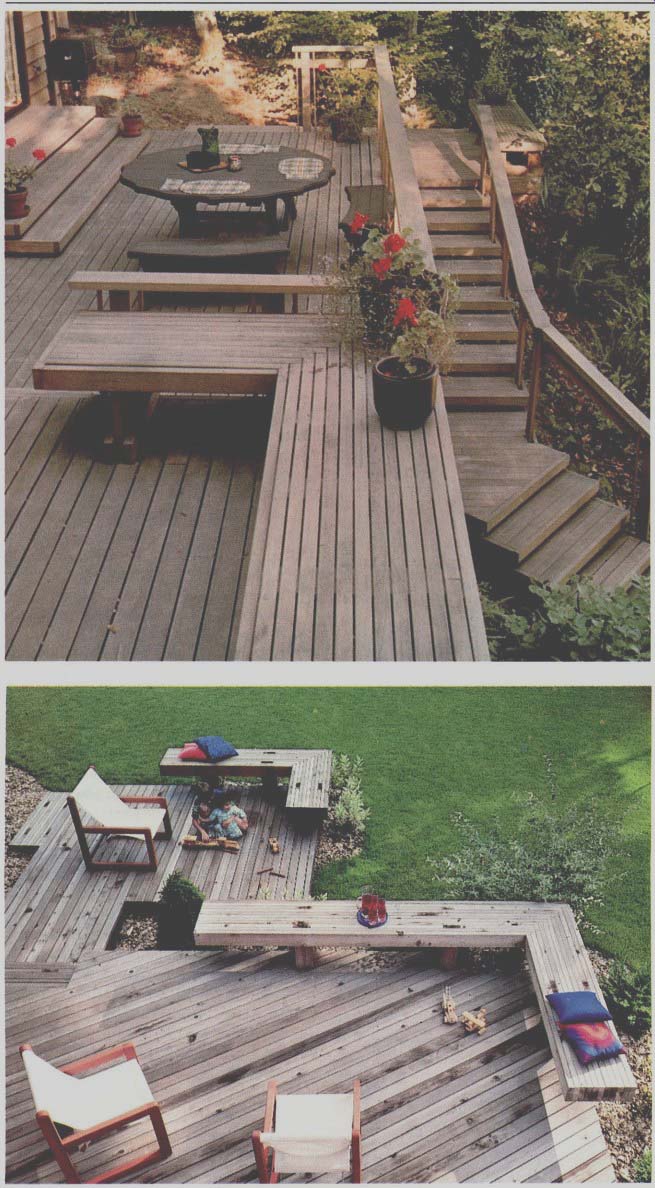
------- Railings and benches should be detailed on your working
drawings - work out what they will look like and how they will fit together
before you begin to build them.
Railings and benches: If a deck is more than 36 inches above ground, railings 36 inches high are required by building codes in most areas. Railings are required only where the deck is that far above ground, but your design might be better if you continue.
a railing system to a corner or other logical stopping point. For residential decks, that part of the railing below 3 feet can have no opening larger than 9 inches. This allows considerable flexibility, for there are many combinations of boards and metal work that can meet this requirement. If you are not regulated by codes, you have greater flexibility and may decide to have a low bench as the railing, or an open framework with just a top rail at 3 or 3 1/2 feet. Remember that a railing which cuts across the zone of sight may be less pleasing than one that leaves that area open.
Decide on your plan where you want and need railings, then with detail studies and by examining our examples, draw up your railing design.
Railings can combine with benches and walls to reinforce the planned use of space and the feeling of enclosure.
You may want to enclose the side of a deck that faces a neighboring house with a 6- foot solid wall , and then drop the height down to railing level at a corner or other satisfactory point. If you want to fill in the space between deck and railing, leave a 3-inch gap at floor level every 10 or 12 feet for drainage and to sweep leaves through.
Your concept design may have called for benches that can be built into the railing. There are innumerable bench designs for decks, as illustrated here. Benches can be freestanding, bolted with vertical braces from the joists below, or hung off the railing supports with brackets or angle bars.
An advantage of hanging benches from the railings is that there are no legs to impede deck cleaning.
Spaces under decks: If you are designing a deck that is sufficiently far off the ground to walk under, you may have some uses in mind for the underside space. Obviously, it may be fine to store pool and sports equipment, firewood, garden implements, deck furniture or perhaps the garbage cans. But what about a light well to the basement , a sauna, a fort for the children, heater and filter system for the hot tub or pool , or a laundry area?
On your layout plan, see if you can allow for this kind of upgraded use, surfacing the area as a lower deck or with a patio paving material.
Review your drawings and study again the ideas for detail components of your design - the stairs, railings, wall s and benches - and other special requirements such as lighting, electrical outlets, sprinkler irrigation lines, outdoor heating, treatment of space below deck level, and connections to existing decks or patios. Draw de tails and make notes of them on your plan sheet, being sure that you have allowed for bracings, footings or other supports that the special features may require.
Recheck your joist, beam and post system, and once you have determined it is correct, trace the lines onto a clean overlay, label them and make notes as necessary.
Blueprinting your plans: If you have drawn ,he plan on good quality tracing paper, you can now have a blueprint copy made of it. It is useful to have 5 or 6 copies for purposes of applying for a variance, cost estimating and actual construction. To locate a blueprint company in your area, look in the yellow pages or call a local architect's office and ask them.
Patios: If your concept design called only for a patio, you can disregard much of the information about decks and structures just given. However, you'll still want to adjust your concept plan to use standard sizes and components of materials. You will need to select the materials, specify their color and work out their detail design on your working plan.
Making a dimensional plan: To start, make a dimensional plan of your concept drawing. Write in the lengths of each of the edges around the patio. You may have a wide choice of surface materials, as illustrated in the previous section. You can have patterns of brick, exposed aggregate, smooth concrete, stone, tile, wooden blocks, redwood rounds, asphalt , gravels, indoor/ outdoor carpet or other materials. You may have located stairs or level changes in the design, and you may have raised planters as well as retaining walls as elements that define your space.
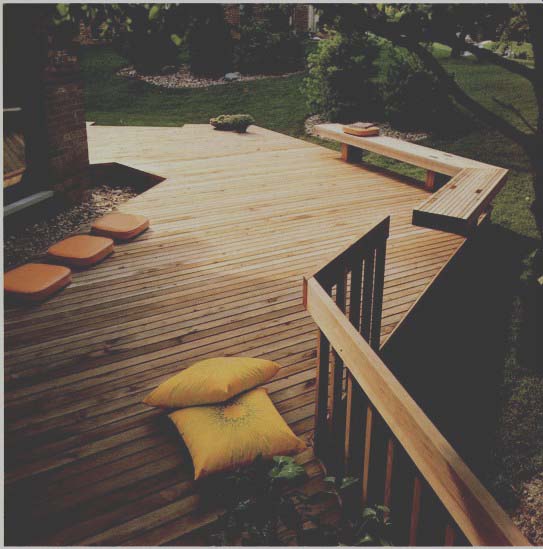
-------- Complexities of angles and elevations are much easier
to decide on paper than after you have Invested in the materials.
Drainage: Because part or all of a patio rests directly on the ground, you have to be more conscious of drainage and settlement of base materials than the deck builder. You don't want your patio to be flooded every time" you hose it down or when it rains or if it settles irregularly.
On your concept plan you noted where natural drainage occurs. You should also have noted any low points on the site that need to be raised to drain well. As you do your working drawing, decide how you will draw the flat surface of the patio. Actually, the surface should slope slightly away from the house - V. inch per foot - toward a planting area or a drain outlet.
If drainage is a great problem, see page 93 for possible solutions.
Draw drainage details on an overlay, and label it as your drainage plan.
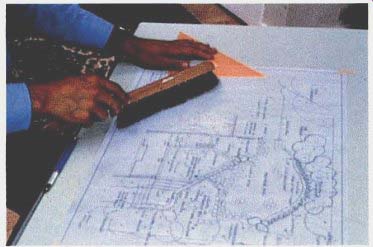
---------- Co-author Lin Cotton finishes his final working plan for
a deck design.
Checking your patio plan: Trace your patio working drawing onto a clean overlay, labeling and detailing with close care. Try to outdo us in anticipating as many of the problems you will encounter during construction as possible, and note your decisions on the plan and details.
Adding on to old decks and patios: If you are making an addition to an existing deck or patio, there are several things you should check out as you create your design.
Be sure that the old structure will last long enough to warrant being left .
In some cases, decks may not show signs of rot on the surface but when you look at t .he footings, posts or joists, you will find advanced rot. Be careful not to limit your new design by an older structure that will need to be replaced in a year or two.
Another problem is blending the textures of new and old materials. If you have a patio surfaced with ex posed aggregate slab, try to copy the aggregate color and size in the new paving. If you are adding on to a deck, consider staining all of the decking, new and old, to blend. You may need to sand the old deck before staining, or match its new color with a specially mixed stain.
Most important , though, be sure that you aren't limiting your design directions in order to save a bit of old patio, and by doing so, precluding the development of outdoor rooms you really want . In some cases it is better to tear down the old structure.
Critical path: Before you begin construction on your now designed deck or patio, map out the critical order of events that you will have to follow in the construction.
Often called the critical path, this organization of the project will be a list of every task and the order in which each should be started and finished.
For instance, if you are building a deck, you will need to order the lumber before you start to dig the footings if you want it to be delivered when you need it.
Anticipate the construction process and problems and map it out for the smoothest job.
With your thoughts and plans fully worked out on your drawings, you are nearly ready to begin construction, following your critical path of activities, ordering materials in time for them to be delivered when you need them, and phasing this work to avoid stalling one aspect of the project because of something you should have done before.
But there are still lots of decisions to be made in the actual selection of materials. Your plans like a road map, will guide you along, but at many a juncture, you will have to find solutions to problems that arise which you didn't consider in the planning phase. You will have to put on many hats for the construction phase, being not only carpenter, but also laborer, electrician, plumber, surveyor , bricklayer, stone mason, and gardener.
As you go to the suppliers, look out for quality materials, and be careful to specify exactly the materials you want.
For both decks and patios, you will want to select the lumber. For a patio you will need relatively little, but even redwood benders can be good or bad.
It is best to hand select what you need so that you don't get split or knotty pieces. For decks, of course, lumber selection will be very important since lumber is the main material and the quality you use will greatly influence the look and strength of the final structure.
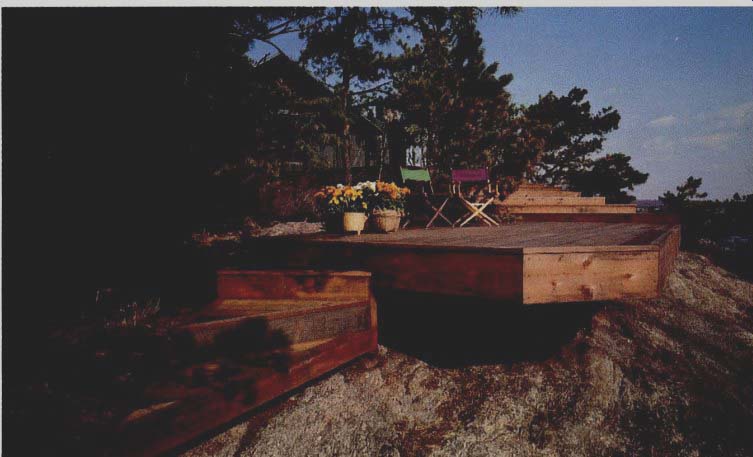
------ Decks can give you access to formerly unusable sites, Improving
your enjoyment of your property. When combined with patios, you can
develop a series of outdoor rooms with great potential for spacious living.
List of events for designing and building a deck or patio:
- Observe all sites
- Select the site
- Consider texture, color, perspective, connections, and forms
- Consider temperature, noise, wind, sun, shade and human scale
- Draw and refine the base plan and concept design
- Draw the working plan
- Estimate material needs
- Select materials
- Construct the deck or patio
- Enjoy the deck or patio.