How you design your deck or patio not only means drawing a set of plans, it also means staking out a grid, deciding on your elevations, and creating your concept design.
Design is a process, not just an end. Like a piece of written music, it is a notation of how you might later do something. Or you can think of the process as a recipe in which you can tryout different ingredients until it suits your taste exactly.
Repeating the cycles of observation and evaluation will force you to reexamine the reasons why you are doing something, and either refine or reject it.
You should be able to design and build your deck or patio with the help of this workbook. There may, however, be aspects of the project that will re quire professional help. If your deck is going to be more than 6 feet above ground, or if you need stout retaining walls or other special improvements for the patio, then consider contacting a licensed landscape architect, architect or civil engineer at least to check your plans. During the actual construction, you may run into special conditions that require the assistance of a skilled carpenter. These experts can be hired on a day-to-day basis.
For most situations, however, you'll find that you can plan your work from the information in this guide. The design process may take you almost as long as actual construction. Remember, though, that it is infinitely cheaper and easier to make changes on paper than in wood and stone. That's what the design process is all about: thinking through the changes and getting them down on paper.
Question your requirements: How do you use your garden (or site) now?
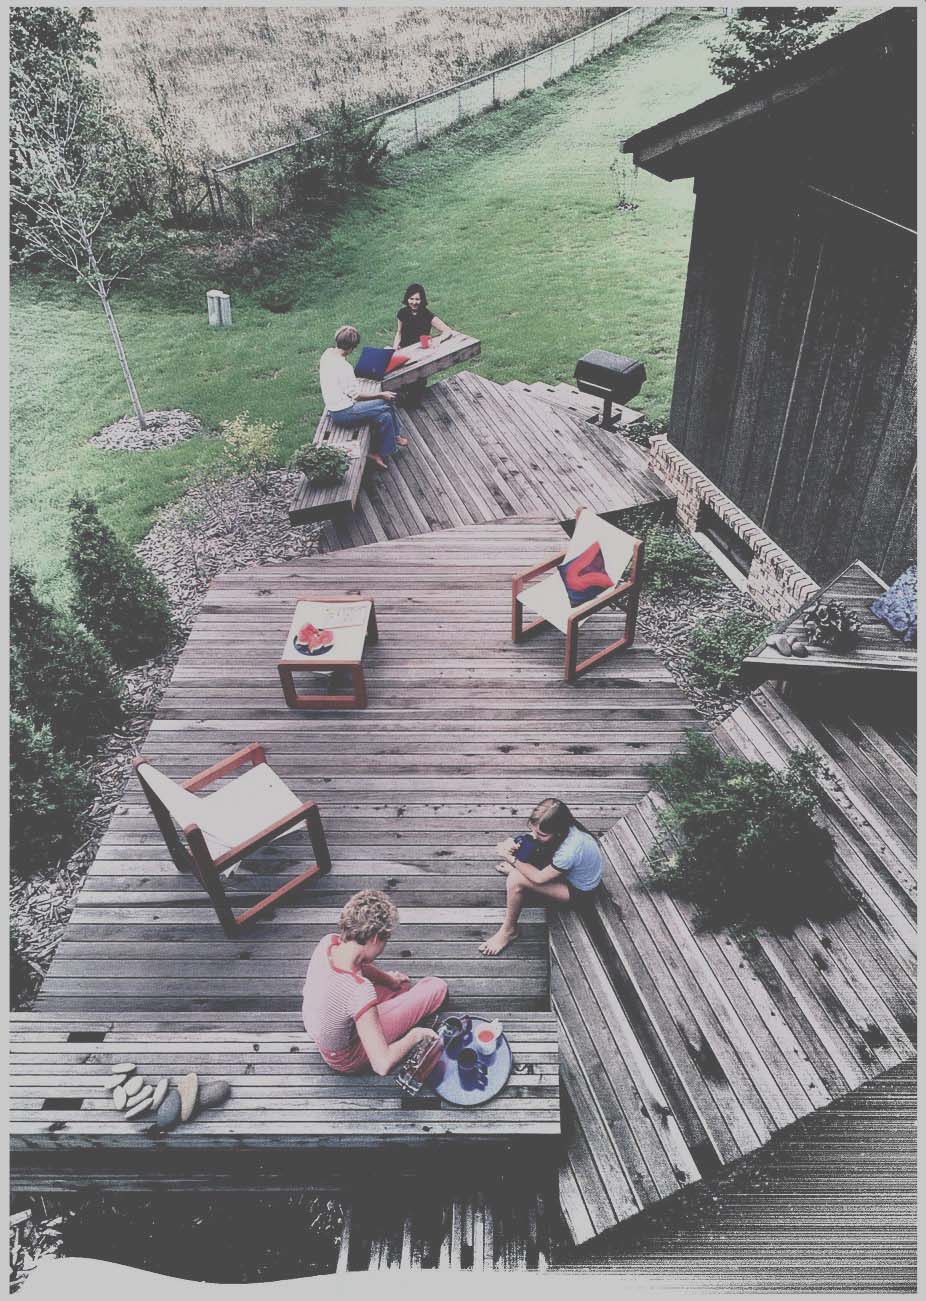
---- How would you prefer to use it? What do you most like
about it? The objective of a design process Is to discover requirements
and limitations so that the eventual spaces will accommodate expected
uses.
What don't you like about it? If you have children, what specific uses will they be growing out of and into?
If you have pets, do they have any specific requirements that would influence your design? Do you want to shut them out or let them in?
What specific uses do you want to plan for? Dinner parties, sunning, recitals, to look at , for quiet talks, the kids to play in, as storage? How do other members of your family plan to use it: get them involved if you can, perhaps by having them each do a concept plan for you to get ideas from.
If you were to think of various parts of your garden, or your deck or patio site, as outdoor rooms or extensions of indoor spaces, what would you call them? (Living room, kitchen, den?) What is the architectural style of your house and should the deck or patio design be consistent stylistically with it?
Do you prefer a particular design style -- formal , natural , Japanese? What other ideas would you most like to include in your design? Perhaps a reading room or aviary? Let it be your own special place.
How much can you spend on the improvements? Pick a figure that you can live with comfortably. Remember that the improvement will increase both the property value and your enjoyment of your home.
How much time will you have to build the deck or patio? Remember, it always takes longer than you think.
How much time will you have to maintain it?
How long do you expect it to last? If you are planning to live there for many years, the greater expense for some things you want may be justified.
How available are materials in your area?

-------- Recitals and musical events can be planned for through
spatial design.
Where are the underground utility lines in relation to your site? Check with the utility company if you can 't discover them yourself .
What local building codes will apply? Check with city hall on this one.
Are there easements, setbacks or other zoning regulations that will influence what you can do?
To find out about easements, zoning regulations and setbacks, call city hall or the building department. There, city officials will advise you of current regulations, setbacks in your zone, easements and other special conditions that might affect your plans.
Does what you are planning affect the neighbors' interests?
Do you have a scaled plan of the site, perhaps from the grant deed or from earlier work on the property? Do you have the tools, skills and patience to complete the project? You may not be able to answer all of these questions fully, and some of them might not apply to your situation.
There may be other questions that you should get the answers to. If there are, jot them down. It is helpful to identify what you don't know about your requirements and needs so that you can be on the lookout for the information.
Other answers to the questions will develop as you work into the evaluation and synthesis phases of the design.
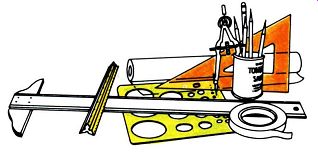
----------- For detailed design plans, purchase the following
materials: one pad 18 by 24 inches 1000H 0.25-inch tracing graph paper;
one roll sketching paper/ tracing tissue, 14 inches wide; one transparent
6-inch, 45 degree triangle; one transparent 8-inch, 30 / 60 degree triangle;
an architect's flat scale; one roll drafting tape; an eraser; a drafting
pencil; soft and hard lead pencils; a small circle template, a ruler
and a compass. Additional equipment for more technical drawings will include
a 24 by 36-inch drafting board, a 36 inch T square, an architect's scale,
a lead pointer, and an eraser shield. (You can do a good job with some
graph tracing paper, ruler and a 50 foot measuring tape for the outside
dimensions).
Redefine and refine your concepts: Allow yourself to go back to review your earlier observations and refine your concepts. This is the evaluation or critique phase of the project. Give yourself every opportunity to refine your program because soon you will need to synthesize the information and create your first concept design.
The activity of making plans, verbal and graphic, is essential. The design advances as you record, study and improve upon your thoughts. Making notes, circling ideas that you like in pictures, and drawing out your original ideas are all intermediate steps to a design solution. The more you strip away areas of indecision and replace them with thought-out solutions, the closer you will be to having a design that will work well for you.
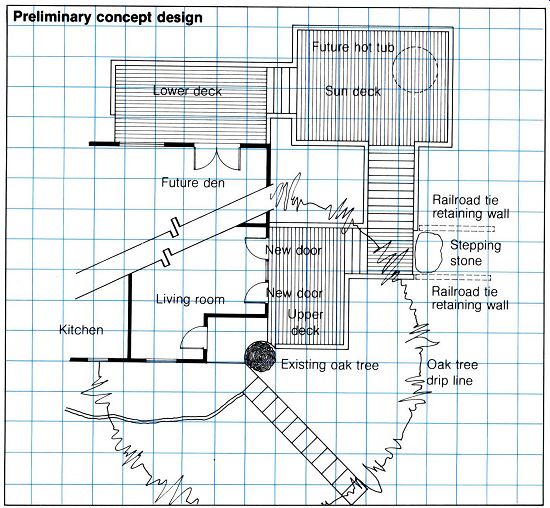
Your plan will be as useful as you make it, reminding you what you have decided to do. Working with tracing paper overlays on top of a base plan of existing conditions, you can experiment with a variety of forms for your deck or patio. Layout rectangles, circles, angles and free forms in a variety of sizes and configurations, each on a separate overlay, and try them over your base plan.
After working out several conceptual designs, choose one or a combination of several for a complete concept design. At this point in the concept phase, your attention should be limited to general use and site needs. In Section 6, you will refine your plan as you decide on actual materials and methods of attaching them.
Tools for drawing plans:
Designs for decks and patios can be drawn freehand or with the aid of mechanical drawing tools--T square, triangles and templates. For the purpose of accuracy, your final working drawings (see Section 6) should be measured with a ruler or architect's scale. This scale is a' handy tool because it calibrates dimensions directly into the scale you are using. For example, instead of measuring 1 3/8 inches with a ruler at 1/4 - inch scale, the architect's scale will show 7 feet.
You can draw most of your plan freehand, then use the triangle and architect's scale to establish angles and dimensions.
With the drafting tape, attach two pieces (one for padding) of the tracing graph paper to a flat table at good working height where there is good light. Use the rolled tracing paper for quick sketch studies as you work through the process. For full overlays, use additional pieces of the graph tracing paper from the pad. The circle template and compass will allow you to measure and draw any circular forms you choose to use in your designs. A soft lead pencil is ideal for making the early freehand sketches.
The hard pencils give a finer line, and thus are more suitable for the later, precise drawings.
As you draft your plans, don't get entranced with using the mechanical equipment such as triangles and templates. They are tools to assist you, not to direct you.
If you choose to work with the more technical drafting tools, including drafting board and T square, you may produce more professional looking drawings. But remember that the purpose of mechanical drafting is to make lines that indicate precisely defined thoughts. For this reason, the concept design should be done freehand and the mechanical aids kept for later base drawings of known facts and working drawings that show exact dimensions and conditions.
For most projects, several different scales are used, depending on how detailed the particular plan needs to be. The larger the scale, the more detail can be shown. To choose a scale for any particular plan, keep in mind the information you will need to portray. If you are working with a very small space but one that will. have lots of details to note on the plan, choose a large scale such as 1 inch = 1 foot.
If your site is very large, you may need to use a scale of 1 inch = 20 feet or even more for the initial layout.
You will later need to separate out detail areas for study at a larger scale.
For most patios and decks in residential situations, 1/4 inch = 1 foot is a good base scale. It's small enough to include the whole project on one sheet but large enough to note details.
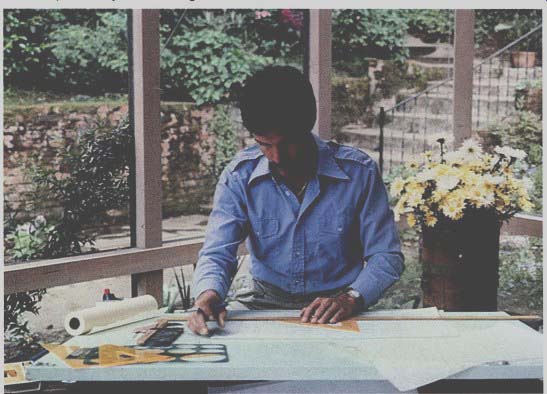
-------- Co-author Lin Cotton completes a preliminary plan with
simple drafting tools that you can also buy and easily learn to use.
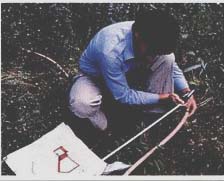
------ One way to layout the general plan for your deck configuration
would be to lay down nylon cord or, as illustrated, mark your proposed
site with garden hose, Base plan: You have tracing graph paper taped
to a table (or a drafting board).
If you have a scaled plan of the site or can get one -- from the builder, former owner, city building department, perhaps a survey for the original building plan - adjust it for your scale and copy the fixed objects off it to save yourself a lot of measuring. But first check the older plan to make sure it was correctly drawn and is still accurate -- that trees haven't grown or disappeared, for instance.
By this time you should have narrowed down the possible sites for the deck or patio, and although you may not yet know the exact dimension, you can define the general area within a few feet.
If you don't already have a base plan drawn to scale that shows existing conditions, now is the time to make one. It can be very easy and lots of fun. Using a 50 or 100-foot tape measure, go out onto the site and start taking measurements that will be transferred to your plan.
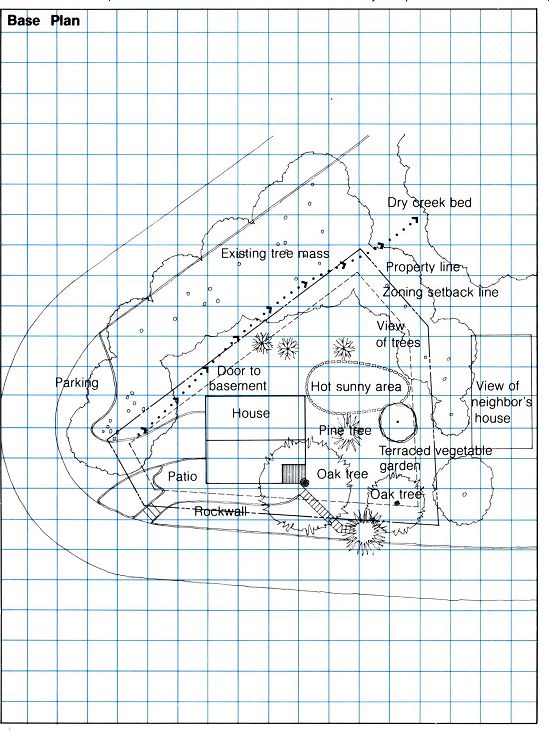
------- Base Plan
If your site is adjacent to the house, take the house wall as the base or reference line. Orient your plan so that when you draw the first wall line, after measuring it , you leave yourself room to draw the rest of the site on the sheet. Always orient the plan with north at the top or left side. This is standard practice and will make it easier for building inspectors or other people you may call on to orient themselves. Note north somewhere on the plan and the scale you are using (probably 1/4 inch = 1 foot) . If your deck or patio is to be away from the house, you can use the line of a fence or out building wall as your reference line, and measure subsequent lines off from it. If the deck or patio is to be separate from all other fixed objects, stake off a straight line with nylon string to use as the reference line, and make subsequent measurements from it.
Stake out a grid
With a bundle of nursery or construction stakes (18-inch 1 by 2s are fine) , and with nylon string, stake off a grid of squares - perhaps 10-foot squares -- covering the extent of the site and based on the reference line. From these grid lines measure other fixed objects that could influence where you build your deck or patio, and draw the objects to scale on your base plan. Include house walls, fences, shrubs, spigots, pools, paths, utility lines overhead and underground, drainage courses, property lines and setbacks.
Check your accuracy occasionally by triangulating on freestanding objects such as trees or fences, To do this, measure back from a known point on the base line and run a right angle out to the object. Check your right angle by marking off 6 feet on one side and 8 feet on the other. A line connecting the two - the hypotenuse of the right angled triangle - should then be 10 feet if your angle is correct. Check the measurements, and on the grid sheet base plan, make any corrections that are necessary.
Once you have everything down on the base plan that you can observe and measure, go inside and trace the plan on a new sheet of paper, correcting angles and being as tidy as you can. The standard plan symbols may be useful to you in making notations to tell one line from another.
Now go out into the site again and on an overlay of tracing paper, note with arrows, words, magic markers or any other system you like how the following site conditions might influence your plan:
• Views, both good and bad; for in stance, mountain range and neighbors' garbage cans.
• Shadows from trees and buildings during various seasons. Some trees lose their leaves, letting sun in with winter but the leaves block its heat in the summer.
• Wind direction and screening needs, sources of sounds, good and bad.
• Snow buildup areas.
• Drainage and runoff problems.
• Present walking-circulation routes.
• Views into the area from the house.
• Privacy screening needs.
• The best access paints.
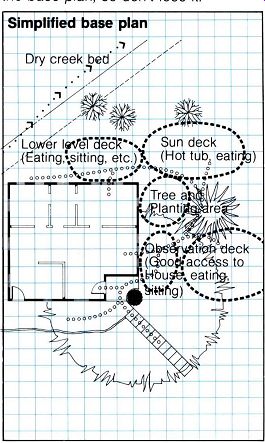
If you find that your base plan by now has a confusing number of notes and arrows, make a tracing of the basic outline of the space and use it for your concept base sheet, keeping the base plan aside for reference. Later you will need to check your concept plan against all the conditions you noted on the base plan, so don 't lose it.
------------
-------------

------------- Decks may rise from just inches above the ground
to many feet in the air.
Elevations for decks: With an other overlay of tracing paper, go to the corner of each grid square and estimate its approximate difference from a reference elevation that is convenient to establish -- perhaps the floor level of the house. Eyeball these elevation differences at each corner and note them on the plan. For greater accuracy, you can use a hand transit, carpenter's level or a line level. If great accuracy is required, rent a surveyor's transit or have a professional surveyor map existing elevations for you. From these elevation notes, you can calculate how many steps you may need for the deck, what length its posts should be, and how vertically complex the space can be.
Once this is done, you will have all the information you need to begin the concept design. You will have completed the observation phase of designing.
Creating the concept design: Don't expect your first design to be the one you want to develop. The concept design phase is the time just to get general spatial relationships down: the size of the outdoor rooms, circulation .and connections between them, views to and from them, and special design considerations such as sequence and separation of public and private spaces. Concentrate on how you will use and move around in the spaces, and on the general physical forms the spaces will assume.
There are many ways to develop a concept design. Every designer probably has an individual technique that helps, and there are no best solutions.
There are, however, many good solutions to any design problem. The degree to which your solution will be good and will be measured by how well it will serve your requirements, how balanced and consistent it is, and how flexible it will be to accommodate future changes.
Using the scale you have selected for your base plan, assign rough dimensions to the various spaces or rooms you think you want. For example, if you want a dining and barbeque space, take as a starting point the dimensions of a good sized dining alcove. Think " room size, " not "great outdoors," to come up with initial space allocations and to avoid making a patio or deck that is too large for comfort and convenience. There is nothing pleasant about a patio that looks like a parking lot. If you are making a deck to entertain friends, how many people do you normally entertain inside? How much more space will they use outdoors? Don't spend much energy on assigning these starting dimensions because they may well change as you play with the design.
With your one or more outdoor spaces roughly dimensioned, draw each as a scaled space - squares, circles, rectangles, trapezoids - on separate pieces of tracing paper and cut them out. Move these tracings around on top of one another to form different configurations, and when you find one you like, make a tracing of it.
After you have developed several combinations you like, go back over them and study each to see if it really accomplishes your design goals, roughly fits the preliminary measurements of your spaces, and seems practicable in terms of serving the uses you have defined for your out door rooms. Save the attempts that have merit.
As you arrange and draw up your preliminary concept designs, be sure to keep in mind that you are creating spaces for activities or contemplation, or both.
Think of the connections that naturally or ideally exist between them, such as easy access from the barbeque to the kitchen or from a hot tub to the bedroom or family room.
Whatever your particular needs are, as you laid them out earlier, be sure that the designs you come up with allow for the uses required.
Be very conscious of circulation --where you will need to walk and where you will want a space to be out of the walking area. The effective use of any room, indoors or outside, may be reduced if it becomes a corridor from one place to another. An example of this might be a dining room situated between a family room and a pool deck. The dining room would be more successful as such if it were off to one side of the direct route between the other two spaces.
Using the tracing paper, create and discard sketch after sketch, saving only those that seem to have really good points. Work freehand, using the graph paper units to keep your spaces roughly to scale, but being conscious mostly of the basic form and how well various designs create space and answer your use needs. Think of changing levels, raising the use area above ground with a deck, or leveling off a terrace for the patio. Consider how the space will look from interior rooms, how you can incorporate existing conditions, and what the orientation of the space is to sun angle, views, noise and winds.
Consider the following ways of defining or changing spaces by design: Low-rise High-rise Multilevel Stepped Connected Freestanding Cantilevered Circulatory Covered Enclosed Sunken Tree Belt Spectacular Featuring Secluded Visual extension
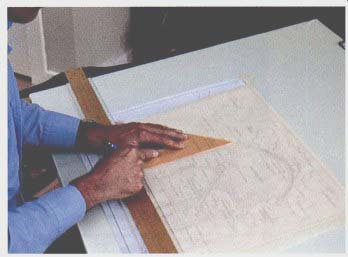
---------- A T-square and triangle, squared off to a drafting board,
make It easy to draw and measure to scale parallel and perpendicular lines.
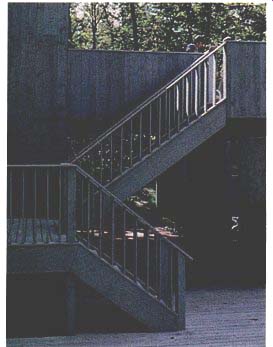
---------- Multi-level decks, as shown above, are best planned
using "elevation" drawings like the one for the deck below.
Sketching sections and elevations: Because plans are two dimensional .representations of three dimensional space, they only partially note and explain what you may have in mind. To help you understand differences in all three dimensions, occasionally draw sectional sketches.
These need not be complex because they are really just vertical plans rep resenting certain areas of the whole.
Picture a section as what you would see if you were to cut across the plan with a knife. Like a piece of pie cut in half, what you will see for a deck or patio is the surface material and a cut-through view of everything below that surface point .
Elevations are created in a similar manner, but everything you can see from a particular direction is included.
Unlike the section, which cuts through the design, an elevation is a view of all the surfaces facing any particular direction.
By using simple sketch elevations and sections as you work through the concept plan, you will know what elevation differences are really possible as you layout multilevel designs.
From time to time it will be helpful to check your schemes on the ground.
Layout garden hoses, or line off with string, chalk or even baking flour, where the edges of the patio or deck would be. Walk into the spaces you are thinking of and imagine the ways you will use them. Tryout the circulation from area to area, confining your walking pattern to the dimensions and directions in your plan.
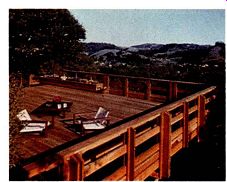
---------- The elevations of a deck can be breathtaking, as can
the view. When planning a deck, sketch the elevations on a side view
o see on paper what a photographic view would be.
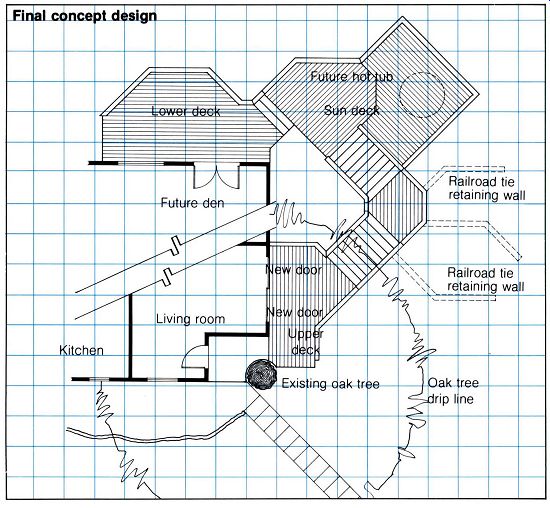
Refining the concept design: Once you have three or four concept designs that seem to answer your requirements, select the one or combine several to make the one that best fits your needs. Check its elevations with some simple sketches from different angles, and work through it again with a fresh overlay, checking to be sure that it includes the spaces you intended, handles access and circulation, and is responsive to the screening and view requirements you have made notes about earlier.
Ask yourself as you go through this cycle of reevaluation, "Does it solve my requirements within my budget , time and other limitations?" After you are sure that it is the best plan you can make, draw a tidy tracing of the final concept design.
If you are dealing with a very difficult site, or there are special conditions you want to study more - such as how well your garden furniture will fit the space - cut out scaled paper or cardboard models of the furniture or whatever, and move them around on the concept plan.
To get a good perspective on the model, put a small hole -- just 1/8 inch in diameter - in another piece of cardboard and look through it into the spaces in the model. Cut out human figures to scale if you have doubts.
Such a detailed evaluation probably won't be necessary, but if you can' t imagine the spaces you are laying out, it will be worth the time. Remember, it is a lot easier to make changes on paper than to make them after you start building.
Figuring costs will be difficult until you have completed the final plans showing exact size and placement of all materials. Before making those plans, however, use your concept to estimate roughly the cost per square foot of your deck or patio.
Because of regional differences in prices, we suggest that you contact a local lumber out let or builders' supply store to get their prices for standard quantities of the construction materials you are planning to use.
Add up the areas of decking, paving, steps and replanting you will need, and multiply them by the local cost figures. If this rough estimate is much higher than you can spend, you should consider doing the project in phases, building some now and some later.
If that isn't possible, work through the concept phase again, reduce the scope of the design, and build up your de termination to stick within your budget.
After you have completed the working drawing plan (see Section 6) , you will know the details of sizes and quantities of materials you need and you will be able to make a complete cost estimate.
In this, the concept design phase, you purposefully have avoided considerations of materials and structure.
This freed you to pay attention to space relationships, circulation and design qualities that create the sensuous force. You have synthesized what you know about the site, your needs and design principles. Now you have the basic out lines and forms for your outdoor rooms. The concept design you have created will be largely responsible for the eventual success of these spaces.
But design doesn't stop at concepts.
It requires a knowledge of construct ion principles. Plans are the most convenient means of noting your decisions about how to put something together.
Different lines on your plan will represent different elements of the structure. Labels, dimensions and notes will also be useful to record your decisions.
A basic knowledge of construction procedures and possibilities is essential before proceeding with the final drawings from which you will actually be able to build. So our next sections are devoted to construction. In Section 6 you will be able to refer back to these discussions in preparing your working drawing plan. The con tents of these sections will also be a useful reference during the actual construction of your deck or patio.
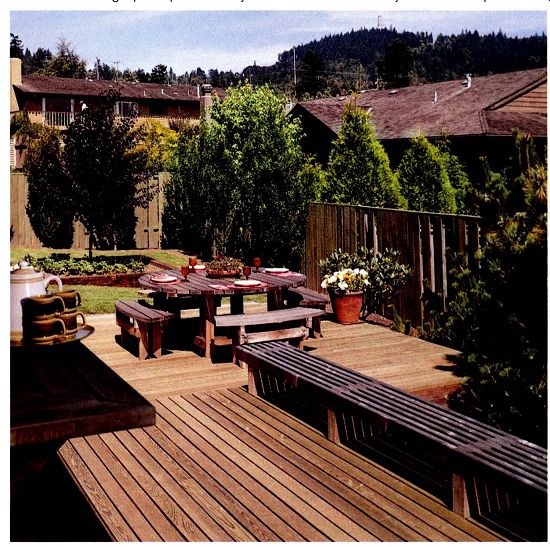
-------- Decks can be built In phases, as time and money become
available, but It Is good to work from a plan showing the complete project.