AMAZON multi-meters discounts AMAZON oscilloscope discounts
Welders must frequently make welds in less than ideal welding positions. The basic skills have to become second nature to deposit a good weld under these conditions.
So far in this discussion we have discussed the melting and freezing of metals, the heat required to melt metals, and the source of heat in welding work. Now we are to consider another important aspect of this general subject—heat transfer. We will start with some definitions.
AMAZON multi-meters discounts AMAZON oscilloscope discounts
Temperature
Temperature is the degree of hotness measured on a definite scale, usually the Fahrenheit scale. This is a measure of the intensity of heat.
“How hot is some substance ?“, we ask. “It’s so many degrees.”
British Thermal Units
British Thermal Units (usually referred to as B.T.U.s) are a measure of the amount or volume of heat. One B.T.U. is the amount of heat required to raise the temperature of one pound of water one degree Fahrenheit.
“How much heat does it take to do a certain job?”, we ask. “It requires so many B.T.U.s.”
The flame from an ordinary wood kitchen match reaches a temperature of about 900 F. If the match is completely burned, it gives off about one B.T.U. If the match is held under a vessel containing one pound of water it will raise the water’s temperature about one degree (provided none of the heat is lost to the air).
If in succession we light a series of ten matches under the vessel, and they all are completely consumed, we can raise the temperature of the pound of water by ten degrees. Or if we light ten matches at once they would likewise raise the temperature of the water by ten degrees; but do it in 1/10th the time. This, de spite the fact that the temperature of the burning matches was still the same 900 F in either case.
From these examples we should see that the heating speed and therefore melting speed of the work piece (for welding or for any other purpose) is dependent on not only the temperature of the heat source, but also the volume of heat, and the rate at which the total heat is applied.
Heat Volume
Now we can use another example. A very small oxy acetylene flame has a temperature of 6000 F at the tip of the inner cone (its hottest part). A very large oxy acetylene flame also has a temperature of 6000 F at the tip of the inner cone. But the large flame gives off more B.T.U.s—just as ten matches give off more heat than one match—and will consequently do more work.
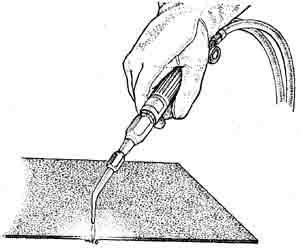
ill. 17—A thin piece of steel plate can quickly be melted with a small oxy-acetylene
flame.
If we have a thin piece of steel plate, let’s say about to 1/16 – 1/8 in. thick, we can melt the edge with a small oxy-acetylene flame quickly, ill. 17. But if we have a thicker piece of steel plate, say about 1/4 in., it will take a longer time—even though both pieces of steel have the same melting point of 2790 F. This is because we need more B.T.U.s (volume of heat) to melt the larger mass of metal, as indicated in ill. 18.
If we want to speed the melting of the thicker plate, we will have to use a bigger flame that supplies B.T.U.s faster.

ill. 18—It takes longer to melt a thicker piece of steel plate, even though
both pieces of metal have the same melting point of 2790 degrees.
Heat Transfer
The thickness of the work piece controls the rate at which B.T.U.s are transferred or withdrawn from the puddle. This rate of transfer affects the freezing rate of the weld puddle. The thicker plate quickly withdraws the heat. The thinner plate withdraws the heat slowly.
The ability to correctly balance the volume of heat input with heat transfer demonstrates the welder’s skill. He heats the base metal to the melting temperature, deposits just the right amount of filler metal to produce the desired weld size and moves along letting the weld puddle freeze before it becomes too large to properly control.
Reviewing
So learn to watch the weld puddle carefully. Learn to recognize the moment of melting and the moment of freezing. You will then be able to add heat or take heat away when you need to. You will be able to pace your speed of travel so as to keep the puddle properly melting in front of the arc and properly freezing in back of it.
Running a Bead
For your next welding exercise, practice running more beads, but this time in addition to trying to improve your ability to make straight, uniform appearing beads, watch for the melting and freezing that we have been discussing. Proceed as follows:
(1) Use scrap plate of at least 1/4 in. thickness and use 1/8 in. electrodes.
(2) Place the plate flat on a grounded work bench. Use D.C. reverse polarity current or A.C. at about 90 to 100 amperes.
(3) Run a few beads as you did in the previous exercise, to get the feel of the arc.
(4) Then start at the left end of the plate at the side farthest away. When the arc is established, be gin to move the electrode slowly but steadily to the right. (Reverse positions for left handed students.)
As before, watch the arc and try to keep the length of the arc constant. Try to move the electrode in a straight line.
As the electrode moves, observe the movement of the molten weld puddle. See how the plate melts in the heat of the arc and watch how it freezes as the arc moves away. This melting and freezing may seem to happen very quickly, but if you watch closely you notice the trailing edge of the puddle solidify as the arc moves along.
The weld puddle appearance tells you whether you are making a good weld. Molten metal has a clear, bright appearance. Molten slag has a dull appearance. A dull irregular appearance along the outside edges of the puddle usually indicates the slag is being trapped along the edges of the weld bead.
After running several beads the length of the plate, look at them carefully and see if there is some improvement over the last practice you did.
Whipping a Bead
As the weld progresses, the temperature of the metal ahead of the arc as well as behind rises. This causes the metal to melt faster and tends to increase the size of the weld puddle. Whipping is a manipulative technique used by the experienced welder to help control the rate at which heat and filler metal are added to the weld puddle and provides the means by which he can control puddle size. This control is particularly needed when the pieces being welded don’t fit tight and a large opening has to be filled. It’s also good to know when welds are made vertical and overhead.
The whipping motion should be performed as follows. After the arc is struck, hold the electrode still for a second; then move the arc forward about 1/4 in. and lengthen the arc to about 1/4 in. As the puddle is about to freeze, move the electrode back into the puddle to a spot about half way between the center of the puddle and the leading edge and repeat the sequence. Varying the return position will increase or decrease bead size and welding speed.
The whipping motion is produced by slightly pivoting the wrist—NOT MOVING THE ARM. The pivotal action of the wrist movement moves the electrode for ward and up simultaneously and automatically.
Repeat the previous exercise of running beads, but this time replace the steady movement across the plate with a whipping movement. Timing is important. Watch the puddle and learn to return just as the puddle is about to freeze. Returning too soon will cause the crater size to increase. Returning too late will tend to produce slag traps and poor fusion between successive layers and weld metal. Don’t let your forward motion become too long. The wrist motion rather than arm movement will help control this. If the puddle does not freeze fast enough during your forward motion, lower the welding current slightly.
After you have run several beads, clean and inspect them. Your progress and ability will be demonstrated by the bead appearance. The skilled welder using a whipping technique can deposit a straight bead that's the same size from beginning to end and has a rippled surface with the ripples evenly spaced. Beads made with the whipping and steady movement techniques are shown in ill. 19.
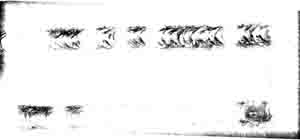
ill. 19—The whip bead (above) has a pronounced rippled appearance as compared
to the bead made with a steady forward movement (below).
Weaving a Bead
Now start a new exercise, proceeding as follows:
(1) Draw a straight line from the left side of the plate to the right side of the plate with a piece of soap stone. You will need this line as a guide line in this exercise.
(2) Strike an arc at the left end of the line and bold it long enough to get the arc well established.
(3) When the arc is steady, begin to weave from one side of the line to the other. Move the arc about
in. past the line on each side and each time you weave, move the electrode forward slightly — about 1/19 to 1/8 in.— with each weave.
Make four or five of these beads the length of the plate. (See the comparison of “stringer” and weave beads in ill. 20.)
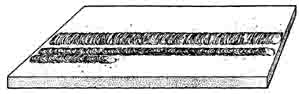
ill. 20—Make the weave bead (top) at least twice as wide as the stringer
bead (front).
Observe
Clean off the flux and look at the beads you have just made. They will be half an inch or so wide, but other wise they will be about the same as the beads you made in the previous exercise. They may be a little rough and uneven, but practice will overcome that problem.
The Other Side
Now turn the plate over to the other side. Brush off all the scale and dirt so you have a clean surface. Use a metal punch and make a series of punch mark lines 3/4 in. apart from one end of the plate to the other. These will be your new guide lines. You will weld between them.
Fill the plate with beads using the weaving or zigzag forward motion described. This time, weave from one line to the other, just barely touching each line on the side-to-side motion, and moving forward slightly (1/16 to 1/8 in.) with each weave. Make the weld deposit as smooth and straight as possible.
Prev: Running a Bead
Next: Oxy-Acetylene Cutting