Gable vents need a slight breeze to work well. A roof vent works even in calm weather, because it takes advantage of hot air’s tendency to rise. Only a ridge vent or cupola vent, installed at the peak of a roof, is more efficient.
The top of a roof vent may be either round or square, but it generally covers a circular hole that provides an escape hatch for the air. A screen bars insects, and the vent top and a raised rim around the vent hole keep rain or snow from falling through into the attic. The assembly is mounted on a square metal sheet, caulked at its edges to seal the base of the hole against wind and water.
For any but the smallest attic, you will need at least two roof vents to provide the minimum venting area. Before cutting the vent holes through the wooden roof sheathing, you must cut away some of the shingles and roofing felt with a knife and , when the installation is complete, repair the shingles by the methods shown on here.
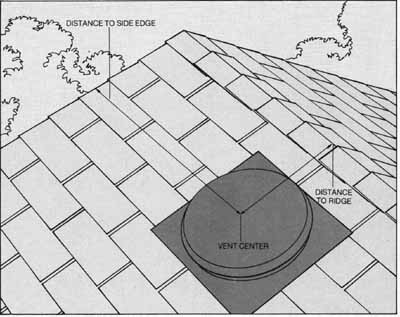
1. Rough-positioning the vent. Set the vent assembly on the roof at the back of the house, far enough below the roof ridge to hide the vent top from a helper on the ground in front of the house. Then slide the vent horizontally along the roof to the position you want. If you are installing more than one, be sure that they will be evenly spaced. After finding a tentative position for the vent, measure the distances from the center of the vent assembly to the ridge and the nearest roof edge. Subtract the distance of any overhang from the latter measurement.
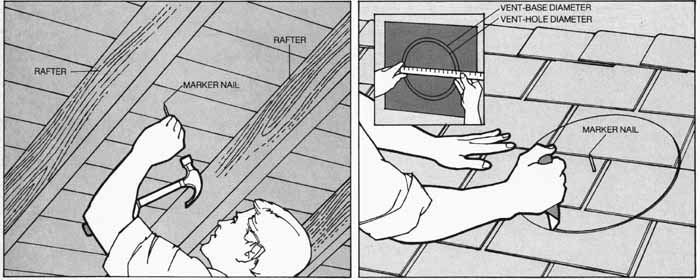
2. Fixing the final position. Inside the attic, use the measurements from Step 1 to locate the tentative position you have chosen for the vent. In its final position, the vent hole must be centered exactly between two rafters. Find the center point closest to the tentative position and drive a nail through the roof to mark it. The procedure should change the vent position that was selected in Step 1 by only a few inches.
3. Clearing the vent area. Locate the marker nail on the outside of the roof. Measure the diameter of the base of the vent housing and , using the marker nail as a center point, scribe a circle of this diameter into the shingles. Remove the shingles, roofing felt and nails within the circle.
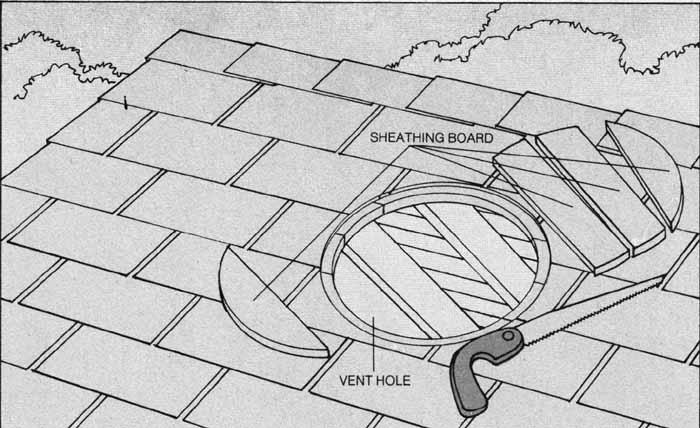
4. Cutting the vent hole. Measure the inside diameter of the vent hole and scribe a circle of this diameter within the area cleared in Step 3. Cutaway the sheathing boards inside the circle with a saber or keyhole saw. The hole should have a slightly larger circle of cleared sheathing around it.
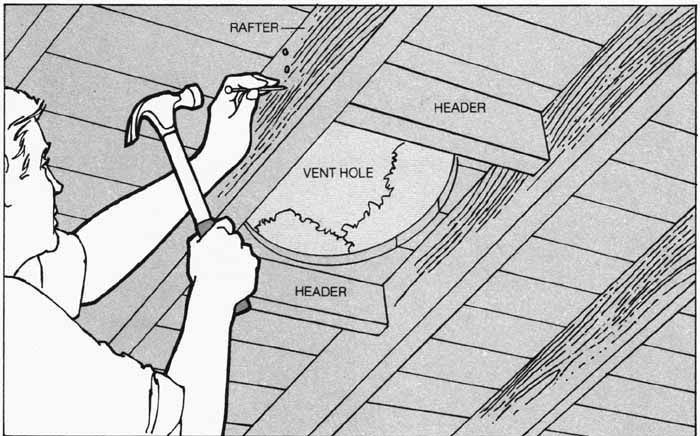
5. Putting in headers. Cut two headers from 2-by-4 lumber long enough to fit between the rafters to the left and right of the vent hole. Fasten the headers above and below the hole by nailing through the rafters into the ends of the headers.
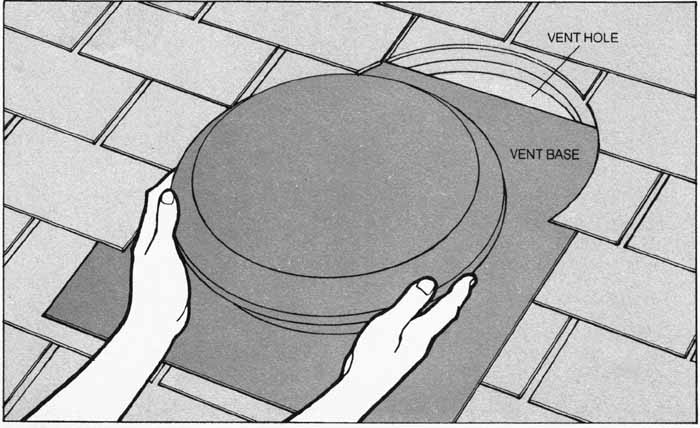
6. Installing the vent assembly. Apply caulking to the underside of the vent base, then slide it up under the loosened shingles around the vent hole and into position over the hole; if the nails holding the surrounding shingles interfere, remove them. Have a helper in the attic check to be sure that the inside of the vent is centered over the vent hole in the roof. Fasten the base to the roof with 1½-inch roofing nails driven through the mounting holes. Apply additional caulking at the exposed bottom edge of the base and repair the loose shingles around the vent by the methods shown here.