Insulating Basement Walls
You can use either method shown to effectively insulate basement walls. Each includes a rigid foam moisture barrier between the framing and the basement wall. The foam eliminates condensation from interior humidity and helps protect walls from minor exterior moisture. Tack the foam to the concrete with construction adhesive while you frame. Don’t install a vapor barrier between the insulation and drywall for either method.
Building codes in some colder regions require basements be insulated at least 2 ft. (60 cm) below grade and /or to R-12 or greater.
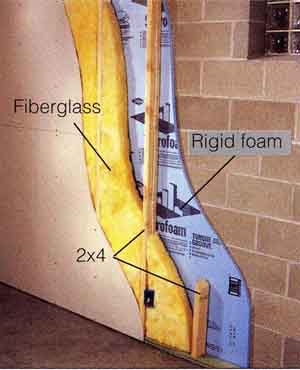
Fiberglass and foam. In a 2x4 framed wall, use a combination of rigid foam and unfaced fiberglass (R-11 or R-13). This method makes plumbing and electrical work easier but the wall is thicker and consumes more floor space.
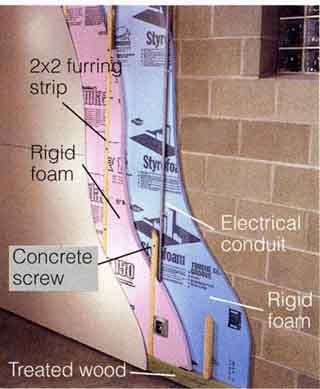 Foam and foam. If you have a plumb, flat foundation wall and want to save floor space, frame with 2x2 furring strips and insulate
with rigid foam on the concrete and another layer of rigid foam fitted between
the strips.
Foam and foam. If you have a plumb, flat foundation wall and want to save floor space, frame with 2x2 furring strips and insulate
with rigid foam on the concrete and another layer of rigid foam fitted between
the strips. Using Steel Studs
Steel framing is easy to work with in confined basement spaces, where you assemble it one piece at a time, like a giant Erector set. Even better, it’s termite-proof and doesn’t soak up water the way wood framing does. The steel framing used here is 25-gauge non-load-bearing track and studs that measure 1-5/8 x 1-1/4 in. The insulation used with steel framing is a semi-rigid spun-mineral fiber with R-5.4 that fits snugly in the cup of one stud and against the back of another.

1. Fasten track to floor with masonry screws. Snap chalk line on joists and floor to keep wall straight and plumb. Keep framed wall 3/4 in. (19 mm) away from masonry wall at closest point. Overlap track and fasten to floor through overlap.
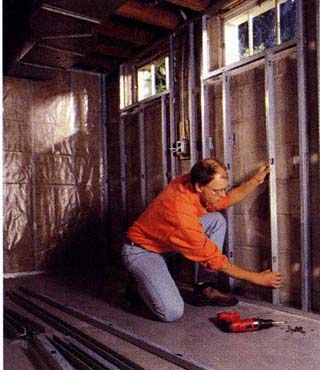
2. Install studs on 16-in, centers and insert them into the tracks with a twisting motion. Fasten studs to track with sheet- metal pan head screws. Holes in studs are for running electrical conduit, not for plastic-sheathed electrical cable.
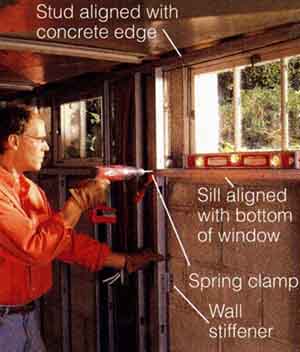
3. Attach windowsill level with bottom of window frame. Align window studs with edge of concrete. Use spring clamps to hold sill while fastening. Install wall stiffeners at midpoint of wall. Fabricate stiffeners from short pieces of track.
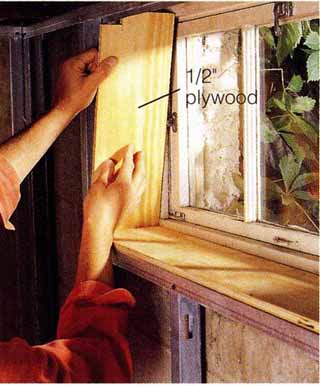
4. Install plywood window surrounds. Fasten them to framing with drywall screws and to concrete with masonry screws. In some cases you can build surround box first, then slide it into place. Finish plywood with drywall.
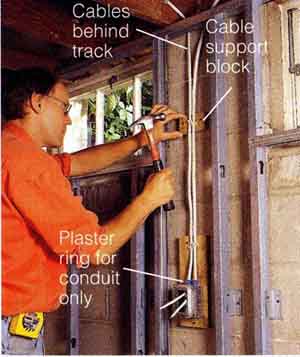
5. Run plastic- sheathed electrical cable behind metal framing. Fasten ply wood blocks to concrete with masonry screws to support cable and electrical boxes. Use different sizes of plaster rings to compensate for variations in wall depth.