Ortho Home Improvement books
Turning dreams and ideas into working remodeling plans and trading your wish list for a shopping list of materials and fixtures is the final act of designing your new kitchen. In this section, you finalize your kitchen plan-tailoring all the previous information to your needs. Finally, take a look at some ideas to inspire your personal style, finishing touches that make the new kitchen truly yours.
----- The original floor plan for this kitchen appears here. On the homeowners'
remodeling wish list were increased light, belter traffic flow, updated
appliances, more storage, easier maintenance, and a modern style.
Turn the page for a look at the final floor plan and see how they achieved their goals.
++++++++++++++++
Finalizing THE PLANS
Combine your best preliminary plan from the second chapter with the construction elements, cabinets, fixtures, and appliances you have chosen to produce the final plans.
Drawing the Final Plan
The final plan serves as a visual guide for the actual remodeling work. It shows in accurate detail the shape, size, and position of every element in the kitchen. Measurements for cabinets, fixtures, and appliances are the exact dimensions of the particular models you have chosen, based on the manufacturer’ s installation literature.
Any prescribed clearances, such as those around a refrigerator or a corner cabinet, also appear on the plan. The positions of light fixtures, switches, and receptacles are detailed.
Draw the final plan using the same tools as before, on graph paper or architect's vellum, gridded or plain, in sheets 18 inches by 24 inches.
Use a pencil graded number 3 or harder. If the plan will be sub mitted to the building department-especially if structural changes to the house are involved--you probably need to have it finalized by an architect or professional designer. You can finalize the plan as outlined here and submit a clean, perfect copy for the designer's reference.
Trace the base plan-or the new floor plan, if you changed it-onto the vellum. Do not use a photocopy as the size may not be accurate. Using the preliminary plan as a guide, draw in every structural element of the new kitchen, noting its name and exact dimensions (within its outline, if possible; other wise make a marginal note and direct a line to it).
Indicate door swing by drawing a curved line. Double check that doors can swing un impeded, that appliance doors have room to open fully, that aisles are wide enough, and that corner cabinets won’ t ob struct each other.
On the completed plan, write the legends: " Do not scale drawings. Measurements govern "; and " Verify all dimensions on the site. Notify (yourself or contractor) of any discrepancy." These mean that anyone using the plan must work by the measurements given, not by the way the drawings look, and that if the measurements don’t jibe, some one in charge must be notified before work can proceed.
Drawing Specialty Plans
You may wish to make more detailed drawings of certain elements of (he kitchen design because the changes are complicated or in order to show structural changes to the building department or to a builder. To do this, trace a copy of the final plan, omitting measurements and other notations for clarity.
If ceiling elements are simple, they can be detailed as dotted lines on the floor plan; how ever, if the ceiling will be structurally changed, a specific ceiling plan may be required.
Other common specialty plans include those for electrical, plumbing, ventilation, and cabinets.
Details
Plans of small areas, called de tails, give a close-up view of a single aspect of the overall design. Commonly, details show the pattern on a tile installation or the profile of trim pieces on a cabinet door. These are drawn on a larger scale of your choice, such as 3 inches to 1 foot. By drawing such elements to scale before installation you can see how they'll look, and installers can know exactly what you want them to do.
Sections
A cutaway view of a "slice" of the building showing a complicated construction element is called a section. It shows the builder cross-section details of a wall , for example, to show a wallboard-and-insulation fire barrier, or of the roof structure, if you are vaulting the kitchen ceiling. These section plans may be required by the building department, especially if you are planning exterior changes that affect the foundation of the house.
Elevations
An elevation is a two-dimensional scale drawing of a wall, with all its elements in place. Unlike plan drawings, elevations are fairly representational pictures of the features within the room. You don’t need elevations for every project, but they are instrumental for complicated installations, for planning and ordering cabinets, and for checking the visual relation ships between various features.
Elevations are drawn using the same tools and techniques as for a plan, in the same 1/2-inch scale. To produce an elevation, use the final plan, manufacturers' specifications, and photo graphs and illustrations of individual fixtures.
Do an individual elevation for each wall, as needed. Start by drawing the outline of one wall--it will most likely be a rectangle. Add the architectural details, such as windows and doors. Then plot the outlines of the major cabinets, such as a tall storage unit, sink unit, wall oven unit, and corner units; re member to include the height of the toe kick.
Next, add the appliances, using the manufacturers , specifications. Then draw the counters; be sure to .position them at the height you have chosen, and draw the countertop thick ness and any overhang.
Draw all the walls this way. Draw all sides of any island or peninsula, too. Line up the drawings and check that they form a harmonious whole, with adequate storage, before making the final elevations. At this point, you can also sketch in any molding details and hard ware styles you are considering.
You can try various color schemes with colored pencils on photocopies. On the final elevations, write the name and dimensions of every element.
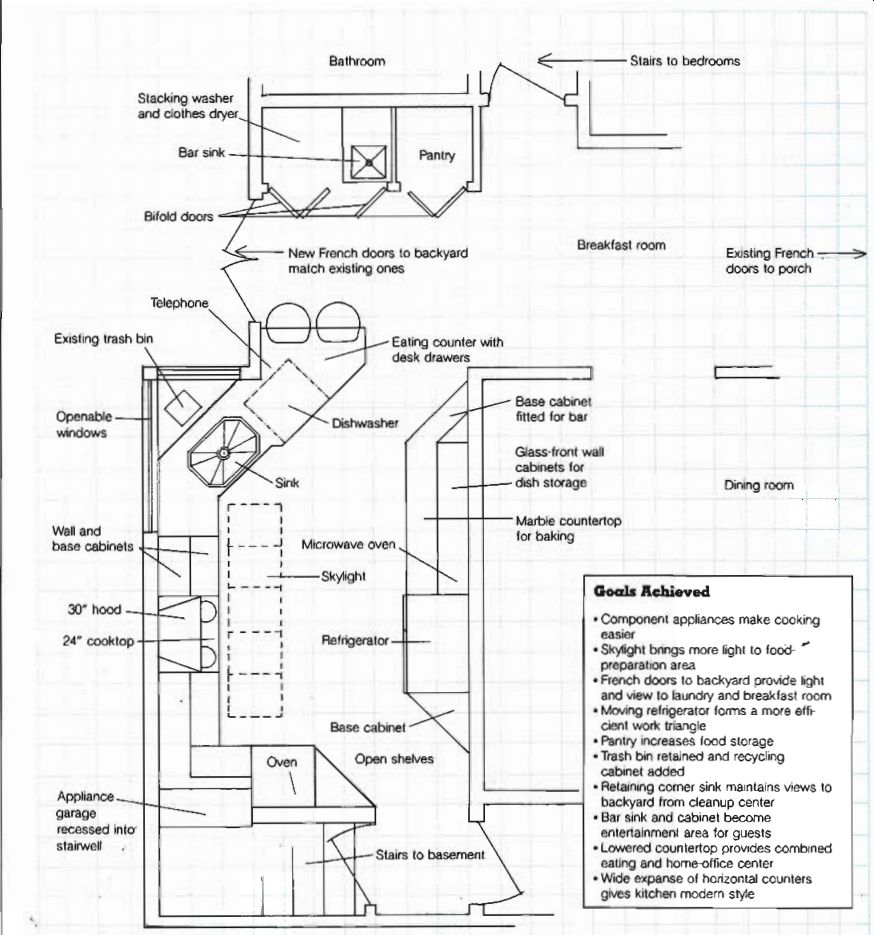
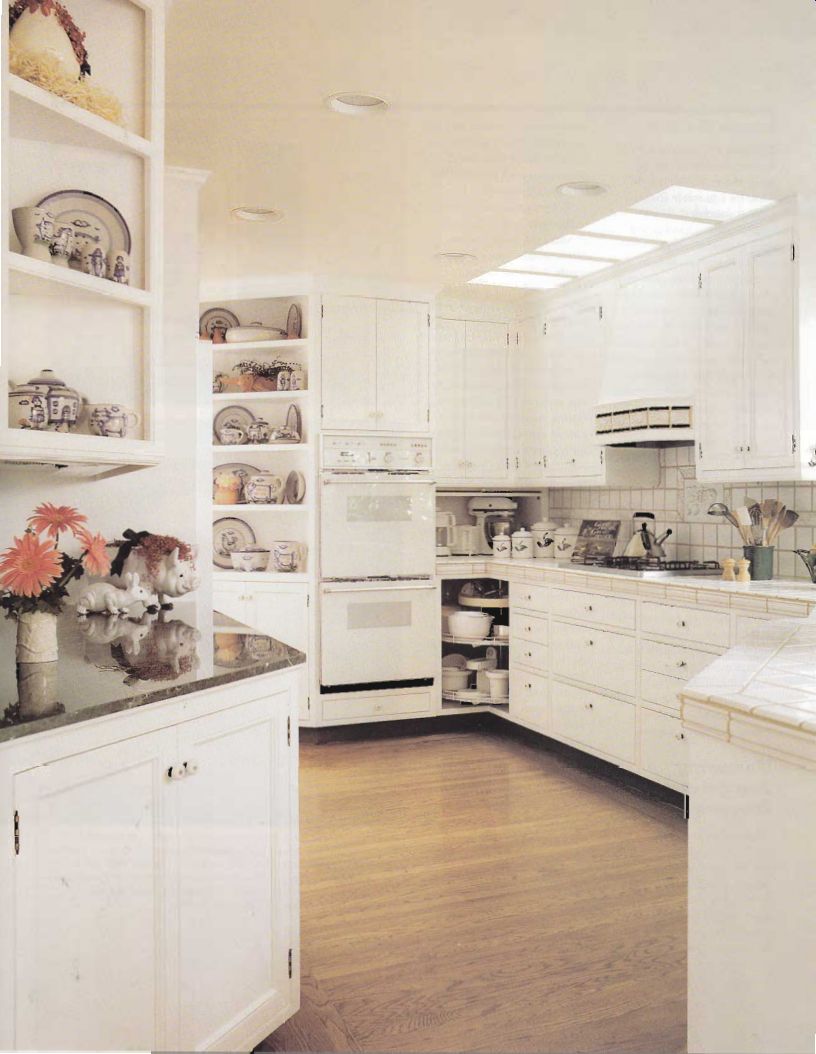
--------------- The Final Plan
Cools Achieved
. Component appliances make cooking easier
. Skylight brings more light to food- " " preparation area
. French doors to backyard provide light and view to laundry and breakfast room
. Moving refrigerator forms a more efficient work triangle
. Pantry increases food storage
. Trash bin retained and recycling cabinet added
. Retaining comer sink maintains views to backyard from cleanup center
. Bar sink and cabinet become entertainment area for guests
. Lowered countertop provides combined eating and home-office center
. Wide expanse of horizontal counters gives kitchen modem style
Your name and telephone number here.
Do not scale drawings. Measurements govern. Verify all dimensions on the site. Notify homeowner of any discrepancy.
------------------
+++++++++++
ADDING FINISHING TOUCHES
Fashion magazines claim it is the accessories that make the outfit. The same can be said of accessorizing the kitchen. Once the floor plan is completed and construction begins, you can return to your wish list and start compiling the finishing touches for the room.
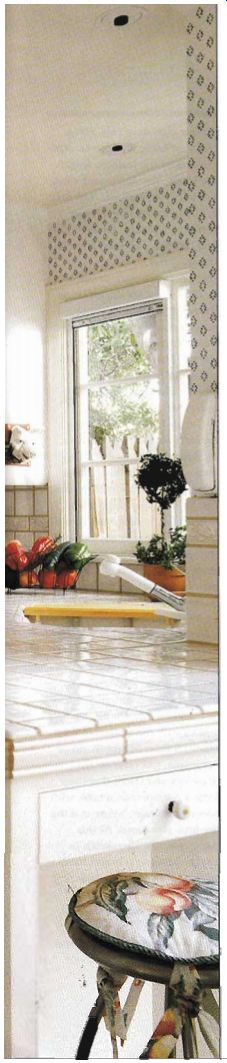
Window Treatments
Install window treatments to harmonize with the look of the house and the window, from both the inside and outside. Also consider the practicalities, such as covering the window against the elements and for privacy.
If the window admits strong sunlight at some part of the day, you will need filtering blinds, either vertical or horizontal, to cut the glare and to protect people and furnishings from ultraviolet rays.
Drapes in eating areas should he lined for extra protection against winter drafts.
Floor-to-ceiling draperies around larger windows in an adjacent family or dining room can be matched with shorter length curtains, tiebacks, or a valance for smaller kitchen windows.
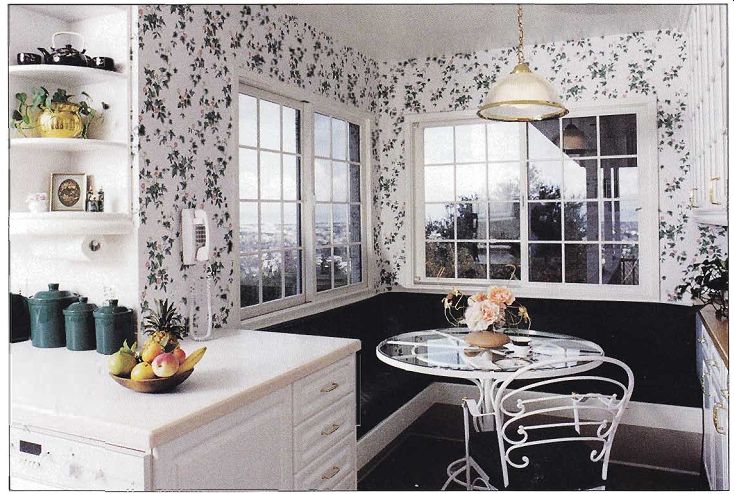
--------- Designers of the most successful kitchens plan finishing
details before any construction begins. Here the while wrought-iron table
and chair fit this breakfast nook perfectly because the built-in seating
was planned to accommodate the furniture.
Modes for hanging window treatments depend on the kitchen look. A plain rod, painted or stained and set on brackets, could support simple drape panels hung by tags or loops in a country kitchen. A classic kitchen might have a shirred valance over curtains pulled back with brass rosettes.
A fold-down canvas panel or a brightly colored Roman shade mounted on dowels will smartly accent a black-and white Eurotech kitchen.
Use window treatments to enhance a view. Where there is a fine view to be framed, plan drapes that pull back completely. If the window does not need to be covered, use a contrasting trim treatment to frame the view from a picture window the same way you use a mat when framing a picture.
To block an unsightly view from the bottom of a window, use an upside-down window shade mounted on nautical hardware. To completely hide an unwanted view, hang a piece of stained glass that complements the kitchen colors, or find a stained-glass window to mount in the window frame.
Furniture
The tables, chairs, stools, buffets, serving tables, and fire place settees in the kitchen must all harmonize with the design concept. A simple way to coordinate the room is to match wood furniture to the cabinets. Some manufacturers offer furniture pieces lo match their cabinet lines; others will finish your own raw furniture if you are willing to pay the two-way freight to their factory on top of the finishing costs.
You can, of course, paint or stain furniture to match the cabinets yourself.
Tie together various kitchen elements by using matching fabrics. If you sew, use the same fabric on window treatments and chair seat covers.
Some wallcovering manufacturers produce matching or co ordinating fabrics for curtains, shelf lining, and seat covers.
Art
Whether your tastes run to for mal or fun, the same rules of scale, shape, pattern, texture, line, and color that apply to the room as a whole also apply to displays within it. Your choice of exhibits and art is obviously a matter of personal taste, but whatever you decide to display in your new kitchen should work with the style and theme.
A collection or artwork might trigger or even establish the kitchen theme; the color in a piece of art might be the jumping-off place for the entire color scheme. If your art deco jukebox, life-sized sculpture, or neon sign requires power or plumbing, be sure to keep it in mind as you determine the floor plan.
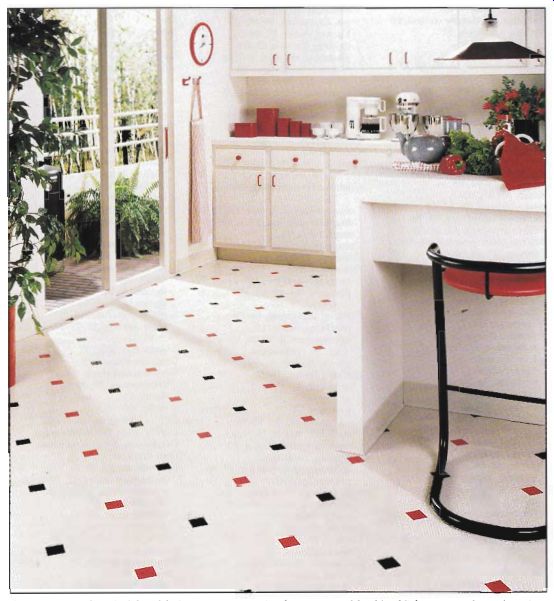
------- Continue lo use the principles of design as you accessorize
the new room. Matching kitchen accessories to the red diamond in the resilient
tile floor uses the principle of color to coordinate the elements. Imagine
how different this room would look if black was used as the accent color
or if all the accessories were white.
Accessories
Even if your accessories aren’t one of a kind, they should cohere with the look of the kitchen. For a formal, sym metrically balanced window wall, for example, evenly place same-sized potted plants on a shelf. For an asymmetrical room, use a row of candlesticks arranged from tallest to shortest. Repeat curvilinear lines with a round clock or mirror. Pick up the color of countertops in the mats of framed prints. Make a photo gallery in an alcove with frames stained to match the wood cabinets or painted to match the brightly colored drawer and cabinet pulls.
Remember linens, too, from placemats o pot holders, which need to be coordinated to the design concept. Notify friends and family of your color scheme so they can be sure to give you the right new accessories when you invite them to the warming celebration of your remodeled kitchen.
================