About 65 percent of a home’s heat loss occurs through the attic. Insulating and sealing up that, along with caulking around windows and doors, costs far less, saves far more, and is much easier than insulating the walls.
Serious DlYers can buy insulation and rent the blowing machine, but you need special tools and know-how to do the job right—and for a task you’ll most likely under take once in a lifetime, it may not be worth the hassle. Pros can often finish the job in a day. Some larger companies also provide before-and-after infrared pictures of your walls to show they did a complete job.
Do it Yourself -- Save energy, save money and feel more comfortable.
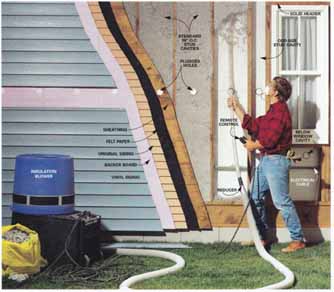
Installing blown-in insulation creates a huge mess, so most pros prefer to work from the outside. The procedure is to drill 2-1/2-in, holes in each stud cavity, fill the cavity with insulation, then plug the holes with tapered plugs. If the house has its original lap siding or has been re-sided, pros will remove rows of siding, do the work, then rein stall the siding. Some contractors (as in our example) remove a single strip of siding in the middle of each wall, blow the top half of the cavity first (the cellulose will stay put), then blow the bottom half. Others bore holes at the top or both midway and top, then blow insulation down through the holes. Odd-size cavities and spaces below windows should also be insulated, though sometimes it’s not cost effective to insulate every little nook and cranny.
Houses with brick exteriors must be insulated from the inside. Stucco homes can be insulated from the outside, but the dozens of plug holes can be an eyesore if the patches don’t match perfectly. This is a challenge even for stucco experts. Working from the inside makes sense if the house is vacant or if remodeling is under way and the insulating holes will be painted, wallpapered, dry-walled or paneled over.
Cellulose insulation is a popular choice because it’s inexpensive, easy to blow, minimally irritating and good for packing around ducts, electrical boxes and wires. Fiberglass, mineral wool and foam insulation are also available.
Is it worth it? Many contractors charge $1 or more per sq. ft. of wall. The $1,500 job that saves $250 yearly on heating and cooling bills has a six-year payback. But there are other payoffs: Your house will be less drafty, the walls will feel warmer, your furnace and air conditioner won’t work as hard, and you’ll conserve natural resources.
fh-p49.jpg Our advice? Get an energy audit that breaks out how much money each energy improvement will cost you—and save you—then make your decision. Also check with your utility company to see if it offers any special financing or testing programs. (ALWAYS check your combustion appliances, especially the water heater and furnace, for backdrafting after making any energy improvement.
Insulation frustration: Don’t Try this at Home!
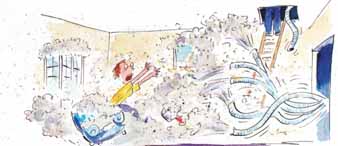
My wife and I rented an insulation blower to add insulation
in our attic. When I got the unit home, I noticed it had remnants of
tape on the hose connection. I checked it out, and it seemed to work
fine. With my wife feeding bags into the hopper and me up in the attic
with the hose, we proceeded to get the nasty job done. Working, my way
around the attic, I noticed that the hose seemed to be caught, so I gave
it a tug. Then nothing was coming out, and finally I heard the machine
stop. I squeezed back downstairs to discover the downstairs covered in
insulation. After a whole day of cleaning, I figured out what all the
tape was for!
Next: The best way to insulate a foundation wall
Prev: Batt insulation basics