Soft tiles include vinyl, cork, and carpet tiles. Some are self-adhesive, others require a separate adhesive. Carpet tiles are laid dry (without adhesive). The sequence shown here relates to self-adhesive tiles. Your starting position will be the same whichever kind of tile is used. If you are laying tiles on a hardboard subfloor, there will be no need to prime the surface. For plywood or self-leveled subfloors, seal the surface or use a primer recommended by the tile manufacturer.
Tools, Materials and Supplies: Basic Tool Kit, and see this page.
1. GETTING STARTED
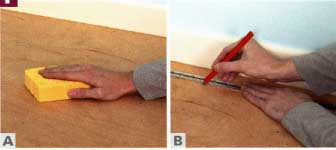
A. Laying self-adhesive tiles is straightforward. Start by thoroughly cleaning the floor: even the smallest particle may show through the tiles.
B. Draw pencil guide lines along the floor to indicate your chosen starting point.
2. PLACING THE FIRST TILE
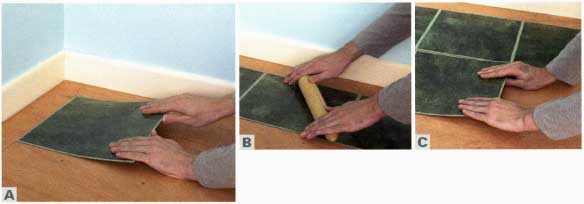
A. Remove the paper backing and position the first tile. Make sure that its edges align precisely with the guide lines. Press down firmly, and apply even pressure. Make sure the first tile is fixed securely before moving on. This will act as a fixed point that will anchor the positions for all the tiles that follow.
B. Build up the first row of tiles, butting their edges tightly together. A household rolling pin will help you to apply pressure evenly.
C. As you progress, make sure the tiles sit flat on the floor surface. A tile that's slightly out of position can throw out the whole design.
3. MEASURING SECTIONS TO CUT

A. Mark off cuts in position, for the most accurate fit. On the last full row near the gap to a wall, lay a dry tile (tile 2) over a fixed one (tile 1).
B. Place another dry tile (tile 3) over the first, and slide it across so that it fills the gap. Where the edge of tile 3 overlaps tile 2, draw a line.
C. Remove the dry tiles, and cut along the guide line on tile 2, using a craft knife and a straight edge such as a metal rule.
D. Check that the cut section of tile fills the gap, before removing the paper backing and sticking the tile in place.
4. CREATING AN L-SHAPED TILE FOR A CORNER

A. Place two dry tiles on top of the closest fixed tile. Slide tile 2 across to one side of the corner. Mark the edge of tile 2 on tile 1 beneath.
B. Move tile 1, with its guide line, to the other side of the corner. Do not rotate it. Place it on the relevant fixed tile. Repeat the marking-off process.
C. Place tile 1 on a cutting board, and cut along the lines to remove the unwanted section of tile.
D. Check that the L-shaped section fits before removing the backing and putting it down in place.
5. CUTTING CURVES (OR IRREGULAR CORNERS)

A. For curves or non-square corners, use a paper template to make a precise guide line. First, cut a piece of paper to the size of your tile.
B. Cut a number of slits into the paper, slightly longer than the portion of tile to be removed.
C. Place the paper tile in position, with its slits against the curve (here, a sink pedestal). Crease the slits against the curve, and draw a pencil line across.
D. Remove the paper tile, and cut along the line. Place the template on a new self-adhesive tile, and draw around the guide line.
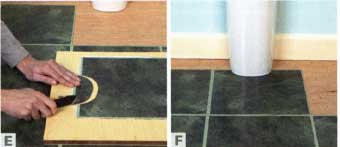
E. Using a utility knife, cut the tile along the guide line, and remove the unwanted section.
F. Check that the tile fits snugly around the curve. Remove the backing and stick the cut tile in position.
6. CUTTING IRREGULAR SHAPES
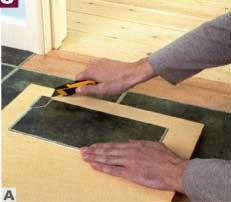
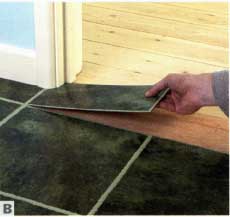
A. For irregular shapes, a profile gauge gives the best guideline. If possible, place its corner where the tile’s corner will go. Push the gauge into the irregular edge and butt it up. Position the gauge on a tile, lining up the corners for an accurate fit. Trace around the irregular shape. Cut along the guide line using a craft knife and remove the unwanted section.
B. Check that the tile fits, and then remove the backing to stick the tile in place.
Laying Carpet Tiles
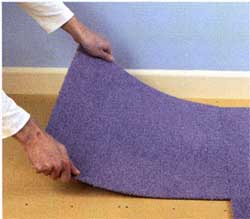
Some carpet tiles are laid dry, and can be regularly moved to even out wear. Planning and cutting is the same as for other soft tiles.
Laying Soft Tiles That Require Adhesive
For soft tiles designed to be laid using adhesive, the principles shown above and here for planning the layout and for cutting sections of tile are exactly the same. The adhesive may be applied to the back of each tile, or to the floor. If you apply adhesive to the tile, do it carefully so that it does not spill over to the front of the tile surface.
The soft tile being applied to the right is cork. Before being laid, natural tiles such as cork should be left for 48 hours in the room where they will be laid, so that they acclimatize before being positioned. Once the floor has been completed, some cork-based tiles will require a sealant to be coated over the surface (the packaging will specify), as shown in image.
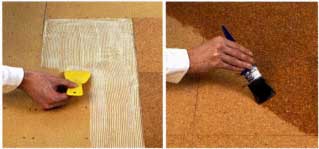
Above: ADHESIVE BEING APPLIED TO THE FLOOR FOR CORK TILES (left); SEALANT BEING APPLIED TO LAID CORK TILES .