From Seed to Harvest: A Grower’s Guide to Garden Favorites
Home gardeners today can choose from a greater selection of vegetables than ever before. A typical seed catalog offers more than 30 varieties of tomatoes, ranging from the tiny cocktail type to 1-pound giants, from genetically engineered hybrids to old favorites like Ponderosa and Rutgers. With so many special varieties available, you can grow virtually any vegetable you want no matter what the soil type, how long the growing season, or how arid or humid the climate.
The guide that follows provides the basic information needed to select, grow, and harvest all the standard vegetables. Suggestions are given on how many to plant.
They are based on Department of Agriculture recommendations and do not take account of personal tastes. When a vegetable is suitable for canning or other home preserving, an extra quantity has been allowed.
In addition to the detailed information given for each vegetable, there are a few general pointers to follow if you want a bountiful harvest. One of the most important is to leave ample space between plants. A vegetable needs enough room so it can get its share of sunlight, water, and nutrients: it is better to raise two good heads of lettuce than three runty, undernourished ones.
Another point to bear in mind is that many pests and diseases attack all members of a plant family-not just one particular species. For this reason, you should not plant members of the same family in the same spot in the garden two years in a row. The three major groups of related vegetables are: (1) tomatoes, peppers, and eggplant; (2) cabbage, broccoli, cauliflower, radishes, turnips, rutabagas, kohlrabi, and mustard; and (3) melons, cucumbers, gourds, and summer and winter squash.
Also note the following when using the guide:
Days to harvest refers to the length of time between when a plant is set out in the garden and when it is ready to harvest. It does not include the number of days a plant grows indoors after being started from seed.
Planting depth is an approximate guide. If in doubt, it is best to err on the shallow side. A handy rule is to plant the seed three times as deep as its size.
Planting in hills, in modern parlance, means planting seeds in small, compact groups. Years ago, a hill was literally that-a low mound of enriched soil.
Asparagus. A hardy perennial that yields edible spears (young shoots) in spring and early summer. A well managed asparagus bed will be productive for 20-25 years. Since asparagus needs a period of cold for dormancy and resting, it does poorly in areas that are warm the year round. Asparagus can be started from seed, but the usual practice is to set out year-old roots in early spring or late fall. Start about 10 to 15 plants for each member of your family. The roots are planted in trenches 4-5 ft. apart.
Dig the trenches 18 in. wide and 12 in. deep. Loosen the soil at the bottom and mix well with manure, compost, or fertilizer, then cover the bottom of the trench with 4-6 in. of good soil and rake level. Set the asparagus roots on this soil 18 in. apart. Cover them with soil up to the top of the trench; if there is any extra soil it may be mounded over the top. An older technique is to barely cover the roots and fill in the trench gradually as the shoots grow. Mulch is recommended for keeping the asparagus bed free of weeds because the roots are shallow, and deep cultivation can injure the roots. Do not harvest the first spring. The next year, harvest lightly (for about two weeks). Thereafter, you may harvest freely until the spears become spindly, a sign that the roots are becoming exhausted. The harvesting season lasts six to eight weeks. Spears are ready to pick when they are tight, smooth, and about 6-8 in. tall. When they start to open up they are too old. Harvest by cutting or breaking the spears at ground level. Any surplus can be frozen or canned for an out-of-season treat.
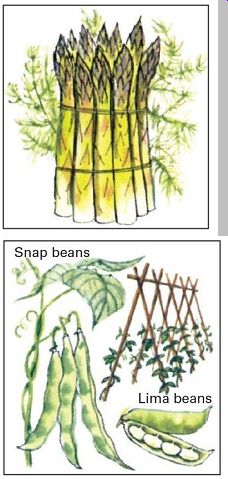
------------ Beans. A warm-weather crop of tropical origin. Lima beans
and snap (string) beans are the most popular types in American gardens. Each
is available in pole varieties (requiring support) or in low-growing bush varieties.
Limas are especially sensitive to cold and need a longer, warmer growing season
than snap beans. Lima beans should be planted when all risk of frost is past.
(some gardeners get a jump on the season by starting limas indoors two to three
weeks before the last frost date.) For bush limas, plant seeds 1 in. deep and
2 in. apart in rows 2 ft. apart. Thin later to 8 in. between plants. For pole
varieties set poles 3 ft. apart in rows 4 ft. apart. Plant about six seeds
per pole and thin to three or four seedlings. About 5-6 ft. of bush limas (or
2-4 ft. of pole limas) per person is ample. Supply plenty of water in hot weather.
Harvest when seeds begin to plump out the pods. Pick frequently to keep plants
productive. Days to harvest: 70-90. For use as dried beans let limas mature
and dry on the plants. Lima beans are also excellent for freezing and canning.
Snap beans are a high-yielding crop that is excellent for freezing and canning.
Sow when soil is warm, after last frost date. Some gardeners gamble by planting
an early batch about a week before the last expected frost. Plant bush varieties
1/2-1 in. deep, 2 in. apart, and thin to 4 in. apart. For pole varieties set
poles 3 ft. apart in rows 3-4 ft. apart Plant six seeds per pole and thin later
to the four strongest seedlings. You will need 5-6 ft. of bush beans or 3-6
ft. of pole beans per person. Harvest when beans are young and tender (3-4
in. long). For continuous yield plant a short row every week or 10 days, or
select a variety that keeps bearing till frost. Wax beans, which are yellow
instead of green, are a kind of snap bean and need the same culture. Days to
harvest: 50-60 for bush varieties, 60-65 for pole varieties.
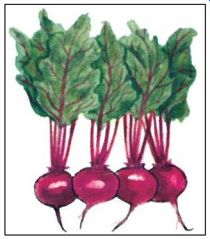
Beets. An easy-to-grow, dual purpose crop: both roots and greens (leaves)
can be eaten. Beets are quite frost hardy and can be planted in spring as soon
as the soil is ready to work. They do well in most types of soil except those
that are highly acid. Plant 1/2 in. deep, 1 in. apart in rows 18 in. apart.
Allow 3-5 ft. of row per person for the average family. Thin to 2-3 in. apart.
For a fall crop, plant in late June or early July. Harvest when roots are 1-3
in. in diameter (pull up one or two to check). Beets that grow larger become
tough and woody. Days to harvest: 50-70.
The vitamin-rich greens may be cooked and eaten like spinach. In the warmer parts of the nation beets are often sown in early fall for a winter crop.
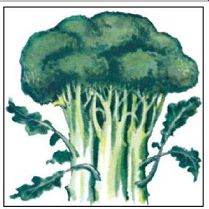
---------- Broccoli. A member of the cabbage group raised for its flower
buds, which are eaten before they open. (Broccoli is not edible after it goes
to seed.) Broccoli prefers cool weather and can stand light frost. It will
not bear in hot weather. In very mild areas it can be grown in winter. Start
broccoli indoors about six weeks before the average date of the last spring
frost; set out in garden two weeks before the last expected frost date. Allow
three to five plants per person. Space plants 15-18 in. apart in rows 2 1/2-3
ft. apart. Harvest while flower buds are tight and heads compact. Cut off about
6 in. below the head so as not to waste the tender, edible upper stem. After
the center heads (the first to develop) are cut, side shoots will develop additional
heads. One plant yields six to eight cuttings over a period of 8-10 weeks.
Days to harvest: 55-60, 75 for fall crops. For a fall harvest sow directly
in the garden around midsummer. Broccoli retains its flavor and texture well
when frozen, and it is an excellent source of vitamins A and C.
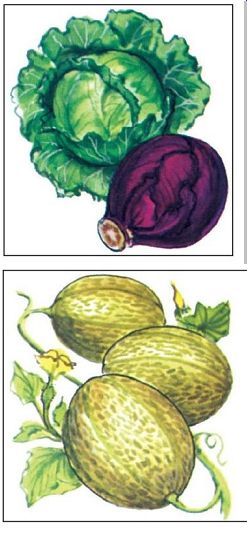
---------- Cabbage. A cool-weather crop that can be raised for spring or
fall harvest. Cabbage is a good source of vitamin C and keeps well in winter.
Types include the familiar green cabbage, the mild-flavored, crinkly-leafed
savoy, and the colorful red cabbage. A heavy feeder, cabbage needs a rich,
nearly neutral soil that contains plenty of organic matter.
For spring cabbage start seeds indoors about six to eight weeks before the last expected frost. Transplant to the garden after danger of frost is past-cabbage seedlings exposed to frost or cold grow slowly and tend to be fibrous and tough. Allow two to three plants per person for the average family. Plants should be spaced 12-18 in. apart in rows 2-3 ft. apart. For fall crops start seeds indoors in May and set out after midsummer, or sow directly in the garden June to August-the milder the winter, the later you should sow. For direct sowing plant seeds in groups of three or four, 1/2 in. deep at 1-ft. intervals in the rows; thin later to the one strongest seedling. Cabbage thrives with an insulating mulch of hay or straw to keep the soil cool.
Harvest cabbage when the heads are tight and full. Days to harvest: 50-90. Fall cabbage develops larger heads and- many people think-better flavor than spring cabbage.
Several soil-borne diseases attack cabbage and its close relatives, such as broccoli, cauliflower, and turnips. To avoid infection, do not plant any member of the cabbage family in soil where any of them has been grown in the last two years.
------------- Cantaloupe. An orange-fleshed melon with a netted exterior. Cantaloupe (a kind of muskmelon) needs a long, warm growing season and full exposure to the sun. Early maturing dwarf varieties are recommended for northern gardens. Since cold is bad for melons (cool temperatures and rain lower the quantity of sugar), they should not be planted until dependably warm weather, several weeks after the last frost. Like other melons, cantaloupes do best in sandy soil with plenty of manure and compost mixed in.
To plant in rows, sow seeds 1/2 in. deep, 4-6 in. apart in rows 5 ft. apart and thin to 18-24 in. apart. Alternatively, plant three to a hill, with the hills 5 ft. apart each way. Figure on about four fruits per plant. In colder regions start the melons indoors three to four weeks ahead of planting time.
Melons need ample water while the fruits are growing, but during the final ripening stage limiting the water is said to increase their sweetness. Cantaloupes are ready to pick when the fruit separates from the stem with a slight pull.
Days to harvest: 60-90. If any fruits form after midsummer, pick them off the vine; they will not ripen and will take food from the others.
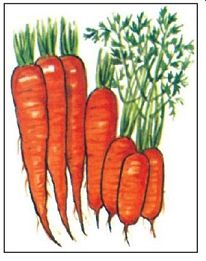
----------- Carrots. One of the old standbys, high in vitamin A and with
many culinary uses. Carrots are a hardy vegetable that can be planted in spring
as soon as the soil can be worked.
Since the seeds are slow to germinate, it is helpful to plant radish seeds along with them to mark the row. The radishes will be ready to harvest about the time the carrots start coming up. Carrots do best in rich, deep, sandy loam but will grow well in almost any soil that has been properly prepared. Dig up the soil to a depth of at least 1 ft., loosen it, and remove stones and other debris. This will allow the downward-growing carrot roots to develop properly. Heavy clay soils often cause carrots to fork. Lighten such soils by working in a goodly proportion of sand or humus. Sow carrot seeds 1/4-1/2 in. deep, 15 to 20 seeds to the inch in rows 16-24 in. apart. Allow 4-5 ft. of row per person. Thin the seedlings to 2 in. apart when they are 2-4 in. high or when the roots are about as thick as your little finger (pull up a few carrots to check root size). The tender baby carrots that have been thinned out make delicious eating. The remaining carrots may be harvested at any time, depending on how large you want them. Keep the soil moist until the seedlings have come up. For a fall crop sow in the garden in early July. Carrots keep well in the refrigerator or in winter storage.
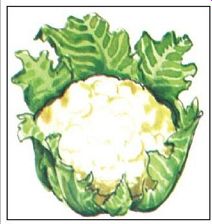
------------- Cauliflower. A "luxury" member of the cabbage group
that is difficult for beginners to grow successfully. Cauliflower needs rich
soil and constant moisture for best development. It is sensitive to heat, requiring
a long, cool growing season to produce good heads. Cauliflower does best as
a fall crop in most areas. For a fall crop, seeds may be sown directly in the
garden in June or July, 8-10 weeks before the first expected autumn frost date
for your locality.
Plant seeds three or four together, 1/2 in. deep and 18-24 in. apart and thin to the strongest single seedling.
For a spring crop start indoors in February or March and set out a week before the last average frost date. Plants should be no older than six weeks when set out. Set seedlings 18 in. apart in rows 30 in. apart. Allow two to three plants per person. When heads are about 3 in. across, they should be blanched-that is, the leaves should be tied over them (this will produce white heads). Harvest while heads are compact and fairly smooth (two to four weeks after tying up, depending on the weather). Days to harvest: 50-95, depending on variety. In addition to the standard white cauliflower, seed houses offer a purple headed variety that turns green when cooked.
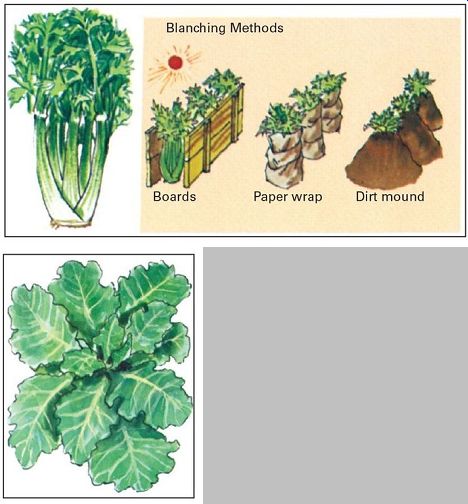
---------Celery. One of the trickier plants for the home gardener to raise. Celery
is very sensitive to both cold and heat and requires a growing season of four
months. Consequently, it must be started indoors in March or April and set
out in the garden between June 15 and July 15. Plants should be 6 in. apart
in rows 18-24 in. apart. Celery needs a constantly moist soil very rich in
organic matter; muck soils are the best. For maximum growth celery should be
fertilized every two weeks. Celery stalks are naturally green but can be blanched
(whitened) by various means. You can hill up dirt around the plants, place
boards along the sides of the rows, or cover the plants with drain tiles, paper,
or mulch.
Blanching is not recommended for the home garden because of the extra space required and the danger of rot.
Days to harvest: 115-135. Note: Celery may be harvested before fully mature. While celery is primarily raised for its crunchy stalks, the nutty root, or "heart," is a delicacy. The leaves are used for flavoring soups and stews.
------------- Collards. A loose-leafed relative of the cabbage. A traditional southern favorite, collards thrive in almost every section of the country. They are an excellent source of vitamin A. Collards tolerate cold as low as 15°F, and frost actually improves their flavor. They also tolerate hot summers better than cabbage and will grow in relatively poor soil. In areas with short, cool summers sow collards in late spring. Elsewhere, sow them in midsummer for a fall crop. Plant seeds1/2 in. deep and 1 in. apart in rows 24-30 in. apart. Allow 5-10 ft. of row per person. Thin so plants are 18-24 in. apart along the rows; the thinnings can be used as greens. Harvest by clipping the young leaves, including the stems. Be sure to leave six to eight leaves on the plant: they are needed to sustain growth. Do not harvest the central growing point or you will have to wait for side shoots to form to provide new leaves. Days to harvest: 75- 80. In the Deep south collards are grown through the winter to furnish fresh greens. Collards can be eaten raw in salads or cooked in a variety of traditional methods, particularly as an accompaniment to ham or pork. The flavor is similar to that of cabbage but richer.
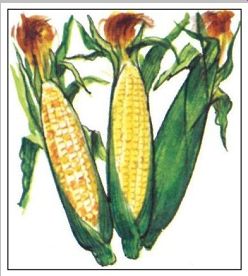
---------- Corn. A space-consuming crop but well worth growing for its
fresh-picked sweetness. Corn needs a long, warm growing season, plenty of water,
and rich soil. Varieties of sweet corn (the sort grown for the dinner table)
include yellow, white, and bi-colored kinds, dwarf strains for the small garden,
and quick-maturing hybrids for regions that have a short growing season. Plant
in either rows or hills.
For rows sow seeds 1 in. deep, 4 in. apart in rows 30 in. apart, and thin later to 8-12 in. For hills plant three to four seeds per hill, 2-3 ft. apart. Old-time gardeners always planted extra seeds to allow for destruction by birds, bugs, and other pests. Corn should not be planted until the soil is warm and all danger of frost is past. Harvest when the silk of the ears turns dark brown and the kernels spurt milky juice when pressed with a fingernail. Each plant will produce one or two ears of corn. Corn is best when picked just before eating; once off the plant, the sugar in the kernels turns to starch, making the corn tough and pasty.
Days to harvest: 62-94, depending on variety and weather. For a continuous harvest, plant successively maturing varieties at the same time or plant successive batches of the same variety at 7-to 10-day intervals. Since corn is pollinated by the wind, it should be planted in compact blocks rather than long, thin rows. A block should have at least three rows to ensure pollination. Weed every week until the seedlings are tall enough to shade out weeds, or mulch when the corn is 3-4 in. tall. Corn plants often produce suckers-smaller extra stalks that do not bear ears. Old-time farmers removed the suckers, thinking them useless, but modern practice is to leave them, as they provide additional food for the plant and the growing ears.
Popcorn and the colorful indian corn should be planted at least 300 ft. from sweet corn to avoid cross-pollination- corn is one of the few plants in which cross-pollination affects the current year's crop. Hybrid varieties should also be planted separately from other strains of corn.
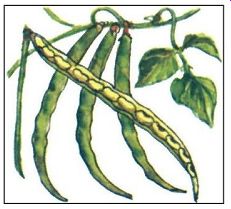
------------- Cowpeas. A favorite in the south. Cowpeas (also known as
black-eyed peas or field peas) can be grown successfully in most sections of
the country. Actually a type of bean, they can be eaten green or dried. Cowpeas
need a long growing season with warm days and nights; the slightest touch of
frost damages them. Sow when soil is warm and all danger of frost is past.
Plant seeds 1/2-1 in. deep, 2 in. apart in rows 24-36 in. apart. Thin to 4-6
in. apart. Days to harvest: 85-90. A 10-to 15-ft. row will probably be enough
for four people. Cowpeas come in varieties with green, white, or brown seeds.
Cucumbers. Not the easiest vegetable to grow but a good yielder with a long
harvesting season. Sow outdoors when soil is warm and danger of frost is past.
Plant seeds 1/2-1 in. deep, 4-6 in. apart in rows 5 ft. apart; thin 12-15 in.
to give the vines room to grow. Cucumbers can also be planted in hills 5 ft.
apart each way, 5 to 10 seeds per hill; thin later to three to four plants
per hill. For a head-start plant seeds indoors four to eight weeks before the
last frost date.
Three to six plants should produce enough for the average family. For large-scale pickle making the Department of Agriculture recommends three to five hills per person.
-------------- Cucumbers need ample moisture and do best in a deep, rich, neutral soil. Well-rotted manure mixed into the soil is helpful. Plants should be watered throughout the growing season: insufficient water results in undersized, misshapen fruits.
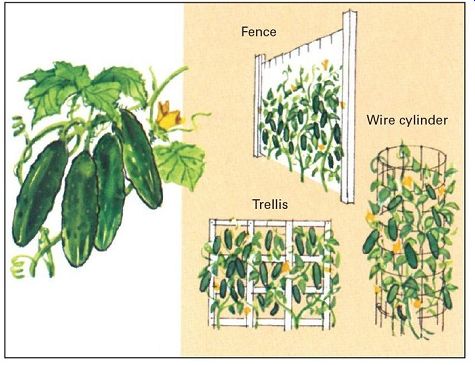
Mulching helps retain soil moisture and protects fruits by keeping them off the soil. Cucumber vines are eager climbers and may be trained on poles, fences, frameworks, or wire netting. These methods of saving space are preferable for the small garden. Some cucumbers are bred for pickling, others for salad use. The difference is mainly in size and shape; in other respects pickling cucumbers are perfectly good in salads, and salad varieties make fine pickles. Pick salad cucumbers when 6-9 in. long; harvest pickling types at whatever size is convenient. Note, however, that cucumbers must be picked before they turn yellow-at this stage the seeds harden and the fruit loses flavor. Keeping the vines picked stimulates them to produce until frost kills them; the presence of big, ripe cukes on the vines halts fruit production. Days to harvest: 50-70, depending on variety.
Each cucumber vine bears separate male and female flowers (except for certain all-female hybrids). No fruits are produced until the female flowers appear (identifiable by a tiny cucumber beneath the blossom). Since the vines grow from the tip only, do not break their tips off, as this will stop their growth. To avoid spreading disease, do not handle the vines or harvest the fruits when they are wet. Despite old wives' tales to the contrary, cucumbers do not cross with squash and melons.
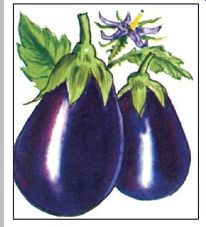
-------- Eggplant. A native of indian related to the tomato and the
sweet pepper. it is a staple of Middle Eastern cooking.
The eggplant needs a long, warm growing season and will not sprout unless the soil is warmer than 75°F. Most gardening books recommend buying started seedlings.
Eggplant can be started indoors in warm soil 8-10 weeks before the last frost. Set in the garden 2-3 ft. apart in rows 3-4 ft. apart. Three to six plants yield an adequate supply for the average family. Eggplant can tolerate drought better than most vegetables. Harvest while fruit is plump and glossy; when it loses its sheen it is overripe and will taste bitter. Eggplant produces until frost. Days to harvest: 65- 75.
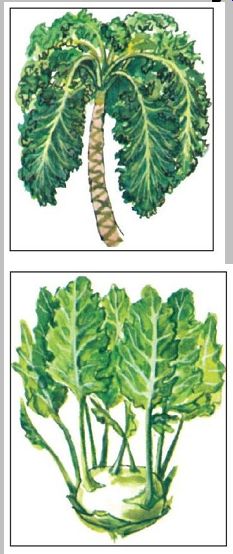
---------- Kale. A non-heading member of the cabbage family often grown
for its ornamental, curly foliage as well as for the dinner table. It is a
good source of vitamin C and thiamin.
Kale can tolerate summer heat and is extremely cold hardy.
It can be raised as a spring or fall crop. Sow in spring as soon as soil can be worked, 1/4 in. deep, 1 in. apart in rows 20 in. apart; thin to 12 in. between plants. About 5 ft. of row per person should furnish an adequate supply. For fall and early winter harvesting sow in midsummer. Harvest by taking entire plant or by cutting the outer leaves only, leaving the inner ones to develop. Days to harvest: 60-70, depending on variety. Kale can be covered with straw or burlap and kept fresh and green in the garden until very cold weather, south of Virginia, this protection is usually not necessary.
------------ Kohlrabi. A cold-resistant member of the cabbage group raised for its turnip-like, bulbous stem. Kohlrabi makes a good crop for both spring and fall. Sow in early spring as soon as the ground can be worked, 1/4 in. deep and 1 in. apart in rows 18-24 in. apart; thin to 3-4 in. apart. About 5 ft. of row per person should be sufficient for the average family. Kohlrabi can be eaten either raw for snacks and salads or cooked.
For a fall harvest sow in July or August. Harvest when the bulbs reach 2-3 in. in diameter. When larger, they become stringy and lose flavor. Days to harvest: 55-60.
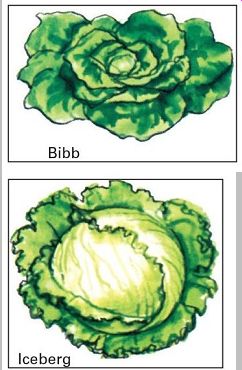
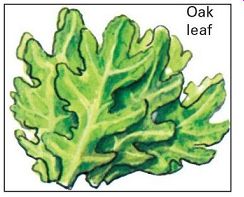
-------- Lettuce. A cool-weather crop available in either head or loose-leaf
types and in many varieties of each. All varieties will provide a bountiful
harvest of salad greens until summer heat stimulates the plants to flower,
which makes them tough and bitter. Lettuce can also be sown in late summer
for a fall crop. Lettuce is one of the easiest vegetables to raise from seed.
Sow thinly in early spring, 1/4 in. deep in rows 16 in. apart. Thin gradually
to 12 in. between plants for loose-leaf types, 16-18 in. for head types. (Head
lettuce is often started indoors in flats and set out when the soil is ready
to work.) Allow 4-5 ft. of row per person. Thin ruthlessly-lettuce needs a
lot of room to grow in. Thinnings may be transplanted or used thriftily in
a garden-fresh salad. To be tender and free from bitterness, lettuce should
grow quickly. It needs plenty of water and nitrogen. To keep leaf lettuce producing
for a maximum length of time, harvest only the outer leaves so that the plant
continuously produces new leaves for use. With head lettuce the entire head
must be harvested. Head lettuce is more sensitive to heat than is loose-leaf
lettuce. The growing season for both types can often be prolonged by planting
them in a partly shaded area of the garden.
Days to harvest: 40-83. For a fall crop sow in August.
Lettuce seeds will not sprout when the soil temperature is more than 80°F, but they can be forced to germinate by chilling them in the refrigerator in damp peat moss and sand for five days.
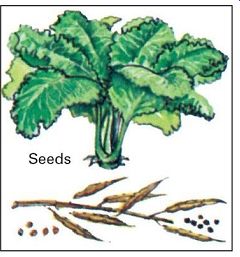
Mustard. Another southern favorite that can be raised anywhere that radishes will grow. Esteemed for its pungent green leaves, mustard is a fast-growing, frost-hardy, cool season crop. Sow in spring as soon as the soil can be worked, 1/2 in. deep and 1-2 in. apart in rows 16 in. apart.
A 20- to 25-ft. row provides ample supplies of mustard greens for the average family. Thin the plants to 4-6 in. apart. Harvest when leaves are 3-4 in. long (sooner if you like). Snap or cut off the leaves, leaving the growing point to produce more. For a fall crop sow in August or September.
In areas with mild winters mustard can be grown for a winter supply of fresh greens. Days to harvest: 25-50.
Pulverize the seeds, and mix with water to make fresh old time mustard.
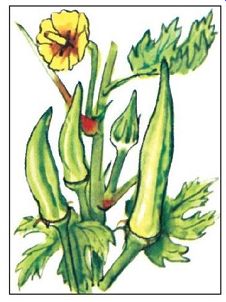
----------- Okra. A tall warm-weather plant related to hibiscus and cotton
that is raised for its edible pods. Although considered a southern vegetable,
okra may, with luck, be grown as far north as southern Canada. It thrives in
almost any fertile, well-drained soil, sow when soil is thoroughly warm, 1/2-1
in. deep and 18 in. apart in rows 3 ft. apart. To speed germination, soak the
seeds in water overnight.
Plant three or four seeds at each spot; when seedlings are 1 in. tall, remove all but one. Allow three or four plants per person. Okra may also be started indoors about a month before the last expected frost date. Harvest pods when they are 3 or 4 in. long or three to four days after the blossom petals fall off. For best flavor pick just before cooking. For continued production keep the pods picked. Days to harvest: 55-60. Okra is used in stews and in soups, especially the famous gumbo of New Orleans.
----------- Onions. Hardy members of the lily family raised for their pungent
bulbs. Onions do best in loose, fertile soil. They are heavy feeders, so the
soil should be enriched by digging in manure or compost before planting time.
Onions may be raised from seed, from immature bulbs called sets, or from young
plants. Because onions have a long growing season, home gardeners generally
prefer sets or plants over seeds. Whatever the choice, onions can be planted
as soon as the soil can be worked. Place sets or plants 1 in. deep and 4 in.
apart in rows 12 in. apart. If grown from seed, thin seedlings to 3-4 in. apart
when they are 3 in. tall.
The thinnings can be used as young green onions or transplanted. Allow 4-5 ft. of row per person for average use. Days to harvest: 80-110 from seed, 50-60 if sets or young plants are used. To harvest onions for storage, bend the tops down to the ground when they start to go yellow.
After the tops turn brown, pull up the onions and spread them out to dry for a week (longer if the weather is damp).
Then braid the tops together and hang the onions indoors to store; or cut tops off an inch above the bulbs and store the onions in mesh bags or shallow open boxes in a cool, airy place. They should keep from two to four months.
Parsnips. A slow-growing relative of the carrot; resembles a large white carrot. Parsnips do best in fertile, loamy soils.
Heavy clay soils and stony soils distort and toughen the roots. Sow seeds in spring as soon as the soil can be worked. Since they may take several weeks to germinate, mark the row with radishes, which will be ready to pull when the parsnip seedlings emerge. Loosen the soil to a depth of 12 in. to let the roots grow properly. Plant seeds thickly 1/4 in. deep in rows 18 in. apart. Thin to 3-4 in. apart. Allow 4-5 ft. of row per person.
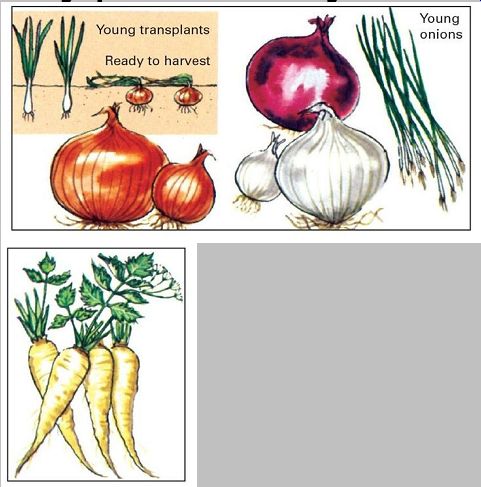
----------- Parsnips can either be dug (not pulled) in fall and stored
in damp sand, or they can be left in the ground for use as needed throughout
the winter. Freezing temperatures improve their naturally sweet flavor. Days
to harvest: about 100.
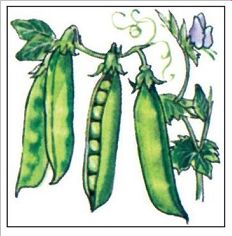
---------- Peas. A cool-weather crop with both bush and tall (requiring
support) varieties. Green peas (known in the south as English peas) are raised
for their immature seeds.
Snow peas, o r sugar-pod peas, are eaten pod and all when very young. Peas do well in most kinds of soil as long as it contains plenty of organic matter. Plant peas in spring as soon as the soil can be worked. Dig in compost, manure, or other organic matter. Plant seeds 1-2 in. deep, 1 in. apart in rows 3 ft. apart. If you plant double rows (8-12 in. wide), allow 40 in. between rows. Many authorities recommend planting peas in a shallow trench, which is filled in with soil as the pea vines grow, but this is not necessary. Give peas plenty of water. Mulch to retain water and keep soil cool. Allow about 10 ft. of row per person.
Tall-growing varieties should be supported on branches or brush stuck in the ground when the vines begin to get bushy. They can also be trained on wire, twine, or netting strung between stakes. Dwarf, or bush, varieties can be grown without support but are easier to care for and harvest if supported. Pick green peas when the pods are well filled but the peas inside are not hard. Pick snow peas when the pods are just beginning to plump out. All peas are at their best if cooked within a few hours after picking. If left too long on the vine, peas become tough and unappetizing, so check the vines every couple of days. However, if you wish to dry peas for storage, let them mature on the vine until they are completely hard, then remove from vine, shell, and dry them in an oven at low heat. They make a hearty pea soup. Peas are also excellent for freezing fresh. Days to harvest: 55-78, depending on variety. In areas with above-freezing winters peas can be sown from midsummer on for a fall or winter crop.

------------- Peppers. A frost-tender crop that needs a long, warm growing
season. In their tropical home pepper plants are perennials and reach the size
of small trees. In the mainland United states they are raised as annuals and
grow about 2 ft. tall. There are sweet and hot types of peppers. All varieties
have much the same cultural requirements as tomatoes, to which they are related.
They do best on a slightly acid soil with full sun and plenty of moisture.
For most areas of the United states peppers should be started indoors about
eight weeks before the last expected frost date and set out in the garden when
the soil is warm. The plants should be 18-24 in. apart in rows 24- 36 in. apart.
Three to five plants per person are sufficient.
The fruits of both sweet and hot peppers may be harvested at any stage of growth. Sweet peppers, also known as green or bell peppers, turn red or yellow at maturity. At this stage they are sweeter. some hot peppers turn red or yellow soon after the fruits are formed. Be careful when picking peppers: the plants are brittle, and you may end up with a whole branch in your hand instead of a fruit. You can avoid the problem by cutting the fruits off, not picking them.
Peppers are temperamental plants. They set fruit only when nighttime temperatures are between 60° and 70°F. If they do not get enough moisture, they drop blossoms and fruits. However, under favorable conditions they bear plentifully.
Sweet peppers are rich in vitamin C and freeze well; hot peppers can be stored by stringing them up and letting them dry. in fall sweet peppers can be kept for two to three weeks by pulling up the entire plant and hanging it, roots uppermost, in a cool (but not freezing) indoor location. Pepper plants can be grown indoors in pots in wintertime or where garden space is limited.
Potatoes. One of the world's major food crops. Native to the bleak Andean highlands of south America, the potato is related to the eggplant, pepper, and tomato. Though killed by frost, potatoes do best in cool weather. They thrive in light, sandy, acid soil. If you can spare the space in your garden (potato plants are sprawling and take up a good deal of room), potatoes are well worth planting for the rewards of tender, young new potatoes or full-sized tubers from your own soil. Potatoes can be raised from sets (small tubers) or seed potatoes (medium-sized tubers specially bred for propagation). A set is used whole; seed potatoes are cut into pieces about the size of a small hen's egg, each containing one or more eyes. Potatoes sold in food markets are not recommended as seed pieces-they are often contaminated with disease, and many are treated with chemicals that inhibit them from sprouting. If you are using seed potatoes, spread the seed pieces on a clean surface and allow the cut surfaces to dry out for 1 to 10 days. This permits the cut surfaces to heal over and reduces the chance of infection from decay organisms. The seed pieces can be dusted with a fungicide for further protection. Potatoes should be planted in spring as soon as the soil can be worked-if late frosts are common in your area, plant them about three weeks before the last expected frost. Plant sets or seed pieces 3 in. deep and 12-18 in. apart in rows 24-36 in. apart. The tubers form close to the surface of the soil, so cultivate no more than an inch deep to avoid injuring them. As the vines grow, mound up soil, mulch, or compost around them to shield the tubers from light: sunlight not only turns potatoes green but generates a poisonous alkaloid called solanine in the green portions. If a potato should have a green portion, cut it away before cooking. For new potatoes harvest when vines blossom. For mature potatoes, intended for storage, dig up when vines have died. Dry tubers for several hours and store them in a cool, dark place, preferably between 40° and 45°F.
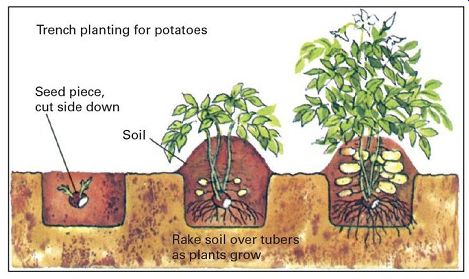
------------ Another method of planting is to set the seed pieces directly
on the bare, prepared soil, press them in lightly to ensure good contact, and
cover them with a 12-in. layer of straw, salt hay, or other light organic mulch.
When the mulch settles, add 6 in. more. Potatoes raised this way are cleaner
and easier to harvest, since no digging is necessary. You need only pull the
mulch away. Days to harvest: 100-120. Potatoes will not form tubers when the
soil temperature reaches 80°F. For this reason they do poorly in warm regions.
Pumpkin. A kind of squash first cultivated by American indians. Whether they are the vine or bush type, pumpkins require a great deal of space; however, in a small garden they can be grown on a trellis with the fruits supported by slings. Pumpkins grow 7-24 in. in diameter, depending on type. In general, the smaller varieties are better for eating.
Large pumpkins were used for stock feed on the old-time family farm. There are also special varieties that are raised for their tasty seeds. Frost tender, as are all members of the gourd family, pumpkins should not be planted until all danger of frost is past and the soil is warm. They may be started indoors three to four weeks before the last expected frost date. For outdoor planting plant seeds in hills 8-10 ft. apart for vine types, 4-6 ft. for bush types.
Plant six seeds to the hill; when seedlings are about 6 in. tall, thin out all but the two or three strongest ones. A shovelful of manure or compost mixed in with the soil will get the plants off to a good start. For pumpkins started indoors use two or three to a hill. Pumpkins may also be planted in rows, with 3-4 ft. of space between plants and at least 6 ft. between rows to allow room for the sprawling vines. Mulching is recommended to keep down weeds, conserve soil moisture, and keep the fruits off the dirt. On the old-time farm pumpkins were often planted with corn, a practice settlers had learned from the indians. To grow huge exhibition-type pumpkins, plant seeds of a large variety such as Big Max or Mammoth. Allow only one fruit to develop on each vine and water the plants heavily.
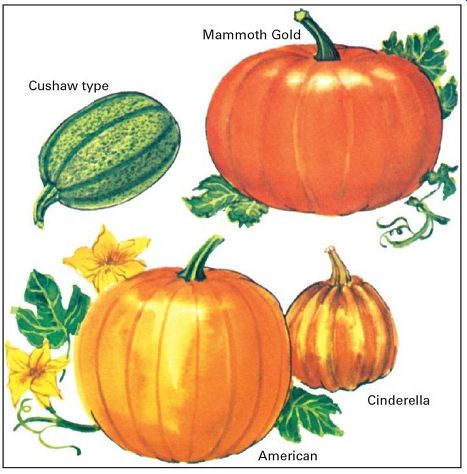
-------------- Pumpkins are normally left on the vine until the vine is
killed by frost or deteriorates from age. (The fruits, with their thick skins,
are not harmed by a light frost.) The best practice is to cut the stem a few
inches above the fruit. Store pumpkins in a cool, dry place. Days to harvest:
100-120 for most varieties.
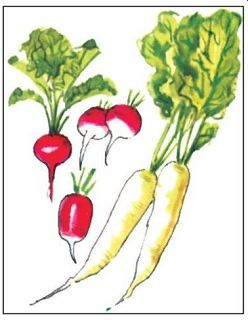
Radishes. A fast-growing, hardy, virtually foolproof cool weather crop related to cabbages and turnips. Radishes are often sown together with seeds of other, slower germinating vegetables such as carrots and parsnips. This practice makes double use of the garden space, marks the location of the second vegetable, and loosens and aerates the soil when the radishes are pulled up for harvesting.
Plant as soon as the soil can be worked, two or three to the inch, 1/2 in. deep. Rows can be as close as 6 in. apart. Thin seedlings to 2 in. apart soon after they emerge.
Radishes become tough, pithy, and increasingly hot to the taste as they get old. Plant small batches at intervals of a week to 10 days to get a continuous supply of young, mild, tender radishes. Hot weather and lack of water also make radishes hot. Do not plant radishes in the hottest part of summer (when daytime temperatures average over 80°F).
They will not bulb up. Sow them for a fall crop when the weather cools off. Radishes are ready to harvest when the bulbs are about 1 in. in diameter, although some people prefer them smaller. If the top of the bulb shows above the ground, the radish is usually ready to pick. Alternatively, probe the soil at the base of the leaves with your finger to estimate the size of the bulb. Days to harvest: 22-30, depending on variety. Winter radishes, much larger and slower growing than ordinary radishes, should be sown in early summer for a fall crop and around midsummer for late fall and winter use. Thin to 6-8 in. between plants. Dig in late fall and store in damp sand in a location safe from freezing. They will remain fresh and crisp for several weeks. Winter radishes may also be cooked using any recipe suitable for turnips. Days to harvest: 55-60.
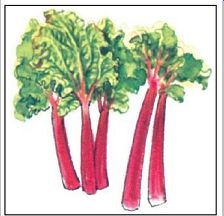
-------------- Rhubarb. A hardy perennial raised for its tart, edible stalks.
Rhubarb thrives in any deep, well-drained fertile soil as long as it has a
good supply of moisture. Rhubarb is almost always raised from roots, which
are planted in early spring 3-4 ft. apart each way. (it does not come true
from seed.) Do not harvest the first year. Thereafter, harvest when stalks
reach 1 in. in diameter.
Caution: Do not use the leaves; they contain oxalic acid, a dangerous poison. Pull stalks, do not cut them.
Most varieties of rhubarb send up a seed stalk noticeably taller than the leaf stalks. It should be cut off at ground level to keep the plant producing.
Every five to seven years, when the stalks become markedly thinner, dig up the plants, split up the root clumps, and replant them. Where possible, select the plants that in past years have yielded the best stalks for replanting.
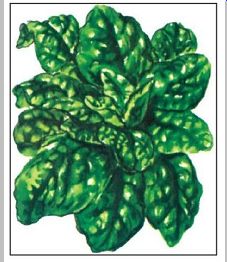
------------- Spinach. A hardy cool-weather vegetable that yields both
spring and fall crops. Spinach is rich in vitamin A and a good source of iron.
Most spinach contains small amounts of oxalic acid, an agent that causes loss
of calcium from the blood. New strains are available, however, that have almost
none of this substance. Spinach thrives on well-drained, fertile soils with
plenty of organic matter. The soil should be slightly acid; on very acid or
very alkaline soils spinach does poorly. Plant seeds four to six weeks before
the last expected frost date, 1/2 in. deep and about 1 in. apart in rows 14
in. apart. Thin to 4 in. between plants. Plan on 5-10 ft. of row per person.
Harvest spinach by picking the outer leaves as soon as they reach edible size.
Should buds form at the center, it is a sign that the plant will soon bolt
(send up its flower stalk) and its leaves will become tough and unpalatable.
At the bud stage the plants are still good and can be salvaged by pulling them
up or cutting them off at ground level. Long days and hot weather in combination
stimulate spinach to bolt. For a fall crop, plant in late August or early September.
Because of its short growing life, spinach should be planted in small batches
at two-week intervals. Spinach can be grown as a winter vegetable in areas
where temperatures do not dip much below the freezing point. Days to harvest:
40-50. Spinach can be eaten raw as well as cooked and is excellent for freezing.
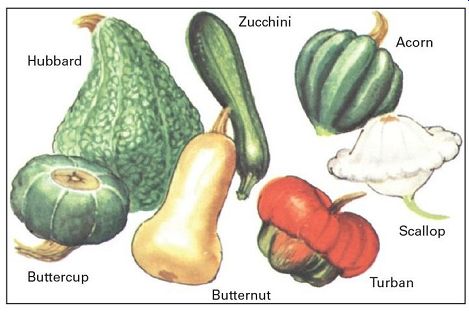
---------Squash. A large group of vegetables belonging to the gourd family.
Summer squash have soft skins and moist, succulent flesh; they are eaten while
young and tender.
Popular summer squash include zucchini, yellow straightneck, and scallop. Winter squash, which are picked in fall and eaten fully ripe, have hard, thick skins and a rather dry, fibrous flesh, a combination that helps them keep for months. Acorn, buttercup, butternut, hubbard, and turban are standard types of winter squash. Most summer squash are bush varieties; most winter squash grow on sprawling vines. All require a good deal of space, although bush kinds are more compact. Cultural requirements are the same for all types of squash. Squash are frost tender and should not be planted until danger of frost is past and the soil is warm. Where the growing season is short, squash plants should be started indoors. Squash should have a rich, loamy, slightly alkaline soil and plenty of moisture; otherwise the fruits may be undersized. Squash can be planted in hills or in rows. Plant seeds 1-2 in. deep.
For hills plant five or six to the hill, thinning later to the two or three strongest seedlings. Hills should be 4-6 ft. apart in each direction for bush squash, 8-10 ft. for vine squash.
When row-planting bush varieties, place seeds 24-30 in. apart in rows 36 in. apart; for vine varieties 2-3 ft. apart in rows 9-12 ft. apart. Plant three or four seeds together as insurance against cutworms, slugs, and other garden pests; thin later to the strongest seedling, squash do well with mulch. Summer squash are best picked when they are about 1-2 in. in diameter and while the skin can still be pierced with a fingernail. (Zucchini, however, can be allowed to grow much larger and still be used for baking.) Scallop squash can be picked when 3 or 4 in. across. Cut fruits off with a knife to avoid injuring plants. Days to harvest: 48-55. Keep plants picked for continuous production. Winter squash should be picked in fall when their skin is so hard that it cannot be scratched by a fingernail. Harvest by cutting stems about 3 in. from the fruit.
For maximum storage life cure in a warm room for about 10 days, then move to a cool, dry area (avoid freezing). Days to harvest: 80-115.
---------
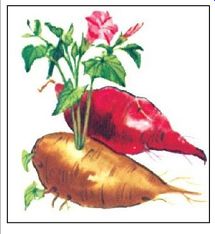
Sweet potatoes. Not a true potato but a member of the morning glory family. Sweet potatoes are a good source of many vitamins, particularly vitamin A. They need a very long growing season-four to five months without frost-and require warm temperatures. For this reason they are grown mainly in the south, where they are often known erroneously as yams. Sweet potatoes do best in sandy soil that is low in organic matter. (Too rich a soil makes them run to vines instead of roots.) Once the vines are established, they are quite drought tolerant. In fact, too much moisture in the soil rots the tubers. Sweet potatoes are raised from transplants (slips cut from sprouting tubers). The slips should be 8-10 in. long and have several leaves. Plant them 15 in. apart in rows 3-4 ft. apart. Set the slips about 6 in. deep, leaving at least two leaves aboveground, and water well. They will root quickly. Rooted plants are also available. In heavy, moist soils, the soil should be raised into flat-topped ridges 8-15 in. high-the wetter the soil, the higher the ridge. Harvest after the first frost blackens the vines. In frost-free areas harvest about four months after planting. Cure the tubers in a warm, dry place for about two weeks after picking them, store in a cool, humid place with good air circulation (not below 50°F or they may spoil). Days to harvest: 120-150.
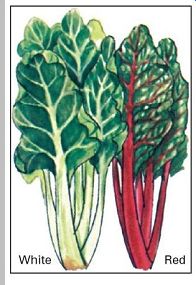
----------- Swiss chard. A type of beet bred for its large, crisp leaves
and fleshy leaf stalks rather than for its root. Chard is rich in vitamin A
and a good source of vitamin C. it tolerates both frost and hot weather-a single
planting can give a continuous yield from spring to late fall. The leaves of
chard may be prepared like spinach, the stalks like asparagus.
Plant swiss chard in early spring as soon as the soil can be worked and there is little danger of a severe frost. Set the seeds 1/2 in. deep and 1-2 in. apart in rows 18 in. apart.
Thin later to 12 in. between plants. Chard should be harvested while the leaves are still tender and succulent.
Cut the outer leaves off with a sharp knife about an inch above the ground. Be careful not to injure the inner leaves and central bud, which produces new leaves. Harvest regularly throughout the summer and fall in order to keep new leaves coming. Days to first harvest: 50-60.
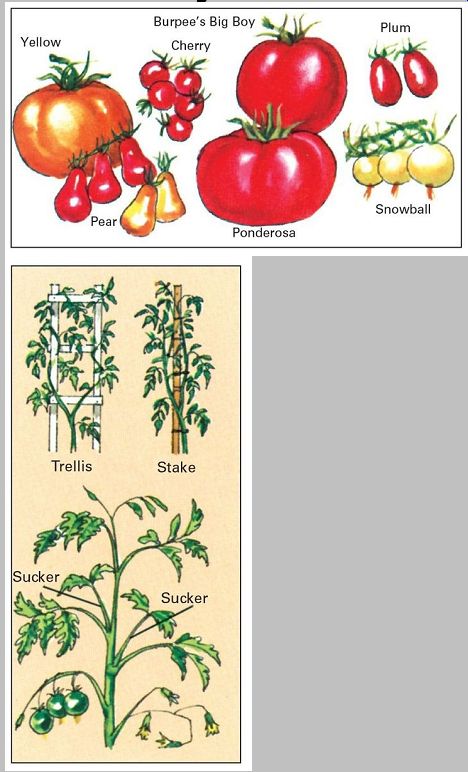
Tomatoes. Once shunned as poisonous but now the most popular garden vegetable in the United states. A member of the nightshade family, the tomato is closely related to eggplant, pepper, potato, and tobacco. Tomatoes are among the best yielders of all vegetables but need a long growing season with moderate temperatures-they will not set fruit when nighttime temperatures are below 60°F or above 75°F, to many a gardener's puzzlement and dismay.
Years of experimentation, research, and controlled breeding have resulted in a profusion of special varieties.
Tomatoes are available that range in size from giant 1-lb.
Big Boy hybrids down to tiny plum and cherry tomatoes.
There are egg-shaped and pear-shaped tomatoes, in addition to the familiar red, there are orange, yellow, and pink tomatoes (orange and yellow types tend to be sweeter, with less bite). There are bushy dwarf strains that can be grown in a pot or window box. Early, midseason, and late-ripening varieties have also been developed. Most early types are so-called determinate tomatoes-the vines grow to a certain length, bear their fruit over a short period, and then die. Midseason and late-season varieties are usually indeterminate-the vines continue to grow and bear fruit until the onset of cold weather stops them. Since tomatoes are killed by frost and grow poorly at cooler temperatures, they are usually started indoors in all but the warmest parts of the country. Start the seeds six to eight weeks before the last expected frost date, and set out when the weather is safely warm. To save time and trouble, you can buy ready-to-plant seedlings at most garden-supply centers and supermarkets and at many neighborhood stores as well. However, only the top-selling varieties tend to be available. The number of plants you will want to grow depends on the type grown, the amount of canning you plan to do, and your family's appetite for tomatoes. Three to five plants each of early varieties and midseason varieties are enough for the average family. Tomatoes do best in slightly acid soil and need plenty of water. Before setting out the seedlings, dig compost, well-rotted manure, or damp peat moss into the soil to improve its moisture-holding capacity.
Place the plants 2-3 ft. apart in rows 3 ft. apart. The vines may either be allowed to sprawl on the ground, which gives a higher yield, or trained on stakes, fences, or other supports. A popular method is to train the vines on a circular "tower" of heavy wire. The advantage of training is that the vines yield cleaner fruit and are easier to inspect and pick. Mulching is helpful, especially if the vines have been left to grow on the ground. Tomatoes that are trained above the ground should be pruned to one or two main stems. This is done by pinching or cutting off the suckers next to the main stems. (suckers are shoots that grow in the joints where the leaf stems meet the main stem; if allowed to grow, they divert energy from fruit production.) Suckers should be pinched off throughout the growing season.
However, do not remove foliage to let sunlight reach the fruits. Instead of aiding them to ripen, it causes sun scald, a discoloration and toughening of the skin. Tomatoes are ripe when they separate easily from the stem. If cool or rainy weather delays ripening, they may be picked as soon as they start to change color and ripened on a sunny windowsill. To pick unripe tomatoes, twist them off the vine.
----------- Tomatoes can be stored for several weeks in fall by pulling up the entire plant and hanging it upside down in a cool, shady place. The tomatoes will ripen slowly on the vine.
Unripe tomatoes may also be picked and stored in a single layer. Rich in vitamins A and C, tomatoes are excellent for canning and freezing. Days to harvest: 52-90, depending on variety.
-------
Turnips and Rutabagas. Two related root crops of the cabbage family. Most turnips have white flesh, while most rutabagas have yellow flesh. Rutabagas are larger than turnips and are often called yellow turnips or swedish turnips.
Turnips are raised for their tops, or greens, as well as their roots. A quick-growing, hardy cool-weather crop, they can be planted for spring or fall harvest, sow in spring as soon as the soil can be worked, 1/2 in. deep and two or three seeds to the inch in rows 18 in. apart. Thin seedlings to 2 or 3 in. apart. Turnips should be harvested when they are about 2 in. in diameter. In most cases they get tough, pithy, and bitter if allowed to grow longer. For a fall crop sow in midsummer. Days to harvest: 35-60.
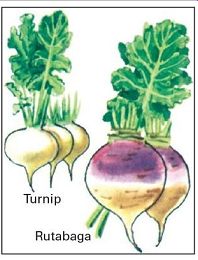
-------------- Rutabagas are slow growing and are planted for fall harvest.
For table use, plant as for turnips about three months before the first expected
fall frost date. Thin to 6 in. between plants. Harvest when roots are 3-6 in.
in diameter (quality declines when they grow larger). Harvest rutabagas and
turnips by pulling them up by their tops. Days to harvest: 90-100.
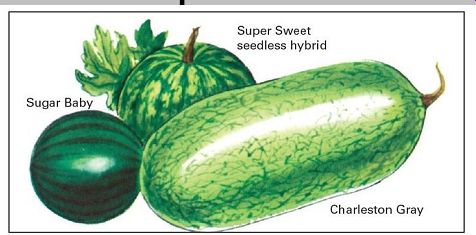
------------ Watermelon. One of the gourd family raised for its sweet,
juicy fruit. Watermelons need a warm growing season, plentiful moisture, and
full sun for proper growth and flavor (even a light frost can kill them). Standard
melons reach sizes of 20 lb. and up and are best grown in the warmer sections
of the country. For cooler regions midget varieties are available. They weigh
4-15 lb. and mature in a shorter time. in all but the warmest areas watermelons
should be started indoors about four weeks before the last expected frost date
and set out when the nights are reliably warm (above 55°F). Watermelons are
usually planted in hills, at least 6 ft. apart in each direction, two seedlings
to a hill. If planted in rows, the plants should be 2-3 ft. apart in rows 6-7
ft. apart.
Mulch is very helpful in preventing the fruit from rotting.
There is no sure way of telling when a watermelon is ready to harvest. One traditional method is to thump the melon; a hollow sound indicates it is ripe. Another is to examine the underside of the melon. When it turns yellow, the melon is probably ripe. Days to harvest: 70-95, depending on variety.
Mulch and water : Helping Nature the Natural way
Mulching is a traditional practice that has found new favor.
Properly applied, a blanket of organic mulch smothers weeds, conserves soil moisture, and adds organic matter to the soil as it decomposes. Mulch insulates the soil, keeping the temperature even and aiding the growth of plant roots. It provides food and habitat for earthworms and burrowing insects, whose tunnels loosen and aerate the soil. It controls gullying and erosion. It prevents the rotting of fruit-type vegetables such as squash, melons, and cucumbers by keeping them away from ground moisture.
Mulch should be applied to the garden in the spring, after the soil has warmed up. Otherwise, by keeping the soil cold, it may retard plant growth. The thickness of mulch to be applied depends on the nature of the material. Loose, porous mulch such as straw should be 6 to 8 inches thick to keep sunlight from reaching weeds; denser materials such as sawdust need only be 1 1/2 to 2 inches thick. If possible, weeds should be removed before applying mulch, even though a thick layer of mulch will smother them. When placing mulch on the soil, be careful not to cover the vegetable seedlings.
It is best to turn the mulch under at the end of the growing season. If you wait until spring for this chore, be sure to add extra nitrogen fertilizer, since decay organisms, activated by warm weather, will rob the soil of much of its nitrogen as they break down the mulch.
A wide variety of materials can be used for mulch, ranging from hay and straw to chipped bark, ground corncobs, and cocoa bean hulls. Some of the best mulches cost nothing. Lawn clippings and leaves, for example, are both excellent; they function not only as mulches but add nutrients and humus to the soil when plowed under. In addition to organic materials, strips of black plastic film are often used as mulch.
Mulch is not entirely problem free. It may contain weed seeds and can also serve as a shelter for slugs, destructive insects, and field mice. (For dealing with these and other pests, see pp.148-153.) Mulch must also be replenished from time to time, since it breaks down gradually.
Nevertheless, a properly applied mulch is one of the simplest and most effective ways for saving labor, improving the soil, and getting better crops.
Watering : How, When, How Much
Vegetables cannot live-much less grow and yield an abundant harvest-without water. If natural rainfall does not supply enough water, then the gardener must supply it. In the arid Southwest artificial watering or irrigation is a necessity. Even in the more humid North-east dry spells of several weeks are not uncommon.
For large commercial farms, open irrigation ditches are one answer to the problem of delivering water to where it is needed. For the home gardener there are less costly, more efficient methods of supplying water. The familiar oscillating and spinning types of lawn sprinklers duplicate natural rainfall, as does a permanently installed overhead sprinkler system or even the simple hand-held garden hose.
Perforated hoses are much more economical of water.
Laid on the ground, they deliver a long, soaking trickle of water directly onto the soil with minimal loss from evaporation or runoff. A wide variety of such hoses are sold by garden-supply centers.
For the ultimate in water-saving efficiency there are buried plastic pipes, also perforated, that deliver moisture directly to the root zones, where it is most needed. (Water must reach the roots to be effective-a light watering that wets only the surface of the ground leaves plants thirsty.) Experts recommend a heavy watering once a week rather than a light one every day. The watering should be heavy enough to saturate the soil 10 to 12 inches deep. (Check the depth of water penetration by opening a slit with your spade.) Clay soil requires more time and more water to saturate it than sandy soil but also holds water longer and so needs less frequent waterings. Experiment with varying amounts of water to determine how much your garden actually needs. No matter what method you use to water your garden, the watering pattern should be spread evenly over the entire area. This is because water tends to move downward through the soil rather than sideways. Water has a limited sideways spread, ranging from about 1 foot in clay soils to 2 feet in sandy soils.
How do you tell when your garden needs watering? The simplest way is to watch your plants. If they wilt in the sun and do not recover when it cools off, they need watering.
(Remember, though, that any vegetable may wilt temporarily on a hot summer afternoon, no matter how wet its roots are.) The best time to water is in late afternoon, when little water will be wasted by evaporation and the air is still warm enough to dry the foliage.
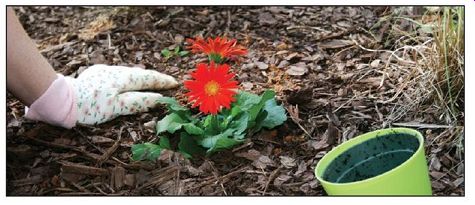
Wood chip mulch discourages weeds and keeps the dirt moist around this Gerber daisy. Mulch absorbs the energy of falling rain and permits the water to soak gently into the underlying soil instead of running off.
-------------
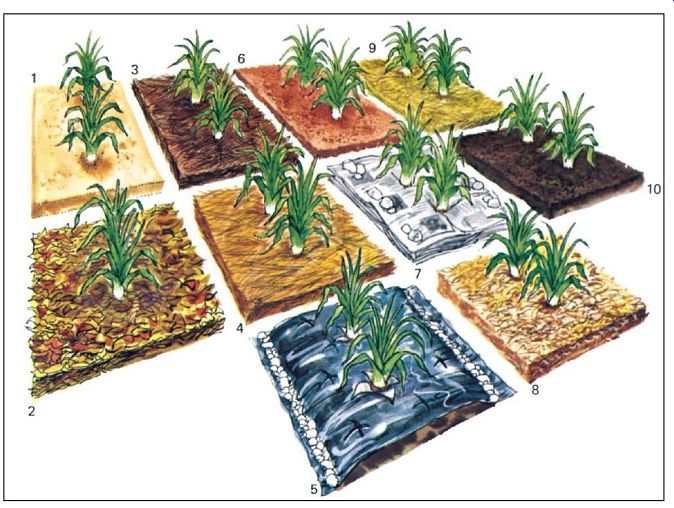
A survey of mulching materials
Sawdust (1) can be obtained from lumberyards and sawmills, if you heat with wood, save the sawdust from your own wood-cutting operations. Let the dust rot until it is dark before use. Apply 1 1/2-2 in. thick.
Leaves (2) are abundant and easy to come by in most regions of the country. You can usually obtain additional supplies from neighbors or from your local park and highway departments. Apply 4-6 in. thick.
Pine needles (3) are cheap and plentiful in many areas.
Their resin content makes them long lasting, and they have a neat appearance. Apply 4-6 in. thick.
Hay and straw (4) can be obtained from local farmers, garden-supply centers, or your own fields. Spoiled hay, which is unfit for animals, and salt hay, from tidal flats, make excellent mulches. Apply 6-8 in. thick.
Black plastic film (5) is sold by most garden-supply and hardware stores in 25-, 50-, and 100-ft. rolls of a standard 3-ft. width. Weed and till soil before spreading plastic on it.
Bury edges of plastic film in shallow trenches to hold it in place, or weight edges down with stones or dirt. Leave a path for walking between plastic strips (never walk on the plastic itself, as it tears easily). Cut holes as needed to plant seeds. Also cut X-shaped slits at intervals to admit water. Black plastic warms the soil, aiding the growth of many crops.
Cocoa bean hulls (6) are attractive but expensive. They are alkaline and so help to sweeten soil; do not use on acid-loving vegetables. Apply 3-6 in. thick.
Old newspapers (7) can be recycled as mulch, but avoid colored newsprint-it may contain lead. Apply papers in layers at least six sheets thick, and weight them down to keep them from blowing. Paper is biodegradable.
Wood chips (8) can often be obtained from power or telephone companies, whose road crews chip up the brush and limbs they clear. Wood chips are durable and slow to decay. Apply 3-6 in. thick.
Lawn clippings (9), considered a problem by many homeowners, can be used productively as mulch. Clippings should be allowed to dry out before use as mulch, since they tend to mat together when fresh. Apply 3-6 in. thick.
Compost (10) is one of the best garden mulches. It supplies nutrients in addition to performing the other functions of a mulch. However, for maximum effectiveness compost for mulching should be only partly broken down; otherwise it may encourage, rather than deter, the growth of weeds. Apply 3-6 in. thick.
----------------
Surprising seaweed mulch

---------- Those who live near the shore can harvest their own supply of
one of the finest natural mulches-seaweed. Rich in potassium and trace elements,
seaweed is also a good fertilizer and a desirable addition to the compost pile.
It should be dried in the sun before using in the garden.
---------------
---------------
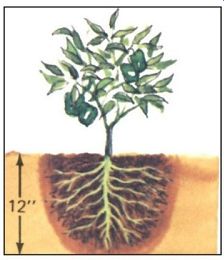
---- The roots of most vegetables grow in the top 8-12 in. of soil, although
some, like tomatoes, may reach 4-5 ft. down in deep, loose soils. When watering,
it is important to saturate the root zone about 1 ft. deep, not just wet the
surface. Shallow watering encourages roots to grow close to the surface, where
they are likely to dry out during hot spells with resultant damage to the plants.
Other ways to wet the soil
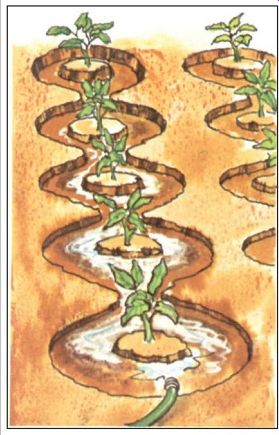
---------- Connected saucers or basins for watering are a refinement of
the traditional irrigation ditch. They confine water to root zones and also
collect rainfall. The series of saucers should be graded to let water flow
slowly down the whole length of the chain.
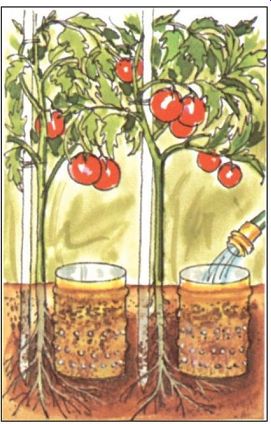
----------- Perforated cans or milk cartons, placed in the soil at planting
time, conserve water by letting it ooze slowly into the root zone. Fill them
by hand or with a hose. A variant on this idea is a short piece of pipe inserted
in the soil at a convenient angle for a hose.
----------
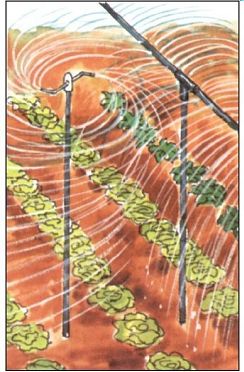
Overhead sprinklers cover a wide area and can be fed by hose or buried pipelines. They are much used by commercial vegetable growers and their spray radius is easily adjusted. How ever, they waste much water through evaporation.
(Wet foliage is susceptible to fungus infections.) Early to midmorning is also a good time for watering. Avoid watering the garden in midday or after sundown.
Do not overdo it when watering. Overwatering wastes water, leaches nutrients out of the soil, damages roots, and encourages the growth of lush, disease-prone foliage. In arid areas it can also cause a buildup of salts in the soil: mineral-laden water, moving upward by capillary action, evaporates leaving a saline residue.
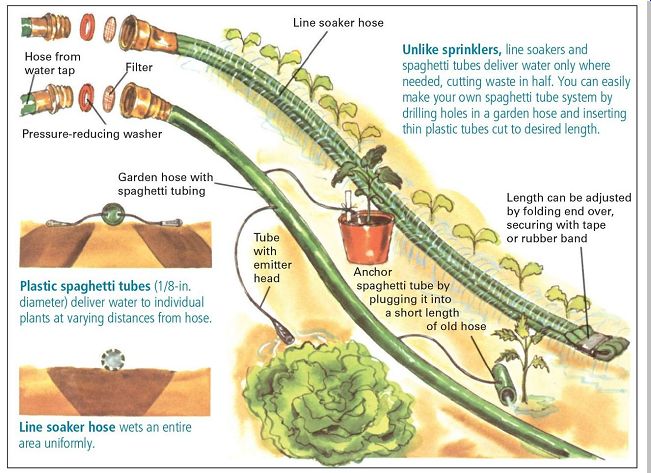
--------- Water-saving drip irrigation
===