A typical cycle on a dishwasher begins when you close and latch the door, push a cycle selector button, and turn on the timer. The timer opens the water inlet valve, allowing hot water to flow into the tub. Detergent released by the detergent dispenser mixes with the hot water, which is further heated by a heating element. The timer then turns on the motor attached to the pump. The pump pushes the water through a spray arm that spins, spraying the hot soapy water onto the dishes. When the timer reaches the end of the wash or rinse cycle, the motor pumps the water out of the dishwasher and into the house drain. With the tub empty the heating element dries the dishes as the timer reaches the OFF position, completing the cycle.
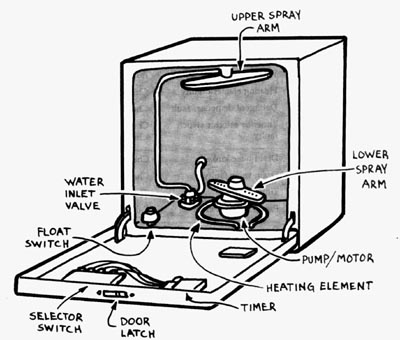
The most common complaint about a dishwasher is that the dishes are not getting clean. There are a number of possible causes. The detergent dispenser might not be releasing the detergent, the detergent might not be right for your type of water, the dishwasher might not be getting enough water, or the water might not be hot enough. Dishwashers are complicated machines, but most problems can be repaired easily by the homeowner. The one area that should be left to a professional is the pump and motor assembly. If the pump seal is not properly installed, water can leak into the motor, creating many more problems than you started with. Before beginning any repairs, make sure the power is turned off, If you find that the parts are inaccessible, call a professional.
Tools and Materials:
- Screwdriver
- VOM/DMM
- Pliers
- Adj. Wrench
- Shallow pan/towel
- Toothbrush
- Stiff wire
==============
TROUBLESHOOTING GUIDE
-------------
Problem:
Dishwasher doesn't
Dishwasher doesn't fill or overfills with water
Dishes don't get clean
Water doesn't drain
Dishwasher leaks around door
Dishwasher leaks from bottom
------------
Probable causes:
No power to dishwasher
Door not latched or doors-witch faulty
Timer faulty
Faulty float switch
.
Faulty water inlet valve
Faulty timer
Spray arm clogged
Spray arm not spinning
Water temperature too low
Heating element faulty
Detergent dispenser faulty Timer or selector switch faulty
Drain hose kinked
Drain valve faulty
Timer faulty
Pump impeller clogged
Door not closed tight Door gasket damaged
Water inlet valve connection loose Hose split
Broken spray arm
Faulty pump seal
---------------------
Solutions:
Check circuit breaker.
Latch door. Check door switch.
Check timer and timer motor.
Check float switch.
Check water inlet valve.
Check timer and timer motor.
Clean holes in spray arm.
Check spray arm for rotation.
Adjust water heater setting.
Check heating element.
Check detergent dispenser.
Check timer and timer motor.
Check selector switch.
Check drain hose.
Check drain valve.
Check timer and timer motor.
Call repair service.
Adjust door latch.
Replace door gasket.
Check water inlet connection.
Check hoses.
Check spray arm.
Call for repair service.
==================
---------
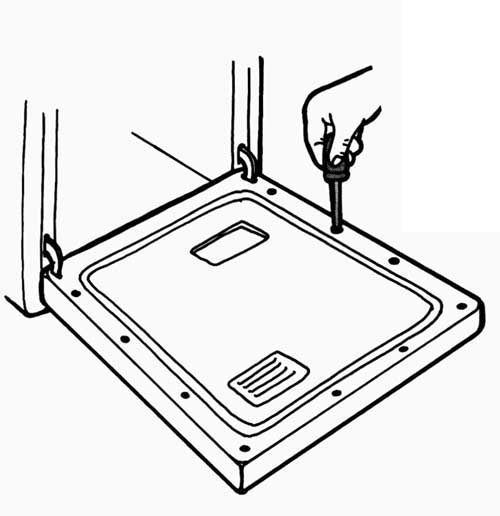
Step 6-1. Removing the door panel. Turn off the power to the dishwasher
at the service entrance panel. Open the door and remove the screws along
the inside edge of the door. These screws hold the door panel in place. Now
remove the door panel from the front of the door.
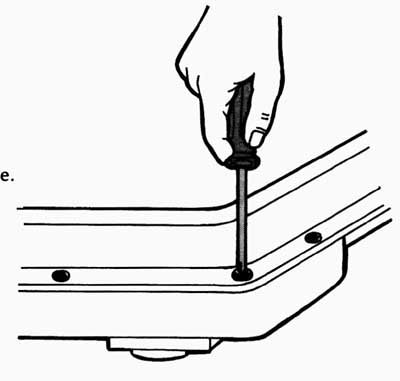
Step
6-2. Unscrewing the control panel. Now remove the screws around the top inside
edge of the door. These screws hold the control panel in place. Support the
control panel with one hand to keep it from falling.
----------
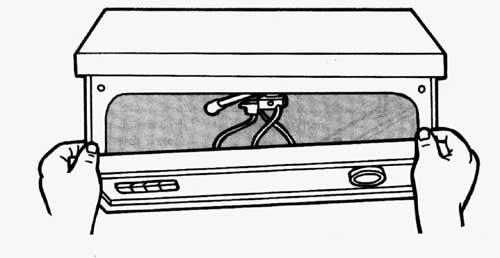
Step 6-3. Removing the control panel. Close the door and lower the control
panel, being careful not to damage or strain the wires.
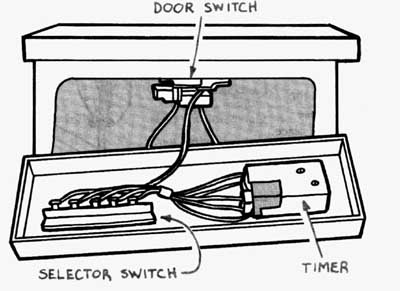
Step 6-4. Gaining access to the controls. You should now have access to
the timer, door switch, selector switch, wiring diagram, and detergent dispenser.
----------------
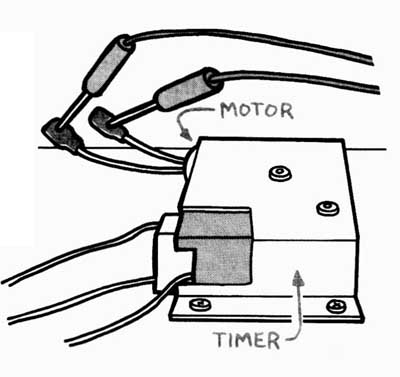
Step 6-5. Testing the timer motor. Unplug the wires going to the timer motor.
Set a volt-ohmmeter on the R x1 scale. Place one probe on one of the wires
and the other probe on the other wire. The needle should move, showing continuity.
if not, the motor is faulty and the entire timer will have to be replaced.
if the motor checks okay, check the timer.
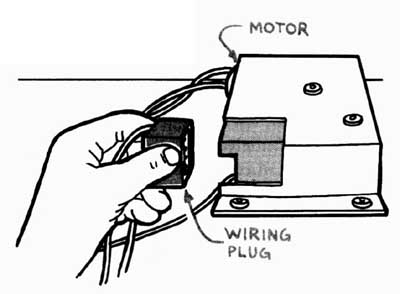
Step 6-6. Testing the timer. Disconnect the wiring plug from the timer terminals.
Now consult the wiring diagram on the back of the door panel. Set the volt-ohmmeter
to the R x 1 scale and touch a probe to each terminal of the first cycle.
The needle should move to 0, showing continuity. Turn the timer dial to the
next step in the cycle. Touch the probes to the terminals connected to that
step in the cycle. Again, the needle should show continuity. Continue turning
the dial and checking the terminals until you go through the full cycle If
any pair of terminals fails to show continuity, the timer should be replaced.
------
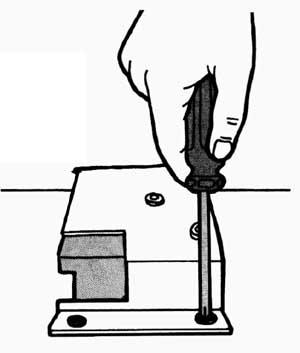
Step
6-7. Replacing the timer. Remove the timer knob from the front of the panel.
The wiring plug and the motor wires should already be disconnected. Remove
the screws holding the timer in place. Install the new timer, replace the
knob, and reconnect the wires and wiring plug.
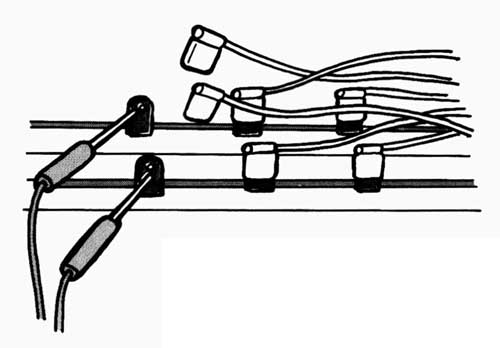
Step 6-8 Checking the cycle selector switches.
With the power disconnected and the control panel removed, set the volt-ohmmeter to the R x 1 scale. Now disconnect the two wires to the terminals of the first switch. Press that switch to the ON position and connect the probes to the two terminals. The needle should swing to 0, showing continuity. With the switch off, the needle should swing in the other direction, indicating no connection. If that switch checks okay, reconnect the two wires to the terminals and go to the next switch. Repeat the steps until you have tested all the switches. If any switch fails to show continuity replace that switch.
-------------
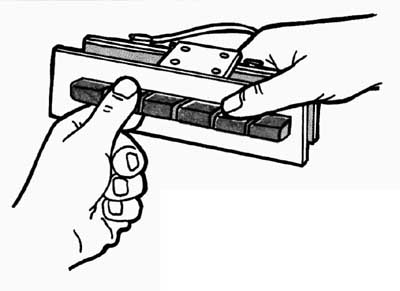
Step 6-9. Replacing a cycle selector switch. Remove the screws holding the
switch bracket to the control panel. Remove the push button from the faulty
switch. Remove the screws holding the switch in place. Install a new switch.
Replace the push button and reconnect the wires to the terminals. Then reinstall
the bracket on the control panel.
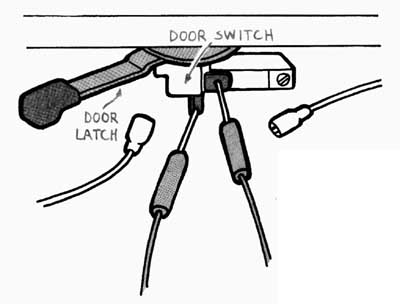
Step 6-10. Checking the door switch. With the power off and the control
panel removed, close and latch the door. Now disconnect the two wires from
the door switch terminal. Set the volt-ohmmeter on the R x 1 scale and touch
a probe to each of the terminals. The needle should swing to 0, showing continuity.
With the door unlatched, the meter should indicate no continuity. If the
switch fails these tests, install a new one.
----------
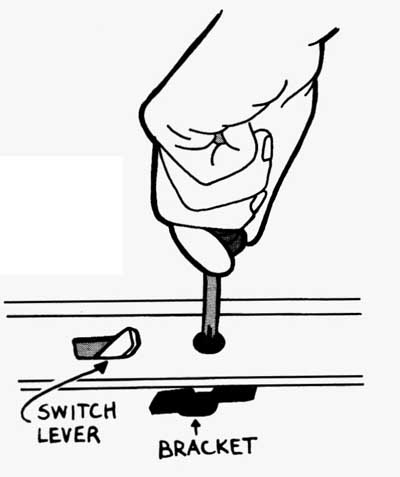
Step 6-11. Installing the door switch. With the wires disconnected, remove
the screws holding the switch to the door panel. Mount the new one in the
door panel. Connect the wires to the terminal of the new switch.
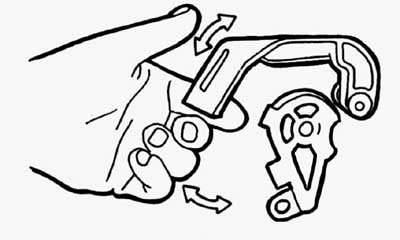
Step 6-12. Checking the detergent dispenser. Work the detergent dispenser
arm back and forth by hand to make sure it doesn't stick. Replace any damaged
parts.
-----------
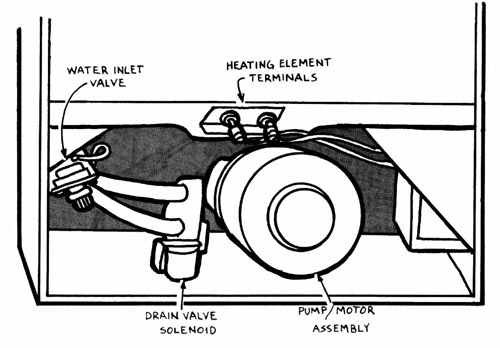
Step 6-13. Removing the lower front panel.
With the power to the dishwasher off, remove any screws holding the lower front panel in place. Pull the panel down and lift it away from the front of the machine. Now you should have access to the water inlet valve, the drain valve, the pump and motor assembly, the terminals to the heating element, and the terminals to the float switch. The float switch probably is positioned near the bottom of the tub and might be hard to see.
------
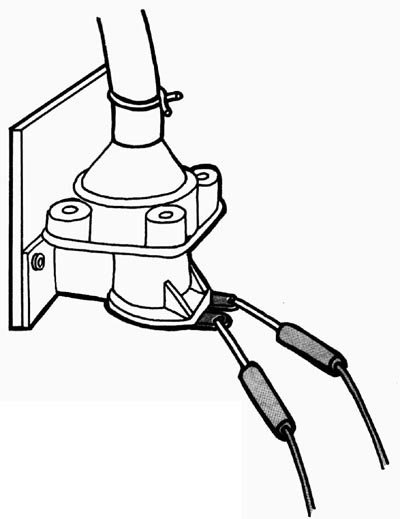
Step 6-14. Testing the water inlet valve solenoid. Remove the two wires going to the terminals on the solenoid. Set the volt-ohmmeter on the R x 1 scale and touch the probes to the terminals of the valve. The needle should move, showing continuity. If not, install a new water inlet valve.
------
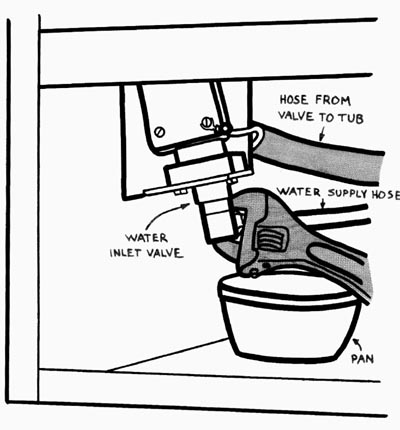
Step 6-15. Removing and replacing the water inlet valve. Before removing the water inlet valve, shut off the hot water supply valve under the sink. Place a shallow pan or an old towel under the inlet valve to catch any spilled water. Use pliers to disconnect the hose from the valve to the tub. Use an adjustable wrench to disconnect the water supply hose from the valve. With the wires disconnected, remove the screws that hold the valve to the machine. If the old valve tested okay, pry out the screen and clean it with an old toothbrush. Place the screen back in the valve and reinstall the old valve, If the old valve failed the test, install a new one. Reconnect the water line and the wires.
----------
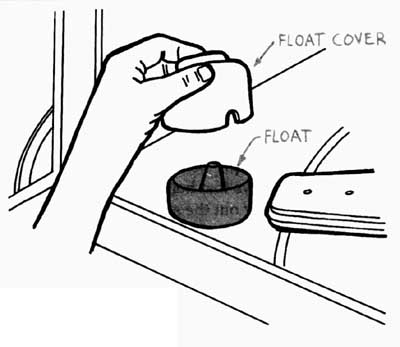
Step 6-16. Checking the float.
Open the door and slide out the lower dish rack.
Locate the float in one of the front corners of the tub.
If the float has a cover, remove it. Now check the float to make sure it moves up and down freely. Lift off the float and check for any caked detergent. if the float is not damaged and moves freely, reinstall the float.
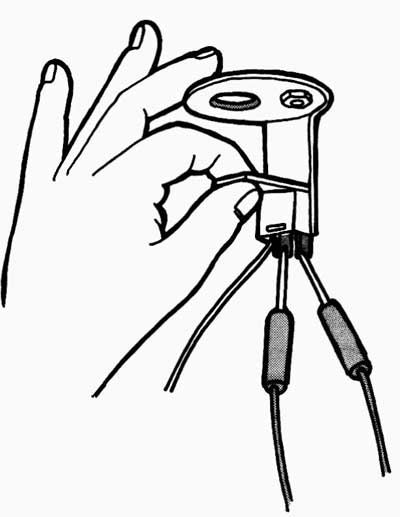
Step 6-17. Testing the float switch. With the lower panel removed, look
at the area directly below the float in the tub. You should see two wires
going to a switch. This switch is the float switch. Disconnect the two wires
going to the terminals of the float switch. Using a volt-ohmmeter set to
the R x 1 scale or a continuity tester, touch the probes to the terminals
of the switch. The needle should show continuity, if not, install a new switch.
Remove the screws holding the switch in place, install the new switch, and
reconnect the wires.
----------
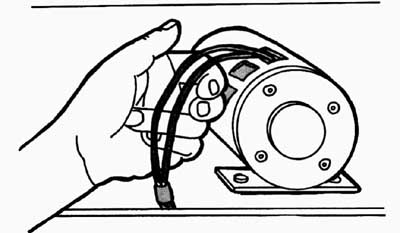
Step 6-18. Checking for a drain valve.
With the lower panel removed, count the number of wires going to the motor. If you see four wires, the motor is reversible and does not have a drain valve. If you see only two or three wires, the motor is nonreversible and should have a drain valve.
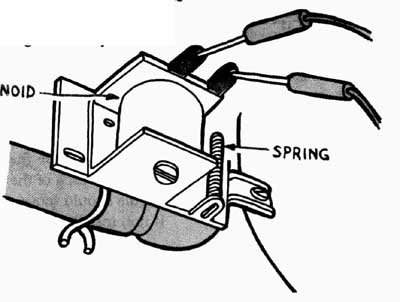
Step 6-19. Testing the drain valve solenoid. Locate the drain valve near the pump and motor assembly.
Disconnect the two wires going to the terminals on the drain valve solenoid. Set the volt-ohmmeter on the R x 1 scale and touch the probes to each of the two terminals. The needle should move, showing continuity If not, install a new solenoid.
----------
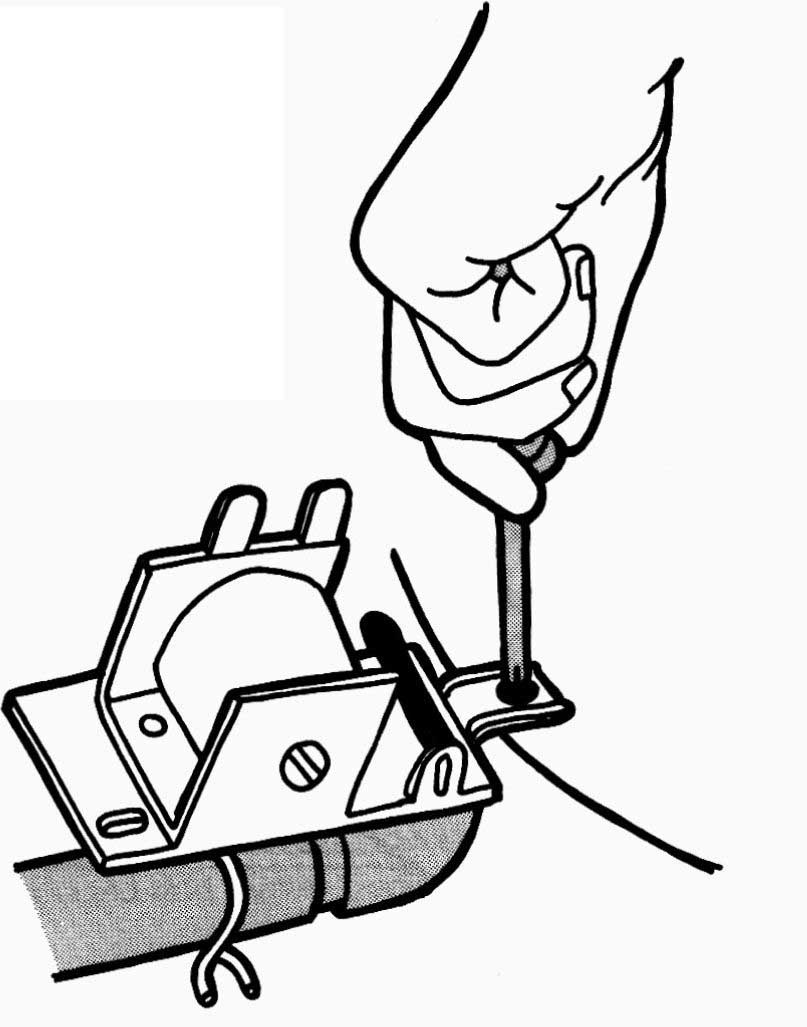
Step 6-20. Replacing the solenoid. With the wires disconnected, remove the screws holding the solenoid to the valve. Disconnect any springs, install the new solenoid, and reconnect the springs. Mount the new solenoid on the valve and reconnect the wires.
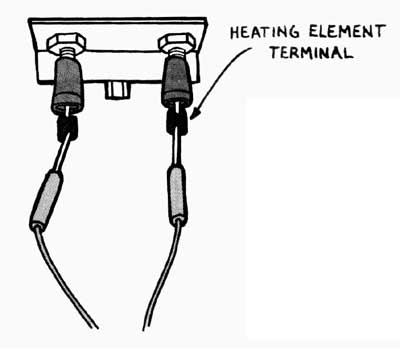
Step 6-21. Checking the heating element. With the power turned off and the lower panel removed, locate the two wires going to the heating element. Disconnect the two wires going to the heating element terminals. Set a volt-ohmmeter on the R x I scale and touch a probe to each of the two terminals. The needle should move, showing continuity. If not, install a new element.
-----------
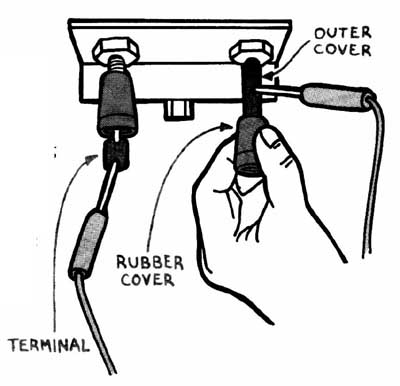
Step 6-22. Testing the heating element for a short. if the heating element checks okay, slide down one of the rubber covers, exposing the outer cover of the heating element. With one probe touching a terminal, touch the other probe to the outer cover of the element. The needle should not move at all, indicating no connection. If it does move, replace the heating element with a new one.
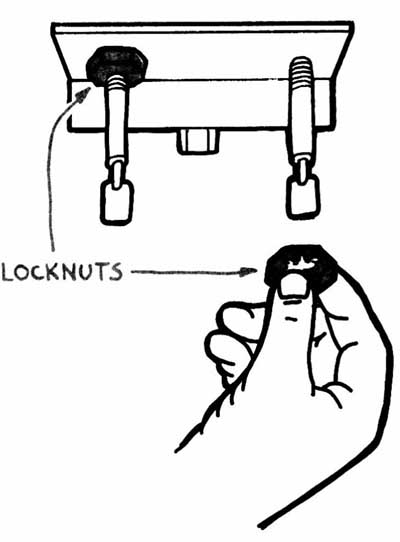
Step
6-23. Removing the heating element. With the wires disconnected, remove the
rubber terminal covers and unscrew the locknuts that hold the element in
place.
----------
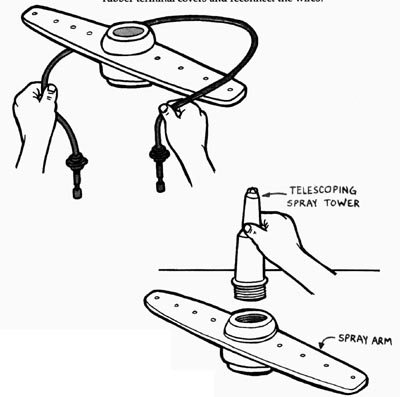
Step 6-24. Installing a new element. From inside the tub, remove the element and install an exact replacement. Then reinstall the locknuts and rubber terminal covers and reconnect the wires.
Step 6-25. Checking the spray arm. With the power to the dishwasher off, remove the bottom dish rack. Make sure the spray arm spins freely. if the arm has a telescoping spray tower, make sure the top slides up and down freely. Unscrew the spray tower or any plastic cover from the spray arm.
-----------
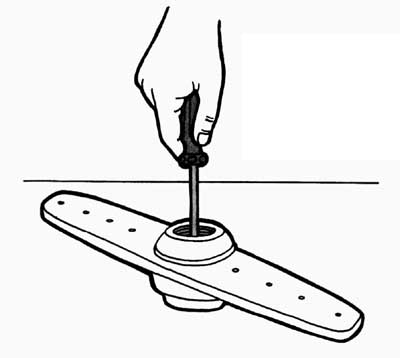
Step 6-26. Removing the spray arm. Remove the screw holding the spray arm in place and lift off the spray arm. Remove any strainers or filter screens from the bottom of the tub.
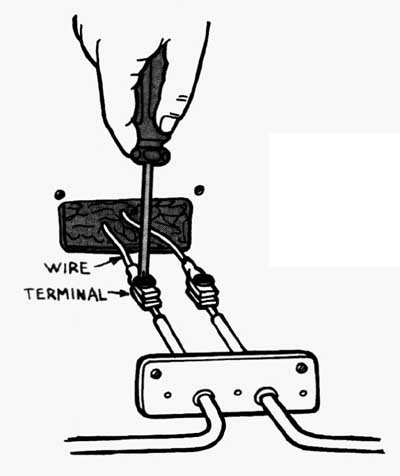
Step 6-27. Cleaning the spray arm. Unclog the holes on both sides of the
spray arm with a stiff wire.
Next rinse the spray arm, strainer, and screen under running water.
Scrub the screen and strainer with an old toothbrush.
Reassemble the parts in the reverse order.
-----------
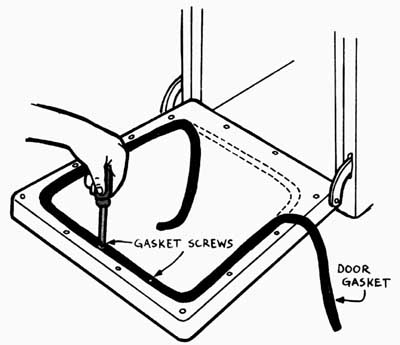
Step 6-28. Replacing the door gasket. Depending on the type of dishwasher, the gasket might be in the tub opening or on the door. The gasket might be held in place with screws or with dips that can be pried off with a screwdriver. Soak the new gasket in warm water to remove any kinks. Remove the old gasket and place the center of the new gasket at the center of the top of the door. Fasten several inches of the gasket in place at the top of the door. Working around the door a few inches at a time, continue fastening the new gasket in place. Once the new gasket is in place, make sure the door latch doses the door securely. Often the latch can be repositioned by loosening the screws, adjusting the latch, and then tightening the screws.
Home Guide/index top of page