The actual procedure of exterminating is based mostly on common sense. Unfortunately, there are times when even supposedly “trained” professionals fail to use common sense (often because their customers don’t let them, but too often because of improper training).
For example, if there are no pests on the lawn, it doesn’t make any sense to spray the entire yard. It’s dramatic, and often used by pest control companies (at least in some areas) as a selling point, but is essentially useless as a routine procedure. The heat and sunlight will cause even a residual chemical to break down in a very short time. (One of the things the E.P.A. looks for when evaluating a chemical for public use is its tendency to break down. Chemicals that last for long periods of time under general conditions tend to be a threat to the environment, and hence are either restricted or illegal.)
It’s a waste of time and money to apply a chemical where it’s not needed. It also increases the potential danger to you, your family, and the environment.
At all times, the goal is to put down as little chemical as possible, especially inside. There are several reasons for this. Most important is safety. The chemicals available to the general public tend to be relatively safe. That doesn’t mean, however, that they are completely safe. The less you use, the safer you are.
There are times when spraying the entire lawn is necessary, and also times when “fogging” the house—or a part of the house—is the only viable solution to a problem. These are normally special occasions, not routine. Most of the time you can get by with less. Sometimes with no chemical at all.
Your first priority is to remove or reduce the four needed basics—food, water, shelter, and entrance. The order depends on the pest being controlled, and the circumstances. (For a pest that stays outside, “entrance” will usually be either unimportant or impossible. A gopher has a “shelter” and a source of “food” that is generally outside your ability to control.)
Chemicals are an addition to, rather than a substitute for, other measures. These other steps are always your first priority. Only then should you begin to apply a chemical, once again, keeping the four basics in mind.
Insecticides are placed in, on, or near the nesting sites, and along the pathways between these sites and where the insect pest is getting its food, and where the pest is gaining entrance to the house.
Baits are placed in many spots. One of the primary functions of a bait is to replace the other source(s) of food and water. If the pest has other sources more readily available, your bait is likely to go untouched. Place the bait as near to the “shelter” as possible, and along regularly used pathways.
USING A SPRAY TANK
The “stock and standard” of pest control is the spray tank. A one-gallon tank is small enough to carry for fairly long periods of time, and can hold more than enough chemical to treat your entire home, inside and outside.
Remember that the idea is to put the chemical only where it’s needed, not to splatter it about until the house is dripping. And you’ll need very little, if any, chemical inside the home. (See A Standard Treatment later in this section.)
Most tanks have several nozzle settings, from stream, to a fine spray. Quality spray tanks have nozzles that spray in a fan shape. Less expensive units most often spray in a cone shape (like a standard garden hose nozzle). The fan shaped spray is easier to control since it can be turned to cover a wide area, or turned to cover al most no area. A cone shape always covers a wide area. About the only way to get good control, such as for treating the baseboards inside the home, is to adjust the nozzle to a tight cone instead of a wide one. Keep in mind that the resulting spray tends to be larger drops.
Many people have the tendency to over-pump the tank. This isn’t necessary, unless you need the exercise. It will also increase the chances of something going wrong with the tank, hose, nozzle, and connectors.
Lower pressure makes it easier to control the spray, which is why you should never over-pump the tank for spraying inside or where splashes can be a problem. Outside it’s less important, but even there a good medium pressure is best.
Most liquid chemical is applied outside, with the heaviest concentration usually going into the crack between the house and the ground. Anywhere else you spray depends on the particular pest problem.
For example, you might need to spray the eves for spiders. Do so very carefully, and keep in mind that the spray is going to drift down. Always spray away from yourself—never straight overhead.
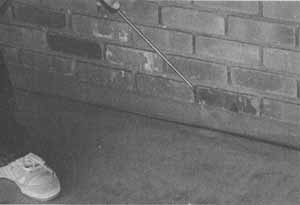
Concentrate the insecticide in the cracks, where most pests
hide.
If there is a breeze, let it work for you. Stand upwind and let that breeze carry the falling droplets away from you. (Don’t spray in a heavy wind.)
There are legal restrictions on the amount of chemical that can be used inside. You’ll never violate these regulations if you use your common sense. Confine your spraying to the baseboard where people and pets won’t be walking, and in front of the doors if the pests are coming in beneath the doors. Don’t spray indiscriminately. Have a reason for spraying a particular spot inside. And never soak down the entire floor.
Spraying Large Areas
There is rarely a need to treat large areas with insecticide. There should be a specific reason for doing so, such as a pest that is destroying the entire lawn.
The job can be done with a hand sprayer. If your yard is small, this is probably the preferred method since it allows maximum control.
Professionals usually use a power sprayer for treating large areas. A small gasoline engine or electric motor drives a pump which pulls the pesticide from a large tank (usually 15 to 100 gallons) and sprays it under fairly high pressure through a special chemical- resistant hose.
These units are expensive. Fortunately, there is an alternate solution for the homeowner—a hose-end sprayer (described in Section 1). These cost $5 to $15, depending on the quality, type, and where you buy it. The one you need should adjust for various dilution rates.
Most often the measurements are given in teaspoons or in tablespoons per gallon, which is strange because most of the insecticides you’ll be using give dilution rates in ounces per gallon. Still, this is no problem. Just remember:
- 3 teaspoons = 2 tablespoons
- 2 tablespoons = 1 ounce
So, for a dilution rate of 2 ounces per gallon, the hose-end sprayer should be set for 4 tablespoons (or 12 teaspoons) per gallon.
A hose-end sprayer is an inexpensive and effective way to chemically treat large areas.
Read the pesticide label carefully before starting. Some chemicals have different dilution rates for larger areas than for smaller areas.
The yard has to be picked up first. This sounds obvious, but too many people don’t bother to take the time and end up spraying the children’s toys or the pet dog. No one, including pets, should be allowed on the lawn for a minimum of several hours, and preferably not for several days.
The day you pick for the job should be still. A light breeze probably won’t hurt, but trying to spray in a wind is foolish. Safety is always important. If the wind can blow chemical all over your neighbors, and over you, put off the treatment for another day.
DUSTING
Dust tends to have a longer life span than liquid sprays. It’s useless in damp areas, but is the preferred treatment in many others.
Treating plants is one example of when dust is often preferred. It has a much lower tendency to burn the plant, and it isn’t absorbed into the plant as readily as liquids. If the plant is edible, be sure to wash it thoroughly, regardless of the kind of treatment used.
Other places where dust is often superior are attics and crawl spaces. These places are usually dry, which allows the dust to stay active for very long periods. And since it’s a solid (rather than a liquid), it won’t be absorbed into the wood and insulation.
Dust is carried by air. This makes it possible for the dust to drift around and coat almost everything.
Consequently, be careful where you apply the dust. ( You won’t want to use dust where there will be people crawling around.)
Treating a large area, such as an attic, with a hand-pumped duster is difficult. Unless there is a natural air flow in the attic, you’ll have to provide it. Although not much is needed, it will be hard to pump enough to send the dust more than 10 or 20 feet. However, crawling into the attic and dusting as you back out isn’t always safe.
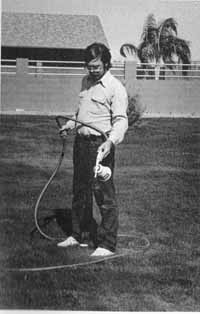
Spray on calm days; always aim downwards.
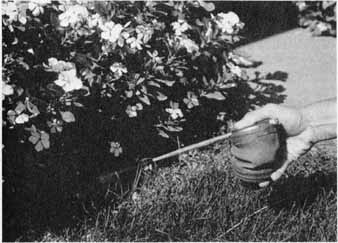
Dust can often reach places liquids cannot, and is generally
safer on plants than liquids.
There is always the physical danger of falling through the ceiling.
Worse, is that no matter how careful you are, while the dust is coating the area to be treated, it’s also coating you—including the inside of your lungs.
In other words, if you’re going to be dusting such an area, do so with extreme caution. If you don’t feel that you can do the job safely, don’t even try. You can always resort to an almost equally good method of treatment -- that of using aerosol bombs. (See the section, Aerosols and “Bombs,” later in the section.)
A similar use involves smaller areas, such as wall voids (the gaps between the walls of your home). Here, even a small hand duster will supply enough air flow for the dust to reach deep inside. The problem is gaining access to that void. You’ll probably have to punch a hole in the wall large enough to admit the nozzle of the duster.
A second use of dust is as a tracking powder. This means simply that the dust is put down so that the pest walks in it and then carries it back to its nest.
One of the most common pests to control this way is the ant. A small bead of dust is placed in a ring around the ant hill, several inches from the opening. As the worker ants go in and out, they carry some of the dust deeper inside. The goal is to have it affect the queen. (Unless you kill the queen, you won’t have much luck getting rid of the nest.)
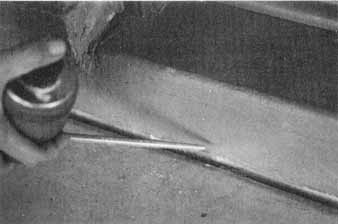
A bead of dust in cracks and in front of doorways
can be very effective.
Dust can also be used, carefully, along the outside of a door. It’s advantage here is its long life span.
Normally, dust is used only outside. It should never be used where people will be coming into contact with the dust. Keep two things in mind whenever you use dust: one, is that it has a long life span, and if kept dry, it’s likely to still be effective months after it has been applied; second, is its nature of being carried by air. A small puff in a cupboard may not seem dangerous at first, but remember that the dust is going to drift and coat the entire cupboard with poison.
AEROSOLS AND “BOMBS”
Too often these aerosols and “bombs” are thought to be the first solution to a problem. What you have to keep in mind is that the insecticide in the aerosol is almost invariably dissolved in oil, which means that it will stain. On top of this, is the problem of polluting the environment with the gases used inside the aerosol. Even if you’re unconcerned with staining, and unconcerned with the environment, the insecticides contained in most aerosols have a limited effect. What you spray out might kill off nearly 100 percent of what the spray hits, but an hour later there is nothing left.
There are two basic proper uses for an aerosol. The first and most common is for a quick kill. The second is as a flushing agent to drive pests from their hiding places so that both the knock-down effect of the aerosol and the lasting kill of the residual already laid down can do the job.
Unfortunately, too many commercially available aerosols don’t do either job effectively. Many are designed strictly for one-time use, with a spray that is so heavy (droplets are too large mostly because the nozzle opening is too large) that it falls out of the air and becomes useless in a matter of seconds.
An aerosol that sprays in a stream is designed primarily to hit a target at some distance. The main use of this kind of aerosol is to kill a wasp.
Other than that, the aerosol you choose should generally have a small nozzle opening and fine spray particles. This is particularly important if the aerosol is to be used as a flushing agent (to get the bugs out of their hiding places) and even more important if the aerosol is to serve as a “bomb” (such as filling an entire room or house, with a “fog”).
Fogging a house is not a standard procedure. If you do it, there should be a specific reason. This is because preparation for a proper fogging is time consuming if it’s to be safe.
The job begins with a thorough application of a good residual spray, such as diazinon or malathion. Then it gets complicated.
All plants and animals have to be removed from the house, including the fish in your aquarium. (Don’t forget to take out, or at least “bag,” the tank. If you don’t, the insecticide will be absorbed by the water.) It’s also necessary to remove all open food, such as bread. (Canned goods, if they’re still sealed, can stay.) It’s also best to remove, or at least cover, any dishes or other eating utensils. The refrigerator can be used to hold some of the things f the door seal is good.
Next, you have to go around the house and shut off any pilot lights. Preferably, even the electricity should be shut off so that there is absolutely no chance of a spark. Most “foggers” are not highly flammable, but many can ignite if given the chance. It doesn’t make much sense to have your house explode or burn down just to get rid of some bugs.
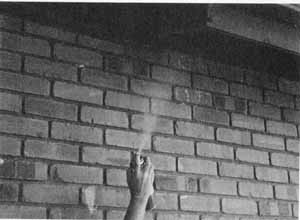
Aerosols are best used as a chasing agent to force pests out
of their hiding places, or as a quick kill.
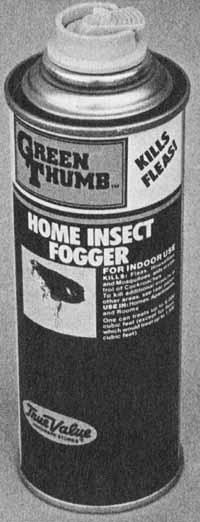
A total release fogger.
Obviously, the entire house has to be closed up, and any ventilation shut off. If the windows or doors don’t seal, or if there are holes in the walls, the fumes will be less effective.
Some bombs have the unfortunate tendency to leak, especially as the can nears empty. For this reason, several thicknesses of pa per, preferably with plastic beneath, should be placed beneath the can to prevent any possible damage. It’s also best to have the can slightly elevated, and as close to the center of the room as possible. Have this place—or places—ready before you begin.
Go to the spot farthest from where the can will be placed, or to the place with the heaviest infestation, and lock down the trigger, letting the bomb spray out and away from you. Work your way quickly to where the can is to be set—and get out fast. The time between when you first lock the trigger, and when you walk out the door, should be fast enough that you never breathe the fumes.
Then you have to find a place to go for six or more hours. The longer the better. For safety’s sake, it’s best to have someone come back early and open the house to clear any remaining fumes.
Fogging an attic or crawlspace is often just as complicated. First, there is the problem that the fog might find its way into the house. Second, there’s always the chance that whatever pest you’re trying to eliminate might find its way into the house. The reverse is also true—that fogging the house might chase the pests into the attic.
You don’t always have to fog the entire house, attic to ground. That depends on the pest and the extent of the infestation. More over, it might not even be legal to do the job the way it needs to be done. For example, if your home connects with a neighbor’s, fogging just yours will have little effect, and the fumes could seep into the other house causing problems for which you could later be held liable.
BAITS
Although there are baits for insects, they are usually used to control a rodent problem. For this purpose, baits can be highly effective—or almost totally useless. The use of rodent baits requires intelligent placement, and usually a lot of patience.
Keep in mind the four basic factors of food, water, shelter, and entrance, and the importance of knowing the habits of the pest. Placing bait without thought means that its effect will be a matter of luck.
The best bait, put in the best places, won’t have much effect if the pest has other sources of food. Your goal is to remove as many of these as possible, to make the pest turn to the bait more often.
Where does the pest live? What paths are followed between its nest and its source of food? The answers to these questions will tell you where to place the bait. (Of course, always keep in mind that safe placement is always of first importance. The bait should be inaccessible to children and pets, and completely out of sight.) It should be placed where the pest will come across the bait first, rather than by accident.
A STANDARD TREATMENT
Most pests come in from the outside. This is where the routine pest control job begins. Quite often it’s all you need. If you do a proper job outside, you might not need to put down any chemical inside.
The most important places to spray are where pests tend to gather. The crack where the ground meets the house is particularly important, since this is often used as both a hiding place and a nesting place. By treating this crack, preferably using the pinstream nozzle setting, you’re applying insecticide where it’s most needed, and where it tends to last the longest.
Keep your eyes open for any other cracks and crevices. Most homes also have cracks where the door threshold and sidewalk come together. There might also be cracks where the siding ends at the bottom of the house.
The width of the spray pattern depends on your particular circumstance. Contrary to what many people think, there is limited value to spraying wide swaths, and usually almost no value to regularly spraying the entire yard without a specific reason. Once you have the “average” home under control, a pint of liquid concentrate should last a year or more, even in the warmest climates where there are pest problems year round. (I live in Arizona, where there is an abundance of very tough pest problems, and am just now getting to the bottom of a pint I bought four years ago.)
The need for liquid spray inside depends entirely on your particular circumstance. It’s rarely needed except for pests that live inside the home or during the early stages of a regular regime of home pest control. Most pests can be stopped outside, before they enter the home.
Routine inside treatment should consist of nothing more than spot treatment, along doors and windows and at the baseboards where pests are regularly seen. There is no need to indiscriminately spray everything in sight on the chance that a pest might touch the chemical.
This is where a quality spray tank comes in handy. The fan spray makes it easier to apply a narrow strip of spray only near the baseboards without getting the chemical into the room where people—especially children—and pets can contact it.
In any case, use fairly low pressure in the spray tank, with the nozzle adjusted for a narrow cone. This gives you better control. And use as little spray as possible.
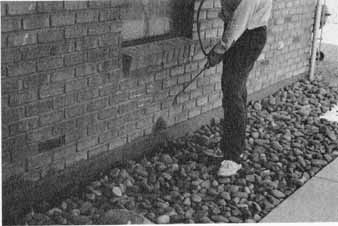
The crack where the ground meets the house is particularly vulnerable
because many pests hide and nest here. Insecticide sprayed here will also
last longer.
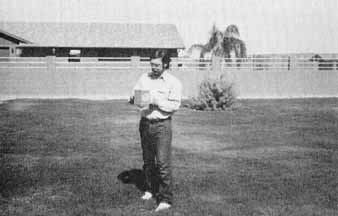
A Whirlybird makes spreading granules easy. For best results, walk
at a steady pace while turning the crank at a constant speed.
Back outside, use dust in dry areas, and on plants that have been bothered. Remember the basic rule—if you can easily see the dust, you’ve probably put on too much. The exceptions are when you put down a bead of dust in special places, such as in front of doorways and around ant hills.
If you have areas of moisture around the house, you may have to follow up the liquid spray with an application of granules. As always, use an amount that isn’t obvious when you’re done.
The job always ends with a thorough cleaning of the equipment, and a check to be sure that any and all chemicals are stored safely out of reach of pets, children or anyone who might accidentally poison themselves.
In most cases, the job should take no more than 30 minutes for an average-size house. Unless the pest problem is extensive, you probably won’t have to repeat it more than once a month, and less often in the colder months.
You might find that one complete treatment a year is sufficient. Other treatments can be applied in specific areas periodically.
Prev: Home Maintenance
Next: Insects—General Information