GETTING TO KNOW YOUR SEWING MACHINE
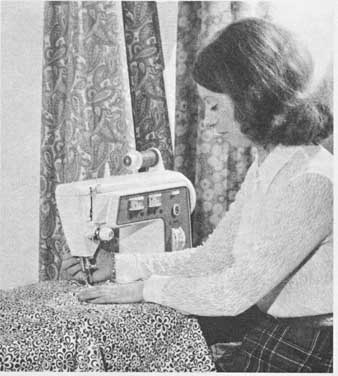
Before you can reach the exciting stage of buying fabric, cutting it out and making it up into an attractive fashion garment to Suit and fit you, it’s a good idea to spend some time just getting to know and understand your sewing machine. After all, this is the most vital piece of sewing equipment in your possession.
If you have still to buy your machine, then before spending a lot of money on an expensive sewing machine, consider carefully several points. First, what sort of sewing do you intend to do? If you want to do a lot of fancy decorative work then the machine you select will be quite different from a model capable of only straightforward ‘plain’ sewing—it will also cost quite a lot more.
Although there are many hundreds of models of sewing machines available, basically most of these fall into one of two categories: a straight-stitch machine, and a zigzag-stitch machine.
A straight-stitch machine sews only in a straight line, back ward or forward, and is adjustable for length of stitch. Attachments are available which expand the usefulness of this machine, so if the initial cost is an important factor in your choice, the straight-stitch machine might be the one to buy. The zigzag machine is a different matter altogether. There are a great number of models in a wide range of prices. The best way to choose is to visit sewing centers maintained by the various machine manufacturers and try the machines under supervision. The more a machine can do, the more it will cost. When making your selection, remember you will be using the machine for many years.
Machines are available as console models, which are free standing and permanently ready for use, with their own flat working surface. Portable models also of course have advantages as they are easy to carry around, to take from one part of the house to another, or—if you wish—to take with you when you go on holiday. Tables into which a portable machine can be set are available. Really a sewing machine is a very personal piece of equipment: so be sure to choose one which is right for you, for the sort of work you intend to do, and for your way of life.
Although nearly all the modern machines produced today are electric, many women are perfectly happy to continue using old manually-operated machines. Again, provided you know and understand your machine, there is no reason why you shouldn’t produce as expert results from an old machine as you would from an intricate and expensive modern model. I am fortunate enough to own a portable machine made in the second half of the 19th century. It was bought for next to nothing in a junk shop, only does chain stitch, but does this very adequately indeed. I have used this machine extensively for plain sewing, for making fashion garments and soft furnishings for my home. The results are perfectly acceptable!
Remember however, whichever type of machine you choose, that a sewing machine is a precision instrument. It requires constant care and attention if it’s to run well. The instruction manual will show how to keep it in good working order, how to make simple adjustments and how to operate it. If you don’t have the manual for your machine, the manufacturer can usually supply one even if the machine is not of recent manufacture. It’s well worth having the manual at hand constantly as a reference to the names of the operating parts mentioned from time to time in sewing directions. The manual will also tell you how to adjust the pressure and tension on your machine so your fabric is held firmly while the machine is stitching, and so you get a balanced stitch exactly the same on both sides of the fabric.
The manual will also tell you how to thread your machine, fit the needle and alter the length of stitch. As a general rule, the finer the fabric the shorter the stitches should be. Heavy, thicker fabrics need longer stitches.
The actual machining of a dress you buy ready-made takes a factory machinist only a matter of minutes—there is no reason why you should not eventually do the same.
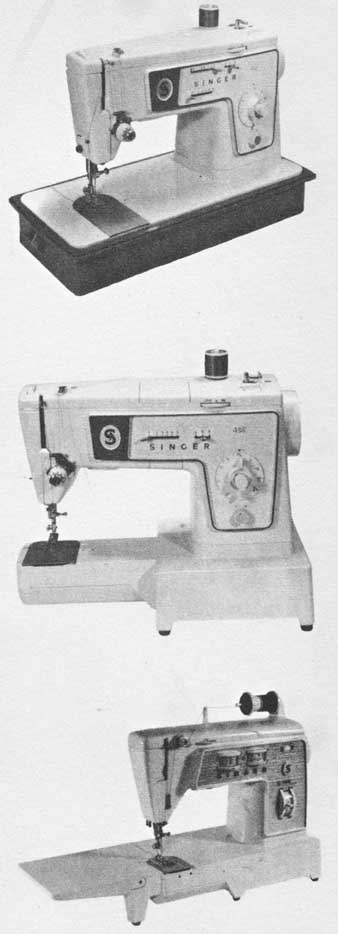
Three zigzag machines by Singer. From top to bottom: model 416, a lightweight machine with stretch stitch and automatic buttonholer; model 438, which has a/I the features of the 416 p/us many decorative stitches; and the luxury 760 ‘Touch and Sew’ convertible which offers instant, perfect sewing—simply at the touch of a button—and a ‘magic’ se/f-winding bobbin.
If you have never used a machine before, have several practice sessions on odd scraps of material before you embark on making a dress. Begin by sewing straight lines of stitches. Use a soft pencil to draw lines on your fabric scraps then stitch along these guidelines. Then try squares, zigzags and curved lines, working at different speeds. Then do the same exercises without pencil guidelines.
Once you are proficient on one layer of fabric, do the same stitches on two layers, pinning the layers together with the pins at right angles to the line of machining, and stitching 3/8 in. from edge of fabric. If your machine has a hinged foot you can machine over the pins but with a fixed or rigid foot you must take them out as they reach the presser foot otherwise you could damage the needle. You will find it easier to keep your stitching line straight if you watch the distance between the edge of the fabric and the right-hand side of the presser foot to see that it’s always the same rather than watching the line of stitching and the needle.
Even if you are already used to machining, it’s always a good idea before making up any garment to take two scraps of the fabric you are using, pin them together and machine a few lines— curved, straight and zigzag. Look carefully at the fabric and see if it has puckered on one or both sides. If both sides are puckered, then the tension is too tight and the stitch probably too small. Loosen the tension, lengthen the stitch (a lower number of stitches per inch) and try again. If only the under layer is puckered, your fabric is ‘travelling’ so it must be basted before you machine any seams; otherwise without basting, the under layer will always end up shorter.
This tendency of the under layer to ‘travel’ can on occasion be useful—for instance, when you set in a sleeve, machine the sleeve into the armhole with the sleeve underneath and the teeth of the machine will ease away the fullness of the top of the sleeve for you. Or, if you are stitching straight and bias strips of fabric together, place the bias strip underneath as it’s more likely to stretch than the straight piece.
If you have a machine with lots of attachments, do practice with them until you understand how they all work. The instruction manual with the machine should tell you how to fit and use them.
Fastening threads:
Secure threads at the beginning and ending of a stitched seam with one of the following methods:
Backstitching. This is done on many machines by simply moving a lever to ‘reverse’. If your machine does not reverse, raise presser foot, keeping needle in fabric, turn fabric round, lower foot, and stitch back over the last few stitches.
Tie thread ends. Remove stitched fabric from under presser foot, and cut threads leaving 3-in, ends on fabric. Draw one thread through to wrong side of fabric, and tie both threads together with a flat or reef knot. Clip threads to
Lock-stitching. This method can be used on firm, heavyweight fabrics. Before you start to stitch the seam, hold fabric in place with the left hand so that fabric does not feed through the machine. Raise the presser foot slightly with the right hand while making three or four stitches very slowly. At the end of me seamline lockstitch the final stitch following the same procedure. Clip threads to .in.
CHOOSING YOUR FABRIC AND YOUR FIRST PATTERN
If this is to be the first garment you have ever made, it’s important to choose both pattern and fabric with care. An ideal pattern for a beginner is a simply-styled dress or blouse, with no complicated fitting techniques, and preferably without a collar to set in or sleeves. A princess line dress where bodice and skirt are cut in one piece, is preferable to a style where the bodice is joined to skirt along waist line.
Choose an easy-to-handle fabric to suit the pattern you have selected. Slippery materials and ones that fray easily can try the patience of the most experienced dressmaker. Cotton fabrics are all good for beginners. So are the cotton and wool mixtures, and fine Shetland wools.

This elegant dress would be a good pattern choice for a beginner, for
there are no sleeves to set in, and the bias-cut skirt has no waistline fitting.
Top-stitching adds extra fashion interest to bodice and neckline.
A plain fabric which won’t need lining is a good choice. If you want a printed fabric, then make sure the design is a small irregular one. Checks, stripes and prints with a large or regular pattern repeat are tricky, as they need careful matching at seams and edges.
Check your pattern measurements:
When you have bought your pattern in the size nearest your body measurements, it’s advisable to check certain of its measurements with your own to see if the pattern may need some slight alteration before you cut out your fabric.
You have already measured your bust, waist, hips and back waist length; write these measurements down and from the back of your pattern envelope fill in the corresponding pattern measurements.
Also you should take the following measurements and write these down;
1. Sleeve length, from shoulder to elbow.
2. Shoulder length, from neck to armhole.
3. Sleeve length, from elbow to wrist.
4. Centre front skirt length.
5. Centre back skirt length.
Now take these same measurements on your pattern pieces. Measure the front shoulder, for measurement number 2 above. You will quickly be able to see whether you need to make any basic alterations in your pattern at this stage.
CUTTING YOUR FABRIC
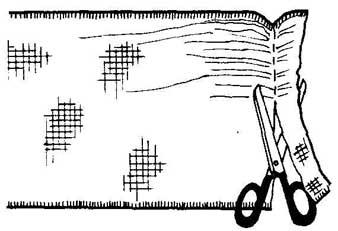
Before you can begin to cut out your pattern pieces from your fabric there are one or two important preparations to be made. First, you must make sure your fabric is thread perfect: this means a single thread of the fabric’s weave should run across the cut or torn edge from selvedge to selvedge. The following methods can be used to ensure your fabric is thread-perfect:
1. Tearing. If the fabric was not torn off the bolt of material at the time of purchase, check to see if it will tear. About an inch from the cut end, clip one selvedge with scissors, tear firmly and quickly to the second selvedge, then cut through the selvedge. If the fabric tears successfully, then repeat the process at the other end. Cotton and synthetics, some wools and silks can all be straightened by tearing, but never treat the crosswise edges of linens in this way.
2. Drawn thread. Clip into one selvedge with scissors. Pick out one or two crosswise threads of the fabric with a pin. Grasp the thread with your fingers and pull gently, slipping fabric along the thread with the other hand. Cut along the pulled thread as far as notice it clearly. If the thread breaks, cut along the line it has made until you can again pick up the end.
3. Cutting along a thread. When a fabric has a prominent thread or rib or a woven pattern such as a plaid or check, it can be used as a guide for cutting from selvedge to selvedge.
Most fabrics should have been treated to prevent shrinkage. But if your fabric has not had such a treatment, or if you are in any doubt it’s best to preshrink the entire fabric length before cutting out.
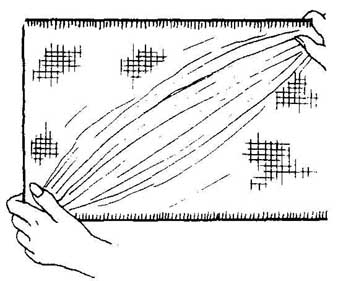
To shrink cottons and other washable fabrics, fold fabric lengthwise, pin selvedges and ends. Fold loosely several times. Put into warm water for about 20 minutes. Remove and unfold but leave the pins in. Hang straight over the bars of a clothes horse or several rows of clothes line. When dry, test to see if the grain of the fabric is straight. To do this, pin selvedges and edges of one end of the fabric together. If the fabric then lies flat and smooth on a table the grain is straight. If it’s not absolutely straight, then pull the fabric gently on the bias (that is, cross wise to the grain of the fabric) in the direction opposite to that in which the off-grain crosswise thread runs.
To shrink woolens, pin selvedges and ends together. Fold a large cotton sheet lengthwise and wet it thoroughly. Place fabric on the sheet so the sheet extends 6in. to 8in. beyond fabric. If necessary, use two sheets. Fold loosely and leave for 4 to 6 hours. Remove fabric and let it dry on a flat surface. If necessary, Dress.
Placing your pattern on fabric
Your pattern will include a number of cutting-out layouts. Choose the layout to suit the particular version of the pattern you are making, the width of your fabric, and the type of fabric (i.e. whether or not it has a nap or one-way design). Check to see whether your fabric is to be cut double or single.
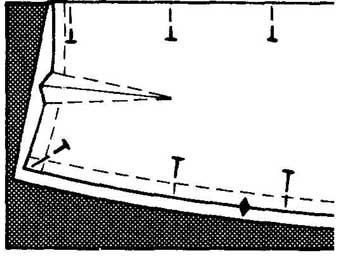
If it’s to be cut double, then fold it with the right side inside. If it’s to be cut on a single thickness, then lay fabric on your cutting surface so the wrong side is uppermost. Now pin your paper pattern pieces carefully in position, following the correct layout diagram as given with your pattern. If some fabric pieces have to be laid on the fabric with a straight edge on the fold of the fabric this is to prevent the necessity for a seam at this point in the garment. You should therefore take particular care to place such pattern pieces accurately on the fold, with the piece absolutely straight.
Pin these pieces in position first, pinning at 6-in, intervals along the folded edge and at right angles to it. Smooth out the IL J. pattern from the pinned line, and pin diagonally into the corners.
Then pin the sides; set pins at right angles to the cutting edge, with the points always towards pattern edge. Don’t let the pin points extend past the cutting edge. Pick up only a few threads of the fabric with each pin so the pattern will lie flat.
Pin the remainder of the pieces to your fabric, being sure to place them on the fabric grain as indicated by the grain symbol on your pattern pieces—this is usually a long line with arrow- heads at each end.
Place the pattern piece so both arrowheads measure the same distance from the selvedge of the fabric. Pin first near these arrowheads, then smooth out pattern piece and pin round edges. Cut out all pieces with your cutting shears exactly along the cutting line. Cut with long, firm strokes never quite closing the shears. Don’t lift fabric from the table; hold it down with the non-cutting hand.
When the same pattern piece is shown twice in the diagram— once in solid line and once in a broken line—the piece should be turned over before the second cutting.
When pieces are laid on a fold, such as a collar or a bodice front or back, make a tiny snip or notch at both ends of the fold edge. This marks the centre point and makes it easier to match pieces accurately when they are joined.
When you come to notch markings on your pattern pieces (used to match edges of one piece against another), then cut little notches in your fabric, cutting the notches outwards from the cutting edge: this keeps the seam allowance intact. When there is a group of two or more notches all together, then cut these as a block rather than singly.
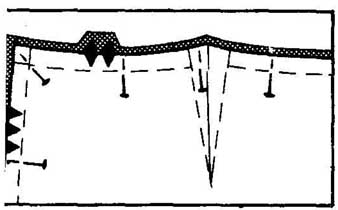
TRANSFERRING PATTERN MARKINGS
Your pattern pieces, as you will see, have a number of marks and symbols on them, as well as the basic information giving the umber and size of the pattern you are using, and usually the name of the particular pattern piece. All the construction symbols and marks—e.g. dart markings, buttonhole positions, pocket positions, indication of gathers—should be transferred to your fabric before you unpin the pattern piece. Straight grain symbols don’t have to be transferred.
It’s also a good idea to transfer the ends of seam lines to your fabric, and curved seam lines if stitching an even seam on curves is likely to be difficult. Straight seamlines don’t have to be transferred. For darts, mark the stitching lines and the line through the centre known as the fold line. Mark a line at right angles to the point of the dart. This serves as a visible guide for the end of the dart when the fabric is folded for stitching.
There are various ways in which these marks can be transferred from pattern piece to fabric:
Dressmaker’s tracing paper. This is used in conjunction with a tracing wheel. Use tracing paper in a contrasting color to your fabric color but light enough so the marks won’t show through thin material on to the right side. To mark single thickness fabric, place tracing paper with its marking side against wrong side of fabric, place pattern piece exactly in position on top, then trace over all the symbols with the tracing wheel. Mark dots with an ‘X’. Use just enough pressure to make a light line. To mark double thickness fabric, put one sheet of tracing paper face up under lower layer of fabric; place another sheet of tracing paper between pattern and upper layer of fabric Trace as for single thickness method.
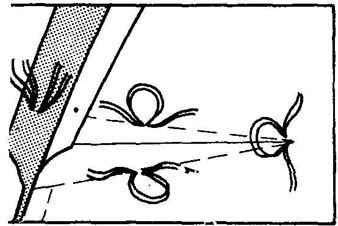
Tailor’s tacks. With a long, unknotted double thread, take a long end Take a second stitch over the first leaving a long small stitch through pattern and both layers of fabric, leaving — loop. Cut thread, leaving long end. Cut through top loop. Remove paper pattern. Separate fabric layers. Clip threads between, leaving tufts of thread on both fabric pieces.
Chalk and pins. Place pins through pattern and both fabric layers on symbols to be marked. Fold pattern back, and mark alongside the pins. Turn fabric over and mark underside over the pins.
To mark the right side of fabric:
Sometimes it’s necessary to transfer marks on to the right side of fabric—for instance, for buttonholes or pocket positions. First, transfer the marks to the wrong side using any of the above methods. Then baste stitch over these markings on the right side.
