Simplified Guide to Major Appliance Repair: Introduction
| HOME | Troubleshooting | DIY Tips |
|
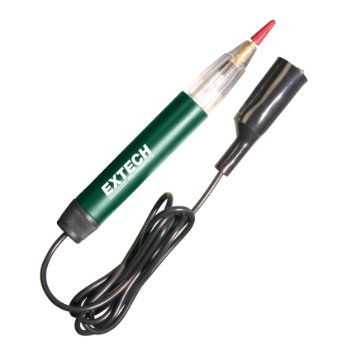
Designed for the average homeowner, this guide addresses the need for practical information on the inner workings and repairs of major electrical home appliances. To make effective diagnoses and avoid time-consuming guesswork, you must first understand the construction and operation of the appliance. Since a number of manufacturers market the same appliance, an attempt to cover them all would require a large volume indeed. However, all appliances operate on the same principle. With common sense and a basic understanding of how the appliance works, most repairs are not difficult at all. Try to get a mental picture of what the appliance was designed to do. Was it designed to heat or cool, run a motor, or both? Normally that’s all appliances do. If it is supposed to heat or cool, is it receiving electricity? If it is receiving electricity, does it have a thermostat? If it has a motor, does the motor run or make a noise? By checking probable causes in a logical order, you should be able to find most problems in a few minutes. Before making repairs, you will need to perform a number of tests with a volt-ohm-meter (VOM), so you should familiarize yourself with the owner’s manual that comes with the meter. The main points to remember: When making voltage tests, always keep your fingers on the insulated part of the probes; and be sure the meter is on the proper voltage scale, not on the resistance scale. When measuring resistance, or continuity, turn the knob to the resistance scale. Then zero the meter by touching the probes together and adjusting the meter to '0' (zero) before making the test.
To use a continuity tester, first make sure that no voltage is present. The appliance should be turned off and unplugged. Then touch the probes together to see if the tester’s bulb lights. If the bulb lights, the tester is working properly. Next, connect the probe to each terminal on the switch (or whatever you are testing) to see if the bulb lights again. A lit bulb indicates continuity. Most of the parts that you’ll need can be purchased at your local appliance parts supply store. Just look in your smart-phone using keywords “Appliance Major Parts”. You’ll need to know the make and model of the appliance and the number of the part, if it has one. If the store doesn’t stock the particular part you need, someone there should be able to order it for you. Before making any repairs, consult the owner’s manual that came with the appliance. It usually offers troubleshooting tips. Also check to see if the appliance is still under warranty. In most cases, any repairs made by an unauthorized service will void the warranty. At times, professional help is necessary, but even then, you need a better understanding of your appliance. You will be able to help pinpoint the problem and are less likely to be overcharged by an unscrupulous repair shop. This guide begins with electric water heaters, then covers laundry appliances, and ends with kitchen appliances. Each section includes a tools list and illustrated step-by-step instructions explaining how to repair the most common problems that occur with each particular appliance. The troubleshooting guides near the beginning of each section will help you determine what you need to look for on the malfunctioning appliance. 5. Ice Makers 6. Dishwashers Home Guide/index top of page |