|
Your most important piece of sewing equipment is a sewing machine. Any machine
in good working condition can be used satisfactorily—it doesn’t have to be
new or elaborate. If you are purchasing a new machine, select a ma chine that meets your needs and fits your budget. Learn to use your machine, study the owner’s manual and take the time to master any attachments and extra features. The success of your sewing depends on what you can do with your machine—not what the machine costs, nor the number of decorative stitches it will make. Keep your machine clean, well-oiled, and lubricated for trouble-free sewing. KNOW YOUR MACHINE Many exciting features have been added to the sewing machine since it was patented in 1846 by Elias Howe, Jr., but the basic process of forming the stitch is the same: The upper thread, carried by the needle, interlocks with the lower thread, carried by the shuttle hook, to form a locked stitch. The needle. The sewing machine needle is uniquely designed to penetrate the fabric and to carry the needle thread through the material. The various parts of the needle—the shank, shaft, long groove, eye, scarf, point, and short groove—have each been developed for a specific purpose. (Fig. 1)
The shank or upper end of the needle is the part held by the needle clamp. Most needles for home sewing machines are flat on one side of the shank, making it easy to set the needle correctly. The shaft of the needle extends from the shank to the point. The size of the shaft is determined by the needle size—the smaller the needle size, the thinner the blade. The long groove is on the side of the needle opposite the flat side of the shank. This groove guides and protects the thread between the last thread guide and the needle eye. The eye of the needle is proportioned to the size of the needle or the diameter of the needle blade. It may be larger on special needles for special situations like topstitching. The scarf or clearance above the eye permits the needle thread to form a loop so that the stitch can be made. The point of the needle is shaped to penetrate the fabric. The ballpoint is customarily used for woven and knitted fabrics; this type of point causes the fibers to spread without damaging them. A cutting point is usually used for nonfabric materials of low elasticity like leather. The short groove extends a short distance above and below the eye. The short groove and the flat side of the shank are on the same side of the needle. Bobbin. The bobbin holds the lower thread. It is placed into a bobbin case which is placed in the shuttle. The bobbin case may be a separate case or built into the machine. Shuttle. The shuttle travels around the bobbin case, and the shuttle hook carries the lower thread through a loop of the upper thread to make a lockstitch. Race mechanism. The race mechanism holds the bobbin, the bobbin case, and the shuttle. Tension discs. The tension discs regulate the amount of tension on the needle thread. Tension regulators. The tension regulator on the top of the machine regulates the tension discs. The tension is easy to adjust if you remember that the tension control is a screw just like any other screw. Turn it clockwise to tighten it and counterclockwise to loosen it. Some home sewers find it easier to remember that the higher the number on the tension regulator, the tighter the tension on the needle thread. The tension regulator on the bobbin case is a small screw which adjusts the spring on the case and regulates the bobbin tension. The lower tension is adjusted by tightening or loosening this screw. (Fig. 2) 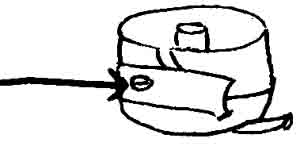
Stitch regulators. The numbers on the stitch-length regulator (1, 2, 3, etc.) indicate the number of millimeters in each stitch. A setting of 2½ is approximately 10 stitches to the inch. On older machines, the stitch length is indicated by the number of stitches to the inch (6, 12, 15, etc.). A setting of 10 indicates 10 stitches to the inch. The numbers on the stitch-width indicator show the width of the stitch in millimeters. Presser loot. The presser foot holds the fabric in place. It is also an invaluable gauge for stitching evenly. The outside and inside edges of the straight- stitch foot and zigzag foot can be used advantageously to gauge different widths. Use the inside of the straight-stitch foot to gauge 6 (1.6 mm) from the fold or seamline when edge stitching, clean-finishing, understitching, or hemming. 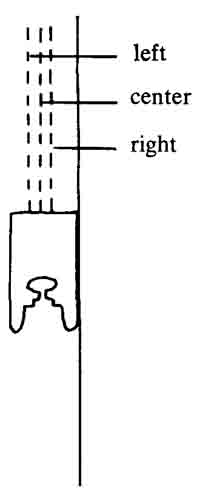
Varying the needle position also increases the use of the inside edge of the zigzag foot as a guide. The presser-foot shank is screwed or locked to the presser bar. The shank for most feet is low (Fig. 4a), high (Fig. 4b) or slanted (Fig. 4c). The feet within each group are interchangeable. This allows you to use a foot made by other sewing ma chine companies on your machine. Bernina has a unique snap-on foot; however, an adapter is available enabling you to use any low shank foot. 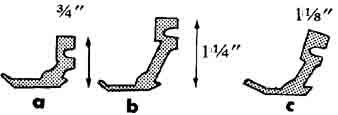
Presser—foot lifter. The presser—foot lifter lifts the presser foot and releases the upper tension so that the needle thread can be pulled easily. The presser foot on some machines can be lifted higher than the regular “up” position by holding the presser-foot lifter up manually. This is advantageous when changing presser feet or inserting fragile or bulky fabrics under the foot. Throat plate. Most machines have guidelines indicated on the throat plate. Use these guides to stitch accurately. If your machine doesn’t have guidelines, place a piece of drafting tape on the throat plate and , using a tape measure, mark guides the desired distance from the needle. (Fig. 5a) 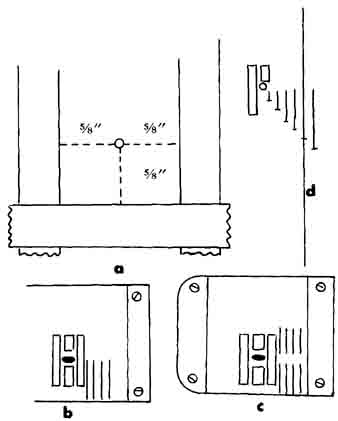
There are several less conspicuous guides on the throat plate as well—the numbers on the guidelines may be in a line even with the needle (Fig. 5b) or the guidelines may begin in a line directly opposite the needle. (Fig. 5c) Examine the throat plate on your machine. On some machines, the guidelines have crosslines to indicate when to pivot at a corner. (Fig. 5d) Most zigzag machines have a throat plate with a small hole and one with a large hole. Use the small- hole plate when straight stitching to hold the fabric securely, to prevent the fabric from being pulled down into the hole and to eliminate skipped stitches and puckered seams. Use the zigzag plate or plate with a large hole for zigzag stitching. Feed dog. The jagged teeth of the feed dog move the fabric backward. While the feed dog is pulling the lower layer backward, the presser foot is pushing the upper layer forward. This is one reason the lower layer creeps and ends up shorter than the upper one. The amount of creeping is increased if there is too much pressure from the presser foot. The pulling action of the feed dog can be used to your advantage when you are easing a longer piece to a shorter piece, shaping a seam, stitching a bias piece to a straight piece, or stitching a loosely woven fabric to a firmly woven one. Lower the feed dog to avoid snagging delicate fabrics when placing them under the presser foot or when stitching a bulky seam or making a buttonhole. Raise the feed dog before you begin stitching. Pressure regulator. The pressure regulator is used to adjust the amount of pressure on the presser foot. The correct amount of pressure is just enough to hold the fabric firmly, feed it evenly, and make a uniform stitch. Too little pressure makes it difficult to stitch a straight line; too much pressure causes the feed dog to leave an imprint on the fabric, the lower layer to creep excessively, and the seam to pucker. The pressure is adjusted automatically on many new machines. Hand wheel. The hand wheel can be turned clock wise or counterclockwise. The hand wheel on most home sewing machines turns counterclockwise when you arc stitching. To avoid making an extra loop which can cause the thread to bubble on the underside of the seam, breaking the thread or jamming the machine, don't turn the hand wheel in the reverse direction. Turn the hand wheel manually for control when stitching difficult seams. Free arm. The free arm is an optional feature which enables you to stitch hard-to-reach sections easily. Some machines are easier to convert from the fiat bed to the free arm and back again than others. This inconvenience tempts many home sewers to do all of their stitching on the free arm, sacrificing speed and precision. Sewing-machine light. The light on the sewing ma chine can be used for little pressing jobs, such as the shoulder seams and back-shoulder darts. Sewing-machine accessories. There are a number of attachments and special feet available for your sewing machine. I have described the ones which I like best. You may not need or want every attachment. Evaluate your needs and purchase only the attachments you’ll use. A zipper foot enables you to stitch close to a raised edge. It is an important aid for stitching zippers, cordings, bindings and difficult-to-stitch seam- lines. I like a foot that can be adjusted when I want to move it closer to the needle. An invisible zipper foot is required to set invisible zippers. It can also be used as a cording foot. Hemming feet are available in several sizes to make very narrow hems or seams. The most common size is 1 (3.2mm). The even-feed or walking foot feeds the top layer of fabric through the machine while the feed dog feeds the bottom layer. Use it for stitching pseudo-suedes, plaids, napped fabrics, thick fabrics such as denim, and for topstitching. The roller foot also feeds the top layer and pre vents slippage of some fabrics. The blind-hemming foot moves along the fold of the garment, enabling you to stitch the hem easily. An overcast foot has a tongue which holds the fabric fiat and prevents curling as you zigzag the edge. Snap-on feet are available for some machines. Several feet, packaged with the appropriate ankle, can be purchased for most machines. A buttonhole attachment enables you to make buttonholes on straight-stitch machines and keyhole buttonholes on zigzag machines. If the manufacturer of your machine doesn’t make a buttonhole attachment for it, attachments are avail able that fit most machines. Separate gauges, which are screwed to the ma chine bed, provide a guide for stitching straight or slightly curved seams. They’re difficult to use when stitching deeply curved seams. A magnet strip which can be stuck to the top of the machine is handy to hold the extra feet you use most often. A foam pad, like those used under typewriters, will keep a portable machine from sliding on the table. A small foam pad placed under the foot control will hold it in place. SEWING-MACHINE NEEDLE SELECTION The success or failure of a garment is sometimes as simple as selecting the proper size and type of needle for the fabric. Selection of the proper needle size is influenced by the size of the thread and the fabric weight and texture. The thread size determines the minimum needle size. The needle size should be just large enough to penetrate the fabric without bending. Using a needle that's too large may cause fabric distortion, puckered seams, and skipped stitches. Generally, the heavier the fabric weight, the larger the needle required to penetrate it. The needle type is usually determined by the shape of the needle point, shank, and the clearance cut above the eye. These features of the sewing-machine needle are varied for use on specific fabrics. It is important to understand the variations in order to select the most suitable needle. Examine various needle types with a magnifying glass to see the differences. Regular, sharp-pointed needles are only used on woven fabrics. (Fig. 6a) 
Ballpoint needles have slightly rounded points and are recommended for general sewing on knitted and woven fabrics. (Fig. 6b) 
Universal needles have a longer scarf, or clearance above the eye, than regular ballpoint needles. This flattened area helps to prevent skipped stitches. (Fig. 6c) The flat side of the shank which fits into the needle bar is deeply cut and positions the needle eye close to the point of the shuttle hook to eliminate skipped stitches. 
Yellow Band Needles (made by Singer), Q Needles (made by Sears) and Schmetz Regular Needles are all universal needles. Needles for two-way stretch fabrics have a fully- rounded ballpoint for skip-free stitching on coarse knitwear and elastic materials. Stretch needles have a super-fine ballpoint, an elongated scarf, a deeply-cut shank, and a special eye for stitching synthetics, elastic knitwear, and delicate fabrics such as very fine silk-like jersey. Leather needles have wedge-shaped cutting points and are designed for stitching leather and vinyl (not for stitching pseudo-suedes). (Fig. 6d) 
Jeans needles have a super-sharp point and are designed to penetrate denim, canvas, and other tightly woven fabrics. Basting needles have two eyes, one above the other. The upper eye is threaded to produce skip- stitches for basting or topstitching. The lower eye is threaded for regular stitching. (At this time, Bernina is the only manufacturer of this needle.) Topstitching needles are fine needles with large eyes which will accommodate a heavy or thick thread. Twin, triple, and wing needles are used for decorative stitching. Experiment with different brands of needles and different kinds of threads until you find the needle-thread combinations that work well on your machine. Keep a variety of needles in several sizes on hand. Change the needle often; synthetic fabrics dull the needle quickly. Most stitching problems are caused by needles that are the wrong size, damaged or inserted incorrectly. BABY-LOCK MACHINES Baby-Lock and Juki machines have recently been introduced to the home sewer. These machines trim the fabric edge and make an overcast stitch on the edge like a commercial overlock machine. There are two different-style machines available. One ma chine requires three spools of thread, the other re quires four. Admittedly, they are an extravagance, but if you can afford one, and you sew a lot, you’ll want one of these machines to save time and to make a truly professional finish. The three-thread machine has a single needle, which carries one thread, and two loopers, which carry the other two threads. As you sew, the three threads intertwine to overcast the edge. The four- thread machine has two needles, each carrying a thread, and two loopers, carrying the other two threads. Two threads intertwine to overcast the edge and two threads make a chain-stitched seam. Since I use this machine just to finish the edges, I prefer the three-thread machine because it makes a more attractive finish. |
| PREV: Get Organized | NEXT: Basic Sewing Skills | Home |
Tuesday, 2009-10-06 6:30
