Your kitchen remodeling begins with what you already have. Use the Kitchen Survey to assess your needs and establish your priorities. Then, using the sample Existing Plan as a guide, translate your three-dimensional space into a two-dimensional drawing.
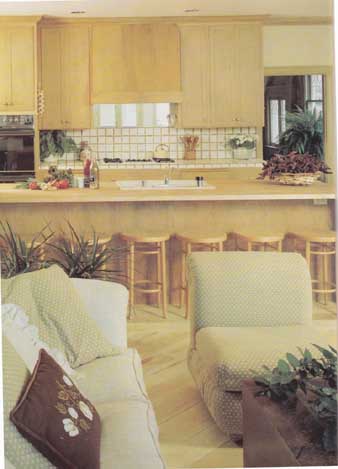
As you start gathering kitchen ideas, consider an open design like
this one. Family sitting and eating areas are well separated from kitchen
activities, but the open room encourages relaxed gatherings. Harmonizing
with the character of the old house, the colors, formal cabinetry, textures,
and trim are all Integral parts of a cohesive design.
If you are like millions of homeowners, you spend more time in your kitchen
than anywhere else in your home. So it’s probably important to you to have
an attractive room as well as an efficient work space for preparing food.
Creating such a kitchen is what this guide is all about.
Maybe you are trying to work within a kitchen planned for an earlier age. You might be running yourself ragged in a large kitchen or cramped into a small postwar tract kitchen with out-of-date and inconvenient appliances. Or, perhaps your kitchen works fairly well but needs improved lighting or energy-saving appliances. Whatever your situation, you have probably already said to yourself, “Something has to be done.” The next steps center around how far you can go, how much it will cost, what skills you will need, and where you can go for help.
Your budget may rule out total renovation plans, but “remodeling” can mean nothing more than adding a few shelves and applying fresh paint finishes. Or it can mean something more substantial, requiring carpentry, plumbing, and wiring skills. Although remodeling a kitchen is not a project to undertake lightly, you will find that everything falls into place if you take your time and break the project down into several steps. If you do not have basic skills, do some smaller projects first, and get help from friends and neighbors to upgrade your knowledge of building techniques. Our Plan:
Each section in this guide covers one of the five stages in a remodeling project. The sections are ordered in the sequence you should follow:
1. Getting started. Analyze the reasons for wanting to remodel by making a survey of your existing kitchen. Take a good, hard look at what you have now. Then draw a plan of your existing space. This will be the foundation for your new design. Section One provides guidelines for these two steps.
2. Defining your style. Section Two outlines the de sign process and provides a photographic tour of re modeled kitchens. By looking at a wide variety of kitchen styles, you develop a clearer sense of what you want to do in your own kitchen.
3. Creating a new design. Section Three shows you how to draw floor plans and elevation sketches for your new kitchen to help you develop your design through stages until you have just what you want. Our Shopping Guide describes some of the products you will find on the market and prepares you for decisions you will need to make when selecting cabinets, appliances, and materials. Finally, this section helps you organize your project and estimate the time, money, and materials it may require.
4. Taking out the old. Section Four provides specific information on removing appliances and cabinets and on stripping walls and floors. By following the step-by-step instructions and diagrams, you should be able to do most of this work yourself.
5. Installing the new. Section Five outlines procedures for installing cabinets, hooking up new appliances and lighting, installing counter tops, laying new floors, and adding the finishing touches.
If you start at the beginning and work your way through, you will arrive at the end with a new kitchen that suits your needs and reflects your own style.
The Project Overview
At the beginning of any major project it helps to be cognizant of the basic issues that will affect you as you proceed. It would be wasted effort to plan a kitchen that your building department, budget, or schedule won’t allow you to realize.
Building Permits
A visit to your local planning or building department will help you learn both the limitations and the possibilities of a remodeling project on your lot. In most communities there are restrictions on how far out you can build, how high up you can go, and what you can do without obtaining approval from your neighbors. You will need to know these basic facts before you can begin to consider your options.
Although there may be no restrictions on the types of alterations you wish to make, your building department usually requires you to obtain a permit for the construction. Whether or not you need a permit may depend on the total cost of your project, the degree of alteration, or both. If you need a permit, you will also be required to submit detailed working drawings showing any structural, plumbing, and wiring work you intend to do. If you plan to use a general contractor for the work, you may be able to rely on him to get the permit for you.
You will also need to know which codes cover which aspects of the construction so you will be able to meet the various building inspections as they occur. They generally come after rough plumbing is in, after rough electrical work has been done, after you have nailed up your wallboard, and after the subflooring is nailed down. A final inspection will be made after everything is hooked up and ready to go. You will not want to redo any work, so you should know how to do it correctly be fore you start. The individual inspectors can provide help and advice as you go along.
Money
Your bank and savings and loan offices are obvious sources of information on how to obtain the best possible financing for the size of your project. You may need only a slightly higher limit on your credit card in order to purchase the necessary materials or a small personal loan to be paid back over a short time. For more extensive remodeling, you may need a home-improvement loan, a loan on the equity you have built up in the house, or even a re-financing arrangement on the house itself. It is also possible to obtain credit through your contractor or cabinet dealer, or to seek help from a credit union, or even a life-insurance company.
If you put in active or passive solar systems, some of your outlay may be retrievable through federal or state income-tax deductions or credits. You will want to explore all possibilities before you get into the actual work.
When you work with professionals, give them a definite limit to the amount you can spend. However, it is all too easy to run a project over the originally intended budget limit. So don’t start with your total figure during discussions. Pick a lesser amount.
Time
The amount of time you plan to devote to the project will include any tasks you take on personally, the days given to waiting for deliveries, and making followup calls to suppliers, picking up supplies, and cleaning up. If you are employed full time, you will have only evenings, weekends, and vacations. If the project is not extensive, this can be done. A very small kitchen can be taken apart and put back into working order over a weekend, with only a few more days needed for finishing up. New construction, alterations to the structure, and relocating appliances will take longer, in which case you may decide to leave the coordinating to a professional and just turn over the key.
If you are like many homeowners, you will do some work yourself and subcontract some of it. Perhaps you’ll get involved in the dismantling process, have the professional supervise the major construction and installation, and then step in yourself to finish the room. This last stage can take as long as you can stand living in an unfinished kitchen. Most homeowners have found that remodeling takes tar longer than they originally bargained for, so give this part of the planning some careful thought. Both schedules and budgets are discussed in more detail elsewhere in this guide. With these basic considerations in mind, move on to phase one of your project.
Gathering Ideas
Start your project with one of the most enjoyable aspects: gathering ideas. There are many sources to which you can turn.
Internet and Computer. Lot’s of resources online, including DIY web sites, blogs and forums. Also, you can purchase architectural or design / layout software.
Magazines. If you have not already loaded up your supermarket cart with magazines, do so. “Shelter” publications, which deal with the home and its design, are full of innovative plans and new ways to use materials and products. The ads represent the newest and best of the products currently on the market. There are also special interest magazines devoted to kitchens. These contain just about all the products, manufacturers, and information you need to get started on your own collection of ideas.

Start a clipping file of kitchen photographs that spark ideas you might
want to try. In the kitchen shown here, open shelves above a breakfast counter
let in daylight and do not obstruct the view of the dining room; yet they
retain valuable storage space and provide an eye-catching display space.
Trade publications. If you have access to a large public library or the office of an architect or a contractor, look over some of the magazines distributed only to the trade. Some manufacturers, such as hardware producers, advertise only to the trade, and you will not get to see their products anywhere else.
Manufacturers. In most ads, the manufacturer provides some method for obtaining further information. The in formation includes brochures, many of them in color; specification sheets that give actual dimensions and finishes for the various lines of products; pamphlets that instruct you on how to install certain elements; and lists of dealers in your general area. If the product advertised is a big-ticket item, the manufacturer may alert your local retailer to your interest and you may be invited to look over the showroom displays.
Check your local library for Sweet’s Catalog. This is a compilation of many brochures put together for architects, designers, and builders. It contains hundreds of photographs and illustrations arranged by topic and manufacturer that can give you additional ideas about how to select and install products in your own kitchen design.
Professional and trade associations. Manufacturers and professionals belong to associations that often pro vide lists of local dealer sources and materials. They may also produce informative booklets on how kitchen cabinets are made, how to install ceramic tiles, or how to work with a kitchen designer. Most will not recommend individual manufacturers, suppliers, or professionals, but they can be of help in answering your general questions.
Showrooms. One of the best ways to get hands-on knowledge about specific products that intrigue you is to visit the showrooms of kitchen specialists, building suppliers, lumberyards, home improvement centers, plumbing suppliers, and other specialists. Although some outlets may sell only to contractors and other professionals, you can still look over an array of products that you might not find elsewhere. You can check out cabinet door hinges, the way drawers slide, and the final look of various finishes. You can turn on faucets to see whether they work easily and look over the styles to see just which spout works best with which faucets. You can open oven doors, measure different types of sinks, peer inside cabinets to see interior finishes and shelf adjustments, and read the control panels of major appliances. Catalogs and specifications are available, and you may be able to borrow sample chips or books to consider products more carefully at home. There you can see just how various materials will look under the actual day and night lighting of your own kitchen.
Organizing Your Research Materials
You will very quickly accumulate a pile of materials that you should organize to maintain a sense of order during your planning. File folders, scrapbooks, or three-ring notebooks with pockets are all helpful for grouping brochures, magazine pages, and notes. Separate them under such headings as Layout, Counter Tops, Appliances, Lighting, Cabinets, and so on. As you sort them into their various categories, the whirl of ideas circling around in your mind will begin to sort itself out.
Clip photos from brochures rather than keeping piles of dog-eared pamphlets. Jot down any dimensions necessary for planning, and put pamphlets dealing with installation aside during the planning stage. You can also winnow out those ideas and products you don’t like.
The Kitchen Survey
While you’re gathering new ideas and compiling your notebook, take a close look at what you already have. Even if you decide to go to a kitchen designer, architect, or contractor, you’ll be asked to go through the same steps outlined in this section. So make the Kitchen Survey outlined below, possibly saving yourself some money. When the survey is completed, you will have a basic list of priorities that will help you keep on track throughout your project. This list and the Existing Plan of your kitchen will be the foundation for all your future planning.
Start by thinking through the primary activities that take place in your kitchen—cooking, serving, eating, and cleaning up—and list the major problems that occur during each. Most of the questions in the following sections ultimately relate to how your kitchen works—or does not work—for you. By looking at your kitchen first in terms of activity “centers,” you’ll quickly pinpoint areas to which you should pay particular attention. Then create one page in your notebook for each of the following categories: Layout, Traffic Patterns, Counter Space, Cabinets and Other Storage Areas, Appliances, Surfaces, Lighting, and Style. Note special difficulties and needs under each heading. Try to determine what the biggest problem is and how it affects your kitchen activities. As you prepare your lists, possible alternatives or solutions may come to mind. That’s fine. Make note of them for future reference. But don’t focus on solutions right now; keep your attention on the very real draw backs you currently face. The questions that follow will help you focus on the specific problems that are prompting you to take on this project in the first place. They are by no means exhaustive, but they should prompt other questions of your own, helping you determine your real priorities.
Basic Layout and Traffic Patterns
Kitchen planning experts all talk about the work triangle formed by the three major appliances—sink, stove, and refrigerator. Their arrangement determines the number of footsteps necessary for one person to pre pare or clean up a meal. The recommended distances are 4 to 7 feet on each side of the triangle, totaling 12 to 22 feet for all three sides. For top efficiency, planners place the sink at an equal distance from the other two corners of the triangle. It’s not essential that your plan measure up to the norm, but by answering the following questions you may be able to determine some of the basic problems. For instance, do you walk too far between any two points of the triangle? Or are two of the points almost on top of each other? Further, how many cooks work in your kitchen? Do you bump into each other as you move around? Can you stand side by side at the cooking surface? Are you working around one another at the only sink? Is there a peninsula? Island? Worktable? Is there a place to eat? Are they all arranged for maximum efficiency? If not, list the problems.
Next, walk from the kitchen into the dining room, the laundry room, and the garage. Go back to the kitchen and make some notes: How many doors open into the room? Are they all necessary? Do kids and pets troop through your work space to get from one room to another? What happens when company comes and moves into the kitchen to help? Must you run around a corner to get to pantry items? Where are your laundry facilities? Would it make more sense to move them into or out of the kitchen? If you find you are doing more walking than working, go back to the assessment of your layout. Try to outline the major problems.
Counter Space
Counter space should function primarily as a work surface. Is this true in your kitchen? Or are the counters more like storage shelves? Are you trying to do all your kitchen tasks on one small counter? Do your kids draw or do homework at your serving counter? Do you have a place for dirty dishes near the sink? A drain-board for clean ones? A place to chop? A place to lay out dinner plates when serving food? Do you have space to put down large grocery bags next to the refrigerator? Is there room to sit a hot pot down next to the cooking surface or the oven? Are your counters all the same height? Can you sit at any of them? Are any approached from both sides? List the areas where your biggest problems occur, where you want more counter space or where you have counter space that isn’t used efficiently.
Cabinets and Storage
Lack of storage space is often caused by cabinets that are full of items which rarely, if ever, get used. Before answering the questions listed below, note everything you have not used during the past year or have taken out only once or twice. You may be able to find other places for these items. Then ask: Is there wasted space above the flat stacks of plates and bowls? Is there a cabinet wide enough to hold mixing bowls? Salad bowls? Mixer? Are cupboards too high to reach? Too low? Too shallow? Too deep? Is there space between the cup board and the ceiling where dust accumulates? Are shelves adjustable? Do the tall vinegar and oil bottles fit? Are cooking utensils stored by the stove? How convenient are the drawers for flatware and table accessories? Do you have any pantry or other storage space large enough to hold the biggest roasting pan, large coffee urn, bags of cat or dog food, mop and broom, vacuum, or picnic baskets and coolers? When you’ve checked out every existing storage space, list both your problems and needs in terms of drawers, shelves, bins, closets and their desirable widths, depths, or heights. If the only thing wrong with the cabinets is the way they look, consider refinishing them or just changing the doors. However, your next consideration is the appliances, and if you change them you may be forced to alter your cabinetry.


Appliances
Sink. If you are replacing the counter, you may have to disconnect the sink, so decide whether you want to reinstall your existing one. Is it scratched or discolored? Is your sink too low, too high, too deep, too shallow? Do large items like grills or roasting pans fit into it? Can you fill large pots easily? Does the garbage get mixed up with utensils and dishes? Do you use the second sink or wish you had one? Does the nozzle swing wide enough and high enough? Before moving on to the second point of your work triangle, decide whether or not you like the location of your sink.
Range/Cooktop/ Oven. Even if there is nothing wrong with the appliance, ask yourself whether it serves your needs adequately. Do you have gas and prefer electric or vice versa? Do you have enough burners? Are they big enough? Are the burners far enough apart to handle big pots or woks? Is the oven too small? Too slow? Could you use a microwave? Do you dislike your range enough to put it on your “must replace” list, or is the problem something else—a bad location, for example? List all the pros and cons about your current cooking appliances.
Refrigerator/Freezer. This is the third appliance in your work triangle. Does the door swing in the right direction? Is it reversible? Does it block anything or is it blocked by another appliance? Is the refrigerator big enough? Is the freezer big enough? How convenient is it to reach the ice? Is the appliance self-defrosting or do you have to defrost it? How often? Does it have energy-saving features? If your main problem is that you can’t open the door wide enough to get the crispers fully open, perhaps you can save the cost of a new refrigerator merely by re locating the existing one. Or perhaps you can have it re finished to match a new color scheme. Decide whether or not replacing the refrigerator is a must.
Dishwasher. If you’re moving the sink, the dishwasher may have to be relocated, too. Is this the time for a new one? Or a second one? How often do you use it? Does it have energy-saving cycles? Are the racks convenient for loading? Does it get the dishes really clean? Does it ever break down? How easy is it to have repaired? When open, does the door interfere with the traffic pat tern or with other cabinet doors? Is it convenient to the sink and to cupboards where clean dishes go? Does loading and unloading disrupt the work and circulation in the kitchen?
Trash compactor. Assess how high on your priority list this appliance should go. Is it convenient? Do you empty it every couple of days? Would you spend more on garbage collection without it? If the answer to these questions is “no,” reconsider your need for this appliance. The storage space it displaces may be more valuable to you.
Surfaces
Although many of your options for surfaces are related to style and color, you should consider the practical aspects: How often do you have to wax or clean your floor? Does it show dirt easily? Is it looking worn or dated in color or pattern? Is your plastic laminate counter burnt or scratched? Is the wood chopping block water-stained? How discolored is the grout between your tiles? Could the walls use a fresh coat of paint or some lively new wallpaper? Remember to consider all the major surfaces in relation to each other. If you replace one, you may want to replace others to maintain a particular look or style. Or you may be able to refinish the surface to update its look while saving some money.
Lighting
Notice how light affects the space in the morning, at noon, and at dusk. Is your kitchen too dark to work in without artificial light? Could you enlarge or add a window? Is there a shadowed area over the sink? Over the stove? Are the backs of the counters in darkness? Is it difficult to read the morning paper at the kitchen table or counter? Can fixtures be moved or turned? Exactly what is it about them that you don’t like, other than design? Analyze your lighting in terms of general ambient lighting and lighting for specific tasks. List all the problems you find.
Style
Make a list of the existing style elements in your kitchen—colors, textures, cabinet style, and so On; then answer these questions: Do you like the basic look of your present kitchen? Does it have a particular style? If so, what is it? Do you like your present color scheme? Are there structural elements you want to disguise or emphasize? What about the details? Do all the handles or knobs match? Are they in keeping with the style of your cabinets? Where do you hang dish towels? Are they just hooked through the refrigerator door handle? Can you reach oven mitts when you stand in front of the oven? Are your pots hanging from large nails instead of hooks? Do you have room for an attractive rack? Note all the elements that contribute to the overall look of your kitchen and write down everything you like or dislike about the look of your kitchen.
Structure
Kitchen walls may be constructed of wallboard, plaster and lath, wood paneling, brick, stone, or adobe. If your tentative thinking calls for expansion, you’ll want to know whether walls are load-bearing or not. Spotting the difference is tough—bearing and nonbearing walls look identical. If you have the original building plans, you will be able to tell. If not, a good rule of thumb is to see whether there is a wall either upstairs or downstairs the identical position. If there is, chances are you are beating with a bearing wall. If not, it is probably a partition wall. The difference is critical if you are considering tearing out the wall. A non-bearing wall is merely a partition and the only problem in removing it is clearing away be rubble and patching walls and floors. A load-bearing wall is part of the basic structure and, like the exterior walls, is used for support. If you remove such a wall. If you remove such a wall you’ll have to install a heavy beam to carry the load.
While looking at the walls, see whether or not outside walls have been insulated and whether they show signs of leaks or dampness. In an older house, check whether your framing is 2 by 6’s rather than today’s standard 2 by 4 studs. The wider studs sometimes placed farther apart than the 16-inch norm now used, might make it harder to work with standard doors and windows. Some older houses have walls with no studs at all. They are constructed with tongue-and-groove boards attached either horizontally or vertically and serve to wall off a smaller room. Such construction requires re placement or reinforcement if you plan to hang heavy objects like kitchen cabinets. The wood can be saved for use in a more decorative, visible way.
Determine whether ceilings are plasterboard, plaster over lath, panels on beams, acoustical tile suspended from a metal gridwork, or something else. Some of today’s high style kitchens pictured in magazines feature interesting uses of the air space. To get additional height, you might want to go up into an attic or second floor space. Or you may have a high ceiling you’d like to lower in order to provide a more cozy feeling with a well-lit area beneath a grid of diffusers.
Check your floors for squeaks or slopes. If you’re thinking of installing a number of additional heavy appliances, make sure your foundation and floors will carry the extra weight. You may need professional ad vice to be sure of this.
Plumbing
If you are considering rerouting appliances, familiarize yourself with the existing plumbing and with the way appliances work so you know what supply, drain, and vent lines are needed. Transferring your sink to the opposite counter may require all new venting as well as plumbing. Switching from an electric to a gas stove will entail running pipe to the gas supply. (Make sure you have one.) On the other hand, moving the refrigerator may be as simple as finding another outlet—unless you have an icemaker, which requires additional plumbing.
Trace all pipes and note the location of connections and shutoff valves. Note which are waste lines, which are supply lines, and which are hooked into the water heater. This step may prove difficult and will certainly entail crawling around in the basement or under the house and peering into the base cabinets. It may also require professional assistance. See our guide Basic Plumbing Techniques.
Wiring
The wiring systems in many older homes cannot carry the load of today’s appliances. Certain appliances use a lot more electricity than others and require their own circuit with a grounded outlet. This is true of electric ranges and ovens—microwave or conventional. If you are adding appliances or relocating existing ones, you will have to provide heavy-duty outlets, which may mean doing some rewiring.
Check the capacity of your system at the point where the main line enters your service panel—it is usually in the basement, garage, or entryway. If your home is old and has a fuse box, chances are that you have 110-volt wiring instead of the 220-volt wiring required by today’s appliances. Newer homes have circuit breakers that switch off automatically when any one line is overloaded.
Check which fuses or circuits serve which rooms by unscrewing fuses or flipping switches to cut off the power. When you have located the kitchen lines, turn the circuit breakers on and off again to see which lines serve what. Some outlets or switches may be on the same line, and some may be on separate lines. Those on separate lines may be capable of powering additional fixtures.
If there are blanks in the service panel, you may al ready have additional lines available. If you need more power, the utility company will have to install new lines. In order to complete your assessment of the wiring, you may want to use our guide, Basic Wiring Techniques, or seek professional assistance.
Heating and Cooling
If you are satisfied with your heating and cooling systems, just note the location of motor, ducts, and outlets. If you are not satisfied with your systems and will be opening up walls to expose and do plumbing work, now is the time to make changes. You’ll need to know exactly what you have before you can decide on possible changes.
In a steam or hot water system where heat is distributed through a loop system of pipes, you can tap in an additional radiator. You may wish to relocate air ducts for a gravity or forced-air heating system. A more convenient place for a duct might be under the kitchen sink, with a grill in the toekick (the recess at the bottom of base cabinets). That way, you’d have the warm air coming into the kitchen at a point where it would warm you more efficiently and be out of the way as well.
Now would also be the time to consider how you can lower your heating costs. For more information on this subject, see our Energy-Saving Projects for the Home, Any air conditioners directed into the present space should be examined for efficiency. Perhaps they need only insulation around the ducts. Or perhaps better window venting would enable them to work fewer hours during hot weather.
Survey Review
When you have enumerated the problems in your present kitchen, examined its structure, and scrutinized all the mechanical systems, organize your priorities. Go over all your notes. In each area, make a list of the most important things that are in need of change. Pull these together and make a “must change” list of top priorities.
Then look at your notes again for less critical problem areas. Make a list of these lesser priorities and label it “would like to change.” The rest of the items on your lists will be those that would be nice to change if at all possible, or that are okay now and not in need of change. When your priorities are listed and firmly in mind, you should be able to focus on your most important changes, even when you are dazzled by items be yond your budget.
 The Kitchen Survey will help you define the
functional and style elements you want in your new de sign. Here, well planned
storage units and a simple color scheme makes cooking both efficient and pleasant.
The Kitchen Survey will help you define the
functional and style elements you want in your new de sign. Here, well planned
storage units and a simple color scheme makes cooking both efficient and pleasant.
Your Existing Plan
When you have completed your priority list, put it aside for a bit so you can draw your Existing Plan which is an exact, two-dimensional rendering of your kitchen as it is right now. It will form the basis for all your future planning. First measure the overall dimensions of your kitchen (including any additional closet or other space that you might use) and the elements in the kitchen that you may keep. To make this plan, you’ll need some Inexpensive materials that are easy to find in hardware, stationery, or art supply stores:
- retractable steel tape
- ruler, 18 inches long
- graph paper (four or eight squares to the inch: ¼- or ½-inch squares) pencils
- eraser
- tracing paper
- masking tape
- plastic template of kitchen elements
- plastic triangle
- compass
You can do all your measuring first and mark the measurements on a rough sketch of your kitchen, or measure and draw to scale as you go. If your paper has a ½-inch scale, use one square for every foot. If your paper has a ¼-inch scale, use two squares for every foot.
Floor Plan
The most important part of your Existing Plan will be a scale drawing showing the floor plan of your kitchen, including cabinets and storage areas; cooktop, refrigerator, and sink; work and eating areas; the hot water heater, air conditioner, and other mechanical devices; and electrical and plumbing lines. The following sections outline the steps you must take in order to prepare a detailed floor plan.
Perimeter. Measure the basic width and length of the kitchen plus any adjacent areas you might use. Measure the distance of doors and windows from a corner or the end of a wall and from each other. Measure the width of their moldings or trims. Draw a line for each wall, leaving the proper amount of space for each door or window. Draw a second line outside the first. These parallel lines indicate a normal 4-inch wall. Fill in the space between the two lines with solid penciling.
Next, draw in the doors. If a door swings, show it in the open position. Using a compass spread to the width of the door, make a quarter circle from the hinges. Make a semicircle if the door swings both ways. For sliding doors, draw in the fixed one, and then indicate whether the sliding one is inside or outside the fixed one, and show it about halfway open. For folding doors, show a series of little w’s to the depth of each panel. Show pocket doors half open, sitting within the stud wall pockets. Draw in the windows. Use a compass to show the way they swing or use the half-open position for sliding windows.
Base cabinets. Measure these individually, as a whole bank of units, or both. Measure both width and depth, front to back. (Base cabinets in older homes are often shallower than today’s standard 24-inch depth.) Mea sure door and drawer widths as well so you can com pare them to new modules you may want to install. Draw in one long line to show the counter edge of a wall of units, three lines for a peninsula, and all four edges for an island.
Next, draw in the sink opening and the cooktop on the counter top outline, using either your template or measurements you make yourself. If you think you may want to keep them in their current locations, measure the width and depth of the range, refrigerator, dishwasher, and laundry appliances and plot them on your scale drawing.
Wall cabinets. These are normally 12 inches deep. compared to 24-inch base cabinets. Measure these units individually, as a whole bank, or both, just as you did the base units. While you are working along the upper bank of cabinets, measure wall vents or hoods that are attached to them. Draw the upper cabinets on your plan with a dashed line to show the proper distance back from the front counter edge of the base unit, Draw in one long dashed line to indicate a whole bank of units. Then draw in their door swings with dashed lines, showing how they swing out into the counter and the head area, If the hood over the range or any other cabinets project out farther than the standard 12-inch depth, indicate that on the plan.
Storage or pantry areas. Measure the width and depth of each storage or pantry area. Draw them in the same way you drew in base cabinets, but show that the counter top stops when it meets the pantry. Indicate how the pantry door swings.
Work areas. These are often a problem, so measure how many inches of counter space you have to the left and right of both the sink and the cooktop, and indicate these spaces on your plan. Note the dimensions of counter space by the refrigerator. If ovens are separate from the cooking area, measure the nearest space for putting down hot dishes.
Work triangle. If you have not already done so in your survey, measure your work triangle from cooktop to sink to refrigerator to cooktop again—midpoint to mid point—and indicate these measurements in another color somewhere on your plan or on a tissue overlay. Eating areas. Whether eating areas are built in or not, measure them precisely. Note the size of chairs and stools—side to side and front to back—and how much clearance you need for pushing them back or getting your knees under the table or counter. Note the size of any tables and the size of their pedestals or bases.
Other elements. Measure and draw in floor grills. Mea sure the hot water heater, furnace, air conditioner, and any other mechanical devices located within the kitchen area, and draw them in on your plan. If there is a door leading to their space, measure and draw in the length and direction of its swing. Note the location of all outlets, light switches, and light fixtures. Indicate where water and gas lines enter your kitchen. Note connections for an icemaker or island appliances.
When your heating units and utility lines are drawn in, you should have a complete floor plan in front of you, with all the elements that you may keep shown on the drawing. Sit back and look at it, darkening lines here and there if you need to clarify what’s going on.

As noted at the beginning of this section, kitchen remodeling begins
with what you have now. The two photographs to the above are “before”
shots of a small corridor kitchen used throughout this guide to illustrate
the various steps in creating any new kitchen design. The photographs immediately
pin point certain problems: the room’s dark and cramped look, the clutter,
and the conflicting shapes and patterns. You may feel you know your kitchen’s
faults all too well, yet photographs such as these help you see the room more
objectively. And because you’ll be using two-dimensional toots (floor plans
and elevations) to create your new design, photographs help you make the transition
from three dimensions to two. Below you’ll find this same kitchen in plan
form, which is the starting point for a new design.
Elevations
Alter completing the floor plan of your kitchen, you will also find it helpful to make a similar scale drawing of each wall. These drawings, called elevations, provide a useful visual aid when you’re generating new ideas, On a separate sheet of graph paper for each wall—call them north, south, east, and west—do exactly what you did for the floor area. Draw a plan of everything on that wall: base cabinets, wall cabinets, appliances, storage space, doors, windows, grills or vents, light fixtures, and outlets. Draw the room height to scale as well as the heights and widths of all other elements on the wall. Draw the frames around the windows and doors. If there is complicated molding and trim, merely draw the width to scale with straight lines. Position the windows and doors the right distances down from the ceiling and away from corners. When you draw the base cabinets, outline the doors and drawers. Don’t bother with paneling, molding, or hardware unless you need some visual aids for the purpose of comparison to a new look. The same holds true for the upper cabinets. Draw in door and open-shelf outlines. Draw in appliances with just enough detail so you know what they are. Don’t forget the hood across the top of the cooking area, pantry units or closet doors, pass-throughs. and eating counters. When the elevations are finished, you will have a complete set of drawings—a plan of your kitchen as it is now. You will use these drawings as the basis for new floor plans and elevations. The sketches below will give you an idea of what yours will look like.
Floor Plan

In the floor plan of the small, corridor kitchen shown above, various
problem areas are shown in two dimensions. The narrow chopping block between
the range and refrigerator presents an impossible work area, and hot pots
cannot be placed on the wood. The overlapping range, refrigerator, and dishwasher
doors become obvious, and the refrigerator blocks passage to the pantry. The
trash compactor, which is already taking up valuable storage space, also blocks
the entrance from the adjacent dining room when it is open. The electrical
outlets are actually well spaced, with the only three-wire plug behind the
range. One wall switch activates a hanging lamp over the eating area, and
another controls both the single fixture in the work area and a short tube
over the sink. A cold-water intake line is located in the pantry area behind
the refrigerator. The sink and dishwasher work off the same hot-water supply
lines, and the dishwasher drain is connected through an air gap to the disposal.
The telephone jack next to the window has a long cord that leads to a phone
on the counter, along with a clutter of note pads, pencils and other message-taking
paraphernalia. Following this type of analysis in your own kitchen, pinpoint
the areas that need your attention. When you begin to draw elevations, you’ll
have a good idea of your focus.
Elevations

Elevations for all four walls of this same kitchen are illustrated above.
Not only do the narrow base and wall cabinets create cramped counter surfaces
and crammed storage space, but they also have a ragged, uneven look. Further,
the dark finish absorbs all available day light and offsets the white of the
appliances, making them appear even larger than they are. Door hinges, particularly
above the dishwasher, are inconvenient for practical use. Even the design
of the cabinet fronts— with raised panels that pull the eye inward—makes them
appear smaller. All cabinet shelves are fixed, and none are high enough to
store vases, bottles, or other tall items. Space above the wall cabinets tends
to get used for storing bulky or extra items, which is impractical and looks
messy. Spice racks over the sink are inconvenient for use and for preserving
the spices—heat from the sink’s steam and light from the fixture cause them
to deteriorate quickly. The hutch at the end of the room, though needed for
extra storage, cramps the round table. Dark shutters on the north wall let
in little light even when tipped open. When you make these kinds of notations
on your elevation sketches, and combine them with those you made during your
Kitchen Survey, you have a very complete picture of the problems you’ll want
to solve in your new design.