One Small Hive Can Keep You in Honey All Year Round
Few projects yield so much satisfaction in return for such a small investment in money and labor as beekeeping. Once the bees are established, a single hive can easily produce 30 pounds or more of delicious honey each year-enough to supply the needs of the average family of four or five plus plenty to give away or even sell. In return, bees need only minimal attention and a little feeding to carry them through the winter.
Bees gather food from an astonishing variety of plants.
Wild flowers, fruit blossoms, shrubs, trees--even weeds--are sources of the nectar that the bees convert to fragrant honey and of the pollen that supplies their vital protein needs. Bees also perform the valuable service of pollinating many plants. So efficient are they that commercial fruit growers often import bees to pollinate their orchards.
Beekeeping in America dates back to the early colonial period when British settlers first brought honeybees to the Colonies (they are not native to the New World). Some swarms escaped and established themselves in the wild; these free-living bees spread slowly westward to the edge of the Great Plains, where the lack of hollow trees for nesting stopped them. It was not until the 19th century that bees reached the Far West, carried there in the wagons of homesteaders.
In colonial times, and long afterward, bees were kept in hives of straw, called skeps, or in hollow logs. Lacking scientific knowledge, beekeepers often found their hives wiped out by disease. Honey yields were often low.
However, thanks to a series of advances since the 1850s, beekeeping today is a scientifically based, thoroughly up to-date enterprise.
Choosing a Site for Your Hive
The right location will get your colony off to a good start and help ensure a productive future. One of the first things to look for is good drainage-dampness leads to disease and encourages the growth of mold. Ideally, the hive should be set on a gentle slope so that rain and melting snow can drain off rapidly. Avoid hollows or low spots where water can collect. Raising the hive above the ground on bricks, cinder blocks, or other supports helps to combat dampness.
Early types of hives
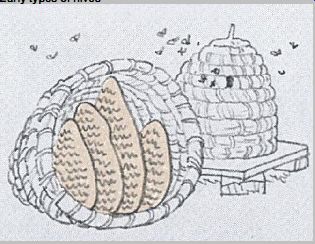
Straw skep is the traditional symbol of beekeeping. it is cheap and snug but unsanitary.
The only way to remove honey from a skep is to kill the bees and cut the combs out.
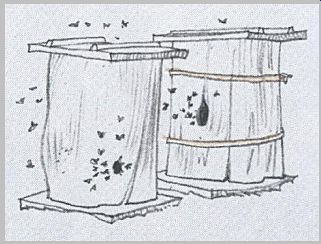
Early settlers frequently used bee gums--hollow sections of the gum tree or tupelo--to hive their bees. Bears often raided these backwoods apiaries to feast on bee larvae and honey.
The site should be sheltered from wind. Bees are susceptible to cold, and even a mild breeze can chill them enough to reduce their efficiency as honey collectors.
Severe cold can kill bees, and in winter a good windbreak may mean the difference between survival and death for an entire colony of honeybees.
Another important factor is adequate sunlight to warm the hive. (To maintain the hive's normal inside temperature of 93°F, bees must "burn" honey, thereby reducing the yield.) Experienced beekeepers orient the hive entrance toward the east or south to take advantage of the warming effect of the morning sun. Afternoon shade is also important- especially in the hotter sections of the country-since excessive heat can be as deadly to bees as excessive cold.
Be sure there is a good supply of forage plants (sources of nectar and pollen) before setting up a hive. Since bees can easily forage as far as two miles from the hive, this is seldom a problem except in densely built-up areas.
If neighbors live close by, screen the hive with a tall hedge or board fence. This protects the hive from molestation and forces bees to fly high above passers by.
Setting Up Shop As a Beekeeper
Start your colony in early spring so the bees can build up their numbers before the honey flow begins. Start on a small scale with one or two hives. Two hives have an advantage, since if one queen dies, the colonies can be combined. Of the various strains available, Italian bees are the best for beginners. They are gentle, good foragers, and disease resistant. Caucasian, Carniolan, and Midnite bees, also popular, tend to swarm and stray.
Major mail-order houses and bee-supply specialists offer complete beginners' kits, including bees, hive, tools, protective gloves and veil, and instructions. As the season progresses, you can purchase extra supers and frames.
Bees need plenty of fresh water. A nearby stream or pond, a pan of water with a wooden float for the bees, or a slowly dripping hose will supply them.
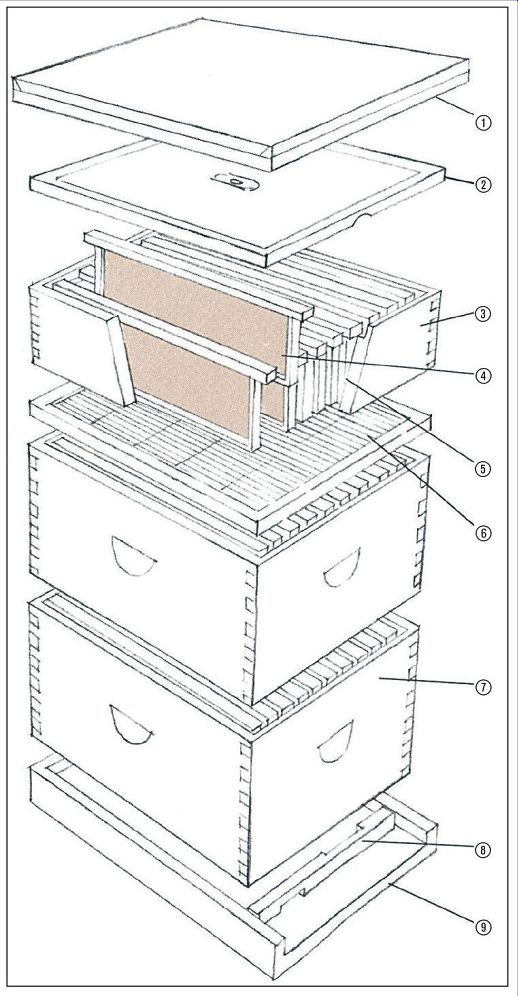
--------- The Standard Hive
1. Outer cover, metal-sheathed for durability, protects hive from rain snow, and hailstones.
2. Inner cover has hole for ventilation.
3. Shallow super, usually employed for honey to be harvested, is lighter and easier to handle than a deep super (40 lb. versus 75 lb. when filled with honey).
4. Frames contain wax foundation sheets stamped with a honeycomb pattern to guide bees in building regular combs with uniform cells
5. Bee space, about 5/6 in., surrounds frames on all sides.
6. Queen excluder is a flat grille that prevents the queen from leaving her brood chamber to lay eggs in honey supers. Workers, being smaller, can pass freely through to all parts of the hive.
7. Brood and food chambers are deep supers in which the queen lays eggs to maintain and increase the hive's population.
Food supplies for winter are also stored in these supers.
8. Entrance cleat, a movable wooden block with different sized openings, allows entrance to be widened or narrowed.
9. Bottom board.
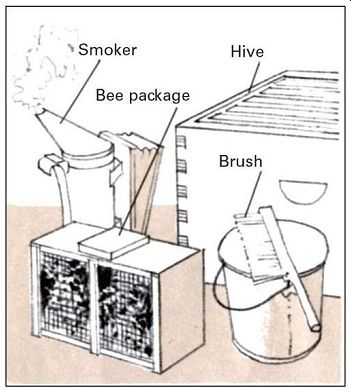
----------
1. The best time for hiving is late afternoon or early evening, when the bees are quietest and least likely to fly off. Place the package of bees near the hive, which you have assembled beforehand. Light the smoker and have a pail of syrup handy. Wear protective clothing for safety.
Identifying the bee castes
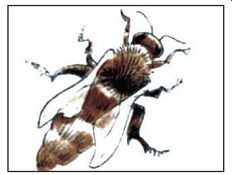
------- Queen: About 1 in. long (larger than drones or workers) with a
long, shiny abdomen. Queens leave the hive only during mating or swarming.
They lay as many as 2,000 eggs a day and live as long as four years. Queens develop from larvae that are fed royal jelly by nurse bees.
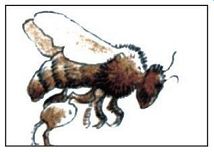
------------ Worker: A bit over 1/2 in. long with furry abdomen and long
tongue for collecting nectar.
Carries brightly colored pollen in "baskets" on hind legs. Workers make honey, build the comb, and tend larvae. They live one month during honey flow , three in winter.
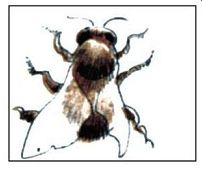
---------- Drone: About same length as a worker but with larger eyes and
thicker body. Drones buzz loudly but harmlessly: they have no stingers. The
drone's only function is to mate with the queen; it dies in the act. Drones
still alive in late autumn are turned out of the hive by the workers. Unable
to feed themselves, they die.
Birth of a bee
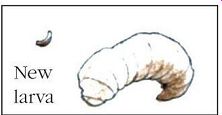
-------------- Egg, larva, pupa: A bee begins life as an egg about as big
as the dot on an i. in three days the egg hatches into a wormlike larva. At
eight days the larva spins a cocoon and nurse bees seal the cell. Workers emerge
after 21 days, queens after 16, drones after 24.
Tools and equipment
-----------
Some favorite bee blossoms
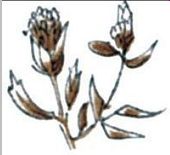
Alfalfa: Light-colored honey with mild, delicate flavor. O major sources for commercial production

Aster: White, minty honey; granulates readily. it is a source of fall honey
and pollen.

Basswood: Light, aromatic honey. Prolific nectar producer. Often
mixed with other honeys for sale.

Clover: Light, delicate honey. Because of its abundance, clover
is one of the leading sources of honey.
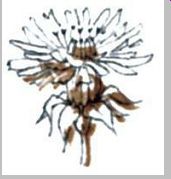
Dandelion: Important early spring source of nectar and pollen. Honey is yellow
to amber, with strong flavor.

Goldenrod: Excellent fall source of pollen and nectar. Thick, golden
honey mostly used as winter food for bees.
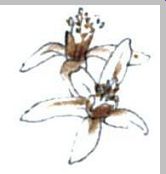
Orange and other citrus: One of the most popular honeys. Fragrant
and mild. Often used for blending with other honeys.
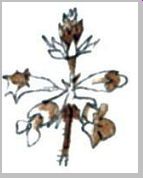
Sage: Important in West. Light colored, mild in flavor. Most sage
honey does not granulate.

Tupelo: Mild greenish-amber honey. Know n for not granulating. A
favorite in health-food stores.
Bees are shipped in packages with wire-screen sides, usually containing a mated queen, 2 1/2 pounds of bees (about 6,000 bees), and a can of syrup to feed them en route. The queen is in a small cage inside the package with several workers to tend her. The exit hole of the queen cage is usually closed with a plug of soft candy that the other bees will gnaw through to release her. Check your bees on arrival to make sure that they are healthy and that the queen is alive. You should contact your county agent before ordering bees. He can advise you on diseases, parasites, pesticides, and regulations.
Once the bees have been installed, open the hive as little as possible; every one or two weeks is enough to check on your bees' welfare.
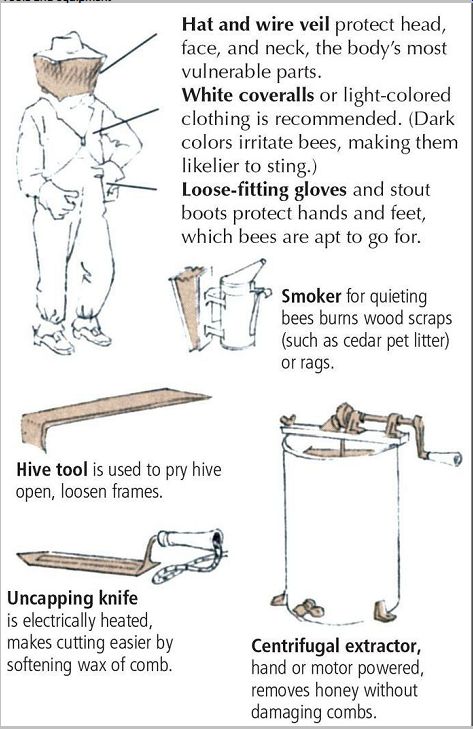
Bees sting only when they feel threatened. Nevertheless, it is important to wear protective gear. A hat and veil are basic; coveralls, gloves, and stout boots are recommended. However, many experienced beekeepers work without gloves for greater dexterity and because bee stingers left in gloves release a scent that stimulates other bees to sting. Move slowly and gently-violent or abrupt motions alarm bees. If you want to open the hive, quiet the bees first with your smoker.
When a worker bee stings, its barbed stinger becomes trapped in the skin and is torn loose when the bee escapes. (The bee later dies.) The venom sac remains attached to the stinger and continues to pump poison into the wound. Scrape off the stinger as quickly as possible with a fingernail or knife blade. Do not try to pull it out. You will only squeeze more venom into the wound. Ammonia or baking soda paste helps neutralize the venom. Most persons develop immunity after a few stings. However, those who have severe reactions should consult their physicians.
-------------
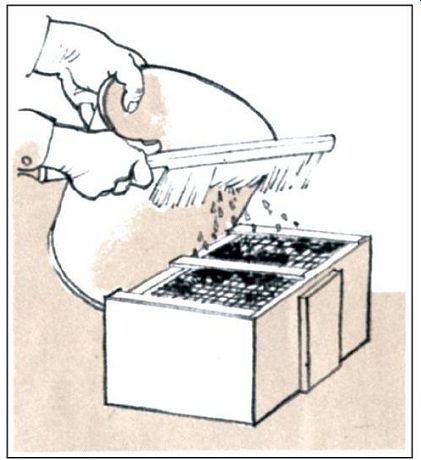
2. Lay the package on its side and brush or spatter some syrup on the wire mesh. The food will help to calm the bees and make them easier to handle. Repeat feeding until they stop eating. When they are full, rap the package on the ground to jar bees to bottom of package.
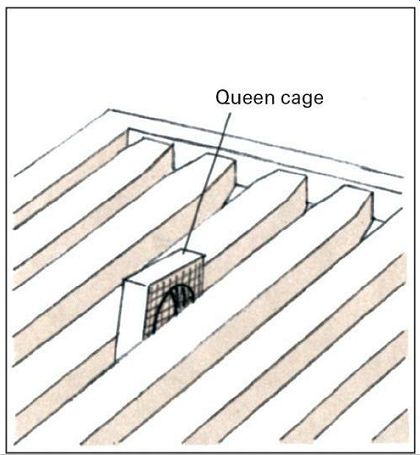
----------- 3. Pry cover off package with your hive tool; again jar bees to bottom. Remove queen cage and replace cover.
Remove cover from candy plug and make a small hole in plug so that bees can gnaw through and release queen.
Wedge queen cage between two frames in hive.
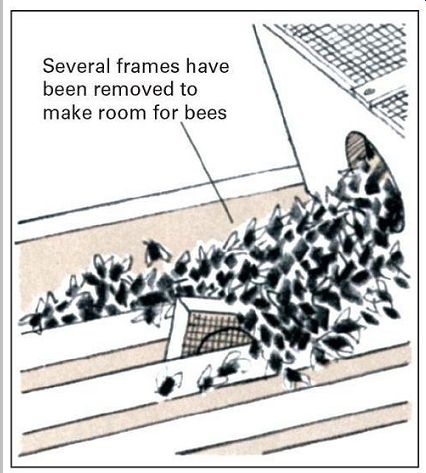
--------- 4. Knock bees down again and remove cover and syrup can from package.
Pour half of bees over queen cage, the rest into empty space in hive. Place
package on ground facing hive to let remaining bees make their way in.
Replace all frames but one; replace it in a few days.
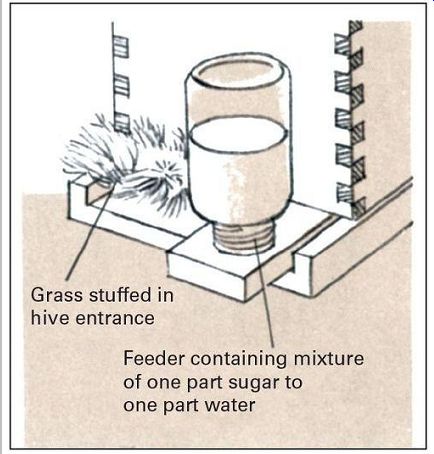
------------- 5. Place inner and outer covers on hive. Be careful not to crush
any bees. A puff of smoke will send bees down between frames to safety. Fill
feeder and place in position.
Stuff entrance lightly with green grass to keep bees inside until they feel at home. Remove queen cage after a few days.
Swarming and How to Avoid It
Swarming occurs when the queen bee and a large number of workers abandon the hive to establish a new colony, leaving behind other workers, eggs and larvae, and a crop of contenders for the new queenship. In the wild, swarming spreads the bee population and prevents overcrowding the colony. For the beekeeper, however, it results in the loss of both bees and honey production.
By far the major cause of swarming is overcrowding although excessive heat, poor ventilation, or an overanxious owner who opens the hive too frequently can also cause the bees to swarm.
One warning that bees are preparing to swarm is the near-cessation of flight in and out of the hive during honey season. The bees, instead of going out to gather nectar, remain in the crowded hive and gorge on stored honey in preparation for flight. Another sign is the presence of peanut-like cells on the brood combs, in which new queens are being reared.
A simple preventive measure is to give the bees more room. Add a shallow super early in spring and add extra supers as needed. Switching the two lowest supers every five to six weeks also helps. Bees tend to work upward; so by the time the upper chamber is filled with eggs and larvae, the lower chamber will be empty.
If you suspect the hive is overheating, rig a shade of boards or burlap. To improve ventilation, tilt the top cover up at one edge and remove the entrance cleat.
Harvesting Honey
An established hive will yield 30 to 60 pounds of honey a year. You will usually have to wait a year for your first harvest, however, since newly hived bees must build up the strength of the colony and rarely produce much honey beyond their own needs in their initial season.
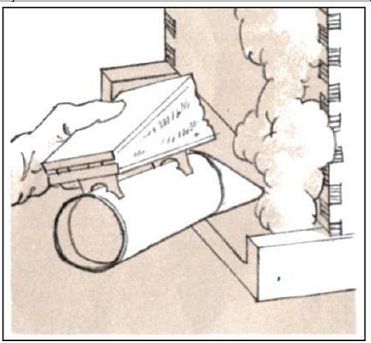
-------- 1. Choose a sunny, windless day for harvesting honey, since bees are calmest then. The first step is to drive the bees away from the honeycombs. Begin by blowing smoke through the hive entrance to quiet the bees. A few puffs are all that are needed; too much smoke may injure the bees.
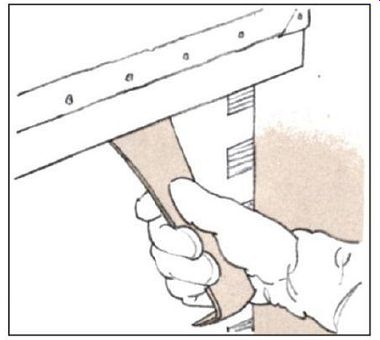
-------- 2. Wait a few minutes for the smoke to take effect. Then pry the outer
cover loose with your hive tool and lift it off. Blow more smoke in through
the hole in the inner cover.
Remove the inner cover and blowsmoke across the tops of the frames to drive bees downward and out of the way.
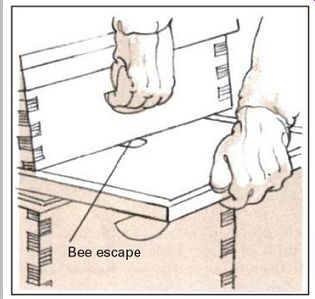
---------- 3. instead of smoke, the bees can be cleared out with an escape
board, which lets bees move down but not up.
Using the hive tool, pry up the super you want to remove and slide the escape board beneath it. install the board about 24 hours in advance to give the bees time to leave the super.
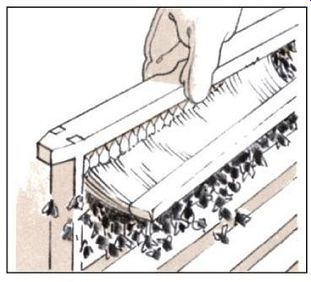
----------- 4. Remove the super and pry the frames loose with the hive tool.
Be careful not to crush any bees (a crushed bee releases a scent that stimulates
other bees to attack).
Gently brush off bees that cling to the frames. A comb is ready to be harvested if it is 80 percent sealed over.
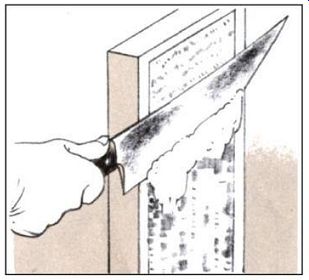
------------- 5. Uncap the combs in a bee-proof location, such as a tightly
screened room. (if the bees can get at the honey, they may steal it.) slice
off the comb tops with a sharp knife warmed in hot water-a heavy kitchen
knife is fine. it is best to use two knives, cutting with one while the other
is heating.
Plants yield nectar in two main flows. The spring flow starts with the blossoming of dandelions and fruit trees and lasts into July in most parts of the country. The fall flow begins around September and ends when hard frost kills the last flowers. Honey can be extracted after each flow, but many amateur apiarists prefer to wait until the end of the fall flow.
One way to extract honey is to let it drip from an uncapped comb into a clean pan. Another is to crush the combs and squeeze the honey out through cheesecloth.
However, bees must then build new combs, which takes time and honey (they consume 8 pounds of honey to make 1 pound of wax). Centrifugal extractors are widely available but expensive. One option is to build your own extractor (see below, right).
Storing Honey
Newly extracted honey should be strained through cheesecloth to remove wax and other impurities. Let the strained honey stand several days so that air bubbles can rise to the top; then skim them off. To prevent fermentation and retard crystallization, heat the honey to 150°F before bottling it. To do this, place the honey container in a water bath on a stove. Check the temperature carefully with a candy thermometer, since overheating will spoil the flavor.
Next, pour the honey into clean, dry containers with tight seals; mason jars or their equivalent are excellent. Store the honey in a warm, dry room (the ideal temperature is 80°F). If the honey crystallizes--a natural process--it can be liquefied by heating in hot water and stirring occasionally.
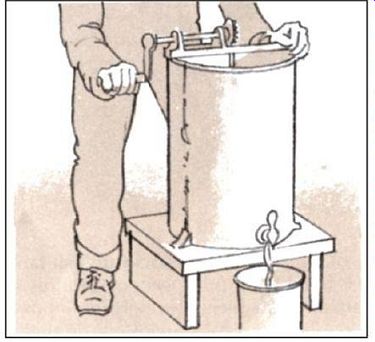
----------6. if an extractor is available, place the frames of uncapped comb
in it and turn it on. (if it is a manual model, turn the handle at moderate
speed to avoid damaging the combs.) Return emptied combs to the hive for the
bees to clean and use again. Combs can be recycled for 20 years or more.
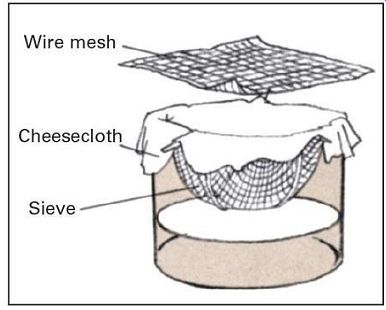
----------- Double layer of damp cheesecloth in a wire sieve makes a good honey
strainer. Use another sieve or a piece of window screen above strainer to
catch larger bits of foreign matter, such as wax and dead bees.
============
Getting your hive ready for winter
The goal of winter management is to bring as many bees through the winter alive as possible. A good food supply is vital. Leave one deep super filled with honey and pollen for the bees. (Bees need pollen as a protein source, and larvae will not develop without it.) supplement with syrup; check feeder regularly. Bore a 1-in. hole in top super for ventilation-dampness can be fatal to bees. This will let out warm, moist air and provide an extra hive entrance.
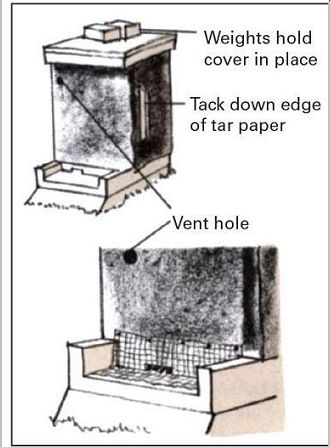
----------Wrap hive in a layer of tar paper to protect bees from sudden temperature
changes. Fasten paper with tacks or staples. Leave vent hole and entrance open.
Remove tar paper in spring.
Mice move into beehives in fall and nest in combs, destroying them. To keep mice out, bend 1/2-in. wire mesh into an L-shape, and tack or staple over hive entrance. Mesh lets bees pass but excludes mice.
==========
Sources and resources
Books and pamphlets:
Dadant, C.P. First Lessons in Beekeeping. New York: Scribner's, 1982.
Gojmerac, Walter L. Bees, Beekeeping, Honey and Pollination. Westport, Conn.: AVI Publishing, 1980.
Graham, Joe M., ed. The Hive and the Honey Bee. Hamilton, III .: Dadant & Sons, 1992.
Hubbell, Sue. The Book of Bees and How to Keep Them. New York: Random House, 1988.
Melzer, Werner. Beekeeping: An Owner's Manual. Hauppauge, N.Y.: Barron, 1989.
Morse, Roger, and Flottum, Kim, eds. The ABC and XYZ of Bee Culture: An Encyclopedia of Beekeeping. Medina, Ohio: A.I . Root, 1990.
===