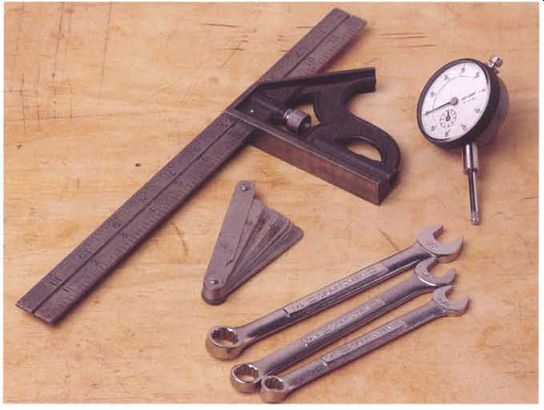
--------- A tune-up and maintenance kit includes familiar tools and some precision measurement tools.
If you are going to invest in woodworking machines, you will also need to invest in the tools to set them up and maintain them. A machine out of the box, brand new, is rarely in the best condition to perform accurately. If you're really lucky, your new machine may be fairly accurate, but don't assume that it is. Check the beds and table for flat and fences and cutters for square. And then, of course, there may be annoying vibration or runout that can affect tool performance.
Think of your machines as kits. You get the basic parts, more or less in the right position, some instructions, and maybe even some tools to help you make adjustments. Unfortunately, this tool kit, if it happens to be included, is rudimentary. If you're going to fine-tune your machine, you'll need a few more things. If you've bought a used tool, you may be starting from scratch.
Fortunately, a tool kit for setting up and maintaining machinery needn't be extensive or expensive. If you work on your car or have a basic home-repair tool kit, you may already have some of the tools you'll need.
------------
Getting the Owner's Manual
If you don't have the original owner's manual or schematics, these are sometimes available through a dealer selling the same brand of machinery.
They can also be ordered directly from the manufacturer (see Sources on p. 198). Make sure you have your model number handy when you call to order.
-------------
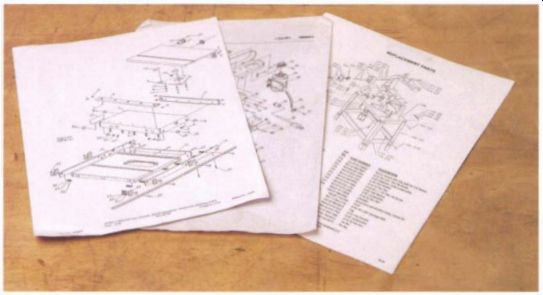
------ Not only can the schematic included with the owner's manual help
you identify and order replacement parts, it also can help you understand
how your machine works.
Tools Accompanying Your Machine
Although it might not seem obvious, information is a tool. Yes, you need wrenches and squares, but knowledge and information (including this guide) are just as important to setting up and maintaining machines.
The more you know about how your machine runs and its internal structure, the better prepared you will be to develop a workable approach for tune-up. Your most valuable tool may be the owner's manual the manufacturer provides with a new machine. These include helpful photos or drawings identifying the parts and explaining their roles in the operation of the machine.
Sometimes the mechanical connections are obvious simply from looking at the tool. But in some cases, it's impossible to see the working parts, never mind understanding how they interact. This is where the exploded drawings showing parts can be helpful. If you study these schematics, you will get a good sense of how your machine is put together. These schematics are essential if you need to order replacement parts. Call-outs indicate individual parts, whose numbers can be looked up on a keyed parts list, so keep this information in a safe place.
Once you've familiarized yourself with the anatomy of the machines and the relationship of the parts, you should cull any information you can from the owner's manual itself. The information on setup and maintenance may be very basic, or even incomplete, but it's a start.
Other tools you may find in the box include wrenches that are specifically for the bolt and nut sizes of your machine. There may also be hex keys or specialty wrenches. Remember to check onboard the machine for tools; some manufacturers have now designed holders to keep setup tools nearby for quick adjustments. Unfortunately, manufacturer-provided tools are seldom the best quality, so if you have your own tools of those types and sizes, you'll probably want to use those.
In most cases, the manufacturer doesn't include all the tools you'll need to set up and tune up your machine. Measurement tools such as squares and rulers are never included, so you'll have to buy them. If you have a used machine, you are most likely on your own where tools are concerned. The previous owner may have included the owner's manual, but the original manufacturer's tool kits rarely come along. In either case, you'll want to gather the basic tools you need before you attempt a tune-up or maintenance. Let's look at the tools in a basic kit.
The Basic Kit
The basic tools you will need fall into two classes: mechanical tools, which are used for tightening, loosening, and adjusting, and measuring tools.
In both cases, buy good-quality tools that will last a long time. Sets of wrenches, sockets, and hex keys will not only contain the sizes you need for your machine but also useful sizes for tuning up other machines and general mechanical work.
When choosing measuring tools, quality is even more important.
How can you make your machine accurate using an inaccurate measuring device?
-----------
Buying Quality Tools
When buying hand tools, most expensive doesn't necessary mean the best quality. In some cases you may be paying for fancy plating or anodizing, but the steel in the tool itself may not be as good as wrenches costing half as much. Sometimes you're paying for the packaging. Also beware of the cheapest: If the price is too good to be true, it probably is.
-----------
MECHANICAL TOOLS
The primary mechanical tools needed are wrenches. For most work, a set of 1/8-in.-drive socket wrenches and a set of combination wrenches will be all that is needed. The socket set should include a 3-in. and a 6-in. extension.
For set screws and adjusting screws, a set of hex keys is a necessity. For value for the dollar, it is hard to beat Craftsman tools, especially when bought as sets for about one-third of the price of the tools if they were bought individually.

----- You need only a basic set of socket wrenches and combination wrenches
to tune up most power tools.
If you are working on cast-iron American-made machines, you will need only inch-sized wrenches. The majority of the cast-iron woodworking machines made in Taiwan also use inch-sized hardware, but it isn't uncommon to find the odd metric-sized bolt thrown in. Most benchtop machines with cast-aluminum components are made with all metric-sized hardware no matter where the machine was made.
European and Japanese machines are consistently metric sized except for some older machines made in England, which will have British Standard nuts and bolts that are neither inch nor metric sized. You can always spot these machines because the bolt heads have been chewed up by someone using the wrong-sized wrenches. You can buy British Standard wrenches from Snap-On tool dealers and specialty catalogs for English sports car enthusiasts.
You will also need a set of screwdrivers, normally Phillips head, but you may have an occasional need for a slotted screwdriver or even a square drive. These needn't be especially good tools, but they do need to be sturdy enough to endure some torque. Especially on older machines, rust and other corrosion can make parts stubborn.
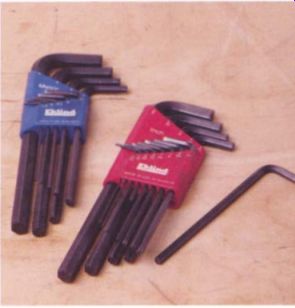
---------- Pulley set screws and many adjusting screws need hex keys to
ad just them. A long-arm set where one leg of each wrench is extra length
is especially useful.
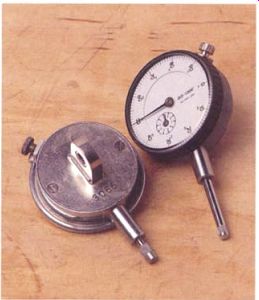
--------- By using a dial indicator, measuring a thousandth of an inch is
as easy as reading a clock. The back of the indicator has a mounting lug with
a 0.25-in. hole drilled through it.
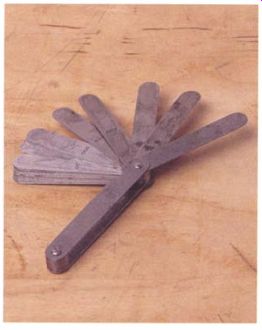
------ For setting and checking the tables on a jointer, you need a feeler
gauge set.
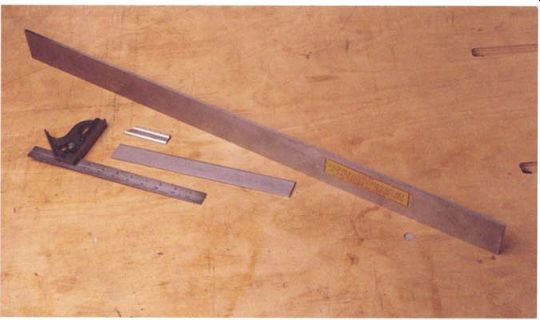
------- Machinist's straightedges, which are avail able in a variety of
lengths, are useful for checking machined beds and tables for flatness.
MEASURING TOOLS
To work their best, the critical components of a power tool need to be positioned and squared up with an accuracy of just a few thousandths of an inch. To a woodworker, a single thousandth (written as 0.001 in. ) may seem vanishingly small, but machinists constantly work to this degree of precision. With just a few simple and inexpensive tools borrowed from the machine trade, you will be able to measure 0.001 in. as readily as you now measure 1/16 in. while woodworking.
For checking surfaces for flatness, you will need an accurate straight edge. A hardware-store yardstick won't do. Aluminum rulers sold for construction in 4-ft. lengths are better but not as accurate as a machinist's straightedge. You won't find one of these at your local home center, but they are available from dealers that sell machinist's and engineer's tools.
The workhorse of precision measurement is a dial indicator. The plunger projecting from the side of the dial indicator causes the pointer on the tool's face to revolve. The pointer makes one revolution for each 1/10 in. the plunger moves; the 100 graduations around the perimeter of the dial each indicate a movement of 0.001 in. of the plunger. A second, smaller dial on the tool's face counts the number of full revolutions the main hand has made. The dial of the indicator can be rotated to bring the zero mark on the face in line with the pointer, a process called "zeroing" the tool.
The dial indicator used throughout this guide and by far the most common style sold is a little more than 2 in. in diameter, has a range of 1-in. plunger travel, and reads in 0.001-in. increments. Chinese-made dial indicators of serviceable quality for the occasional tune-up are available for less than $20.
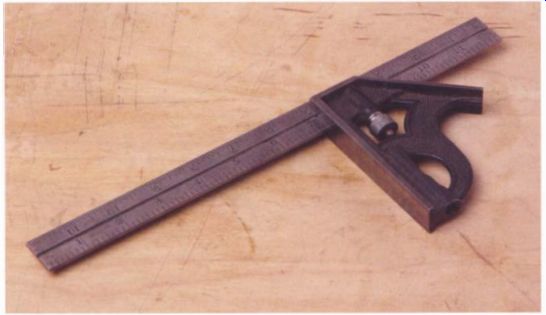
---------- A good- Quality combination square is needed to fine-tune fence
and blade alignments. To preserve its accuracy, the square shouldn't be used
for woodworking.
For tuning up a jointer, you will need a set of feeler gauges. A typical set for machine work contains 26 leaves 15 in. wide and 3 in. long. The thinnest leaf will typically be 0.0015 in., and the remaining leaves will start at 0.002 in. and increase in 0.001-in. increments to 0.025 in. Don't buy a smaller set sometimes sold for auto tune-ups; the smaller blades and fewer leaves in the set make them impractical for power-tool tune-ups.
The last item you will need is a good-quality combination square with a 12-in. blade. This is one tool where it is worth investing in a quality, machinist's-grade tool that will probably cost around $75. Avoid the temp- tat ion of buying a less expensive square made for carpentry work because its accuracy is marginal at best. Take good care of the square and use it only for tune-ups and to check and adjust all of the other squares in your shop. If it is never used as a bench tool for day-to-day work, it should stay accurate forever.
A dedicated machinist's square is also an option, although it's less versatile since it's not adjustable and can't be used for measurement. Avoid dropping a square at all costs. Once it hits a concrete floor, a machinist's square is worthless for setup work and should be thrown away. All squares, whether for machine work or day-to-day woodworking, should always be protected from bumps and accidental dropping. A square will only stay square if it is treated with care and respect.
Commercial Jigs and Setup Aids
The message that machines need to be tuned must be getting out, since woodworking catalogs carry more setup tools than they once did. Now you can buy dial indicators from many of the better woodworking dealers, whereas not too long ago you'd have to go to a machinist's-supply dealer to buy one of these. But beside the basics, there are jigs, devices, and setup aids. Some of these are really useful and will save you some time; others are an unnecessary expense.
Whether you invest in these or not depends on many factors. How often will you need to retune your machines once you have them set to your satisfaction? If you have a cabinet saw, you may have to do this infrequently. But if you have a contractor's saw, which is notorious for getting out of alignment with the least use or bump, you may need to recheck the settings frequently. The other question is, what kind of work are you doing? If it's mostly furniture making, you probably want to set and keep very accurate settings. If you mostly do home improvement projects where accuracy is less important, regular maintenance may be enough.
I've tried to offer shop-made alternatives in this guide wherever possible so that you don't have to spend money on commercial gadgets. All of the procedures I discuss require only a dial indicator, a set of feeler gauges, and a few easily made wood stands and straightedges. But let's look at some of the commercial devices.
--- Living in the Real World
IF YOU ARE AN ENGINEER or machinist yourself, tight tolerances may be a holy grail. If so, indulge yourself and buy all those cool, super-accurate setup tools if you can afford them. But let's be realistic. Yes, accurate reference surfaces mean accurately milled stock. Accurately milled stock means better assembly, and a piece that starts square and straight assembles square and straight. The fact is wood moves. You may mill perfectly straight, square stock one morning and come back that night and find that through changes in humidity, it's not as perfect as it started. The environment is constantly changing, and there is always a compromise and we live in a real world where temperature and humidity, even atmospheric pressure if you live at high altitude, can affect physical objects. Wood moves: It swells, contracts, twists, and bows. And even metals aren't as perfectly stable as we'd like to imagine. As you'll see in later Sections, cast iron (a metal) has a mind of its own, just like wood.
-------
SETUP JIGS AND FIXTURES
There's a lot of confusion in woodworking about what's a jig and what's a fixture. The old saying is that a fixture stands still, whereas a jig, well, does a jig and moves. Most of the jigs for setup do both. For example, the Super Bar holds a dial indicator fast, but it moves in the miter slot of a table saw to test whether the front of the blade and the back of the blade are in the same plane with respect to the miter slot.
This is a handy device, and its cost is not so great as to prohibit purchase. There are set screws to enable a tight fit in the miter slot, and it's designed for the standard distance most table saws have from the blade to the miter slot. If your saw has a broad distance between the blade and the slot, you may not find this device as helpful, since there is a limit to the adjustment. All that being said, the simple wood block I designed to hold a dial indicator for tuning a table saw works as well as the Super Bar and costs very little.
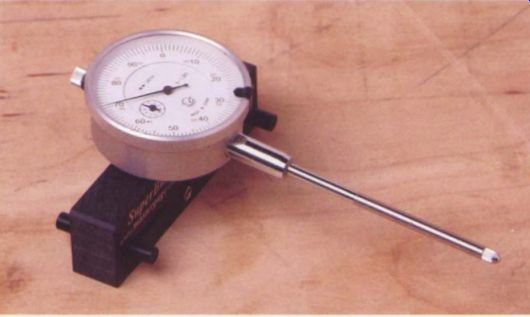
-------------- The Super Bar is designed to test whether the table-saw
blade is aligned with the miter slot.
A more accurate (and expensive) jig of this type is the A-line-It System.
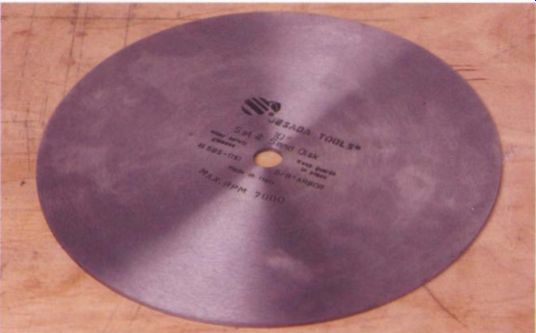
--------- Originally designed to allow disk sanding on a table saw, this
milled steel plate is also marketed as a setup aid.
A dial indicator is very sensitive, and its readings off a surface will depend on the flatness and quality of the surface. Most people use the saw blade itself as the reference when squaring the blade to the miter slot in table-saw tune-up. Remember that the blade may not be flat. If it's a brand-new blade, it may have a coating that will interfere with the reading. (Make sure you remove this coating before using the blade as a reference point. ) Because saw-blades have this variability and the teeth or coating may interfere with the reading, toolmakers have created better reference points.
One is a steel disk that is primarily designed to be a surface to which PSA abrasives can be attached. This turns your table saw into a disk sander. You can also use it instead of the blade for setup work. Keep in mind that this is not the primary purpose of this accessory, but it is more accurate a reference point than the blade itself.
A flat reference surface can be provided by a master plate (available from Woodcraft® and Hartville tools; see Sources on p. 198), which is a milled steel plate designed to be bolted onto the arbor of your table saw.
This is a fairly expensive investment, which you may need only several times in your woodworking life, but it's a definite improvement over using the sawblade. The birch plywood plate, used the way I describe in the table-saw Section, is more accurate than any of these steel tune-up plates and costs very little. I find it flat and dimensionally stable enough to do the job.
Most jigs are designed for table saws, since table saws are the workhorses of the shop and nearly everyone who does woodworking has one.
But the next most vexing setup chore is setting jointer knives. Many of the most popular new jointers and planers feature knife setup that is self-setting. Older machines may require tedious fettling to get the blades square to the tables. To speed this and ease the tedium, several manufacturers have produced jointer-planer knife-setting jigs.
Again this is both a jig and a fixture. Magnets hold the jig dead-on the table surface, while the same force is used to pull the knives into alignment. Before you invest in one of these, make sure you need it. Modern self-setting systems obviously don't.
Magna
Set is the most popular brand name in the jointer and planer knife-setting jig category. Before you buy one, try making the magnetic knife-setting jig I describe in Section 2. I've found that it works better than commercial jigs and costs less than $10.
Making Your Own Setup Jigs
Woodworkers are an inventive group and enjoy making their own clever devices for every woodworking process. If this describes you, consider making some of your setup aids. These can be simple or elaborate. You need to make sure that whatever you use for jigs or tools has accurate reference surfaces. The most important thing to consider when using solid woods is the straightness of grain, quartersawing, proper drying, and avoiding reaction wood. Next look for dimensional stability. Here you have choices in man-made composites as well.
MDF
One of the modern wood composites is medium-density fiberboard (MDF). It used to be that this material was only available from dealers that served professionals. But MDF is so useful as a cabinet material, as a stock for moldings, and as a stable substrate for veneering that it's now more widely available. Your local home center probably stocks it. It's very heavy compared with plywood or solid wood and can be expensive, depending on where you purchase it and the quantity you purchase. But you don't need much of it to make jigs. Fortunately, home centers stock it in smaller sheets that are perfect for jig material.
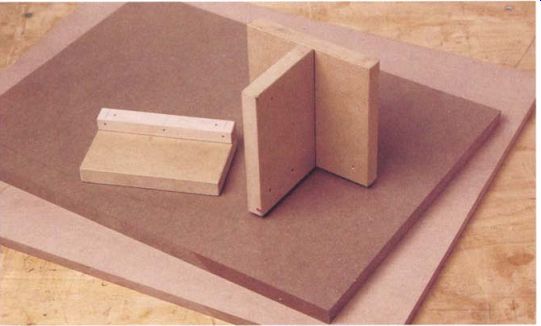
--------- MDF, a sheet good composed of wood dust and resin adhesives,
is now available at many home centers.
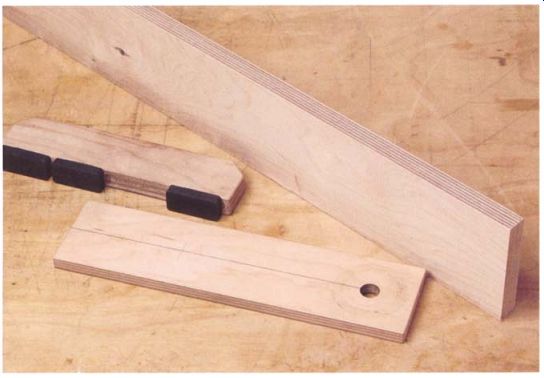
------- Here are some shop-made setup tools constructed of birch plywood.
Remember that MDF is still a wood product and that wood moves.
If you intend to use your jig beyond the initial setup chore, store it care fully to prevent it from changing its shape. Long pieces of MDF, such as straightedges, should be stored flat; if they're left leaned up against a wall for a few days they'll sag under their own weight and take on a permanent bow that will make them hard to recalibrate.
PLYWOOD
When cost is considered, cabinet-grade plywood is the next best choice for setup jigs. Baltic birch is better than MDF but at twice the price. Baltic birch plywood with many laminates is as dimensionally stable as MDF, if not more so. It is not typically available at home centers, so you may have to hunt for it among specialty dealers. This material (as does MDF) mills very much like wood, so it can be cut using woodworking machines. Make sure you remove any fuzz after the cut, so that your reference surfaces remain straight and true.
SOLID WOOD
If you use solid wood, make sure it mills cleanly and resists denting and compression. A good choice is a dimensionally stable hardwood. Maple obviously isn't a great option because it moves with every humidity and temperature change. Tropical hardwoods are very dimensionally stable but expensive. Some domestic hardwoods, including cherry, are better choices.
In some cases, you'll just need a block of wood for distance. Since wood moves less in the linear direction, scraps of any wood species can be used for this purpose.
Other Useful Tools and Materials
There are some other tools and materials that you might find helpful in your setup and tune-up. Don't be afraid to be inventive; sometimes the solution is as simple as a shim cut from an aluminum can. It may not be conventional, but if it works, does it matter? The object is to get your machines to work for you.
-----
Protecting Jigs and Setup Aids
IF YOU INTEND TO KEEP YOUR JIGS and setup aids for next time, make sure you prevent them from changing shape. MDF is very heavy and will sag under its own weight if stood against a wall, so make sure you store long jigs flat to prevent distortion. All wood-related materials will alter shape due to humidity changes over time. To be safe, check the accuracy of your jigs and setup aids after a period of storage by using references that you know to be straight and flat. If necessary, start from scratch and make a new jig rather than waste time trying to get a badly distorted one back into shape.
If you are someone who likes to finish jigs, think twice before applying finish to a jig for setup. In most cases, it's better not to finish them because a finish can interfere with the reference surfaces. Never use water-based finishes, which always swell the external surfaces and raise the grain.
------

------ A rotary tool can be equipped with a variety of small grinding
wheels.
----- Keep a variety of shim stock handy and tin shears for sizing it.
SHAPING, GRINDING, AND FINISH REMOVAL
Sometimes you need to do some fine-tuning of metal parts. One device you may consider or may already have in your tool kit is a Dremel tool.
This rotary tool can be fitted with any number of burrs and sanding drums to grind and polish. Remember that it is a rotary tool and will produce a rounded surface.
Manufacturers coat their tools with paint and finishes. The tools look good in the showroom but interfere with setup and accuracy. If the finish is in your way, get rid of it! The weapons here are grinding devices (stones and files) and abrasives (sandpaper), and in some cases chemical strippers.
Unless you handle sandpaper very carefully, it will almost always create a rippled or rounded surface on any metal. In descending order, this is how I would remove a finish from a machined surface on cast iron or steel:
1. If the finish chips off easily, which is fairly common on iron, I'd use a sharp chisel to scrape off the paint, taking care not to gouge the metal.
2. If the paint is tightly adhered, the only safe method is to use a stripper, but this is messy and risks damaging paint on adjacent surfaces.
3. Once the paint is removed, clean up the surfaces using a file laid flat on the metal. This will remove burrs and high spots without changing the flatness of the surface.
4. You can use a wire brush in a drill to remove paint on iron or steel, but the dust will spread all over the shop. On older machines, the dust will likely contain toxic metals, primarily lead and cadmium.
5. On soft metals such as die-cast zinc alloys, aluminum, and magnesium, the only safe method of paint removal is to use a stripper.
-----------
Choosing Sandpaper
For leveling or polishing machine parts, choose black wet-dry paper.
It doesn't break down easily and it tolerates saturation with machine oil and other lubricants. Fine grits of wet-dry paper can be purchased at automotive supply shops.
-----------
SHIMS
Shims are often necessary to achieve a tight or accurate fit of parts of machines. Metals make the best shims for this purpose because of their durability and stability. Consider copper or brass sheathing or aluminum, which is easily obtained from soda cans. To cut shims to size, you'll need shears or for small shims a wire cutter may do.
Prev. | Next | Article Index | Home