A lot of people are squeamish about killing animals of any sort for food. Still others have moral or religious objections to the practice.
If you have moral or religious objections, please skip to the next section as there is plenty of other information elsewhere in this guide to help you raise a healthy diet without meat. If you are merely squeamish, though, this section may put you at ease. Be forewarned, though, that this section contains graphic pictures of chicken slaughter.
Selecting Chickens
For sheer efficiency, the easiest choice is to order day-old Cornish cross chicks from your local agricultural supply store. These are also known as "broilers. " These are bred to grow quickly with lower feed requirements and to pluck easily. These are a sort of hybrid franken-chicken and are simply voracious eating machines.
In fact, they eat so much and gain so much weight so fast that they may start dropping dead or breaking their legs from sheer weight anytime after 12 weeks of age.
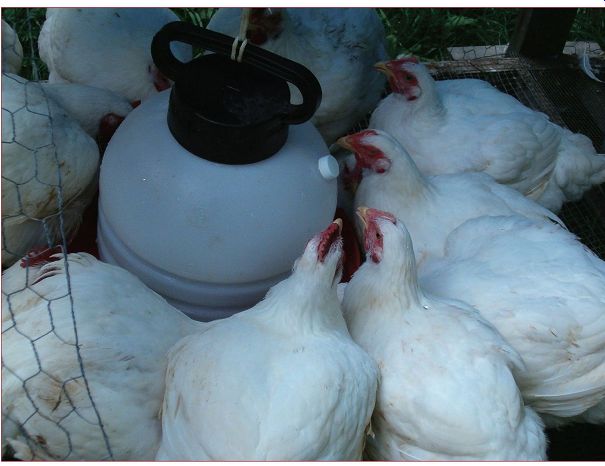
-------- Broilers gathered around a waterer.
Another way to obtain chickens for meat is to let a couple of hens stay broody in the spring and raise a handful of chicks to broiler size by fall. Come fall, pick all the new roosters to be meat birds, plus any of the older hens that aren't laying, leaving yourself with a flock around the same size you started with in the spring--about 10 to 20. The meat birds get processed in the fall, vacuum sealed, and frozen. You should take newly hatched chicks and raise them in the brooder , and thenceforth keep them separate from your regular laying birds. Otherwise, your hens will figure out that you've killed them and get spooked, and your rooster will get aggressive.
Housing for Meat Birds
Unlike chicks of other breeds, broilers can usually be removed from the brooder at about four weeks old because they are pretty well feathered, and it's during a warm time of the year . This is good, because otherwise they'd outgrow the brooder. Regular laying birds raised for meat should be kept in the brooder for six weeks before going outside.
Meat birds are around for only three months of the year, at most, so permanent housing doesn't make as much sense for them as it does with laying hens. What a lot of small farmers use, and we use one too, is a device called a "chicken tractor . " A chicken tractor is a portable enclosure that lets the chickens get fresh air and fresh grass. It is moved every day so the chickens don't end up lying around in their own excrement.
There are about a million ways to make a chicken tractor . Just search on the Internet, and you'll find hundreds of designs, many for free. Your choice of design should allow for about four square feet per bird. Many designs are completely enclosed to exclude predators and keep birds from escaping. So far , I've had no real predator problems, and the Cornish crosses that we grow are too heavy to fly, so our chicken tractor is on wheels and has sides made of only three feet of chicken wire.
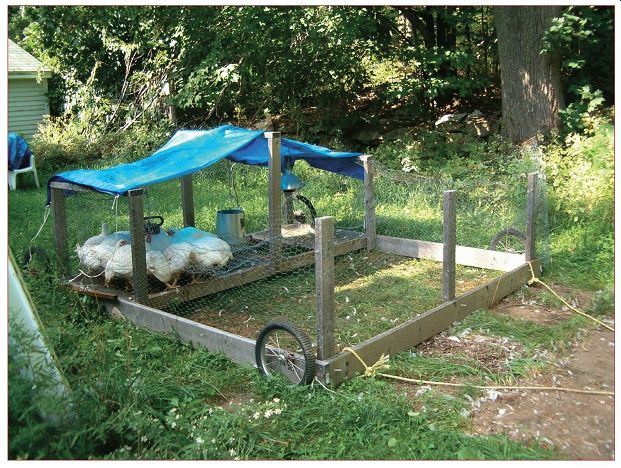
---------- The easiest housing for meat birds is a chicken tractor.
Feeding Meat Birds
Meat birds should receive a starter/grower from the day they arrive until the week before they are processed. The week before, they should be put on a leaner ration. For this you can use either a finishing feed or ordinary layer crumbles like you give your laying hens. As broilers, particularly, seem to have a nearly insatiable appetite, you should feed them by weight according to the directions on the bag.
Some breeds of meat birds will forage while in the chicken tractor , but the broiler crosses will mostly just lay around and eat feed. So you shouldn't count on forage providing a lot of their food.
Slaughtering Birds
As a kid, my family raised chickens, and sometimes I got stuck with plucking them, which seemed to take forever and was less than pleasant. But then I got older and wiser and learned of better ways! Food should be withdrawn from birds destined for slaughter 12 hours before the appointed time, though continuation of water is advisable. This precaution will make sure no food is in the upper digestive tract and thus reduce the possibility of contaminating the meat with digestive contents.
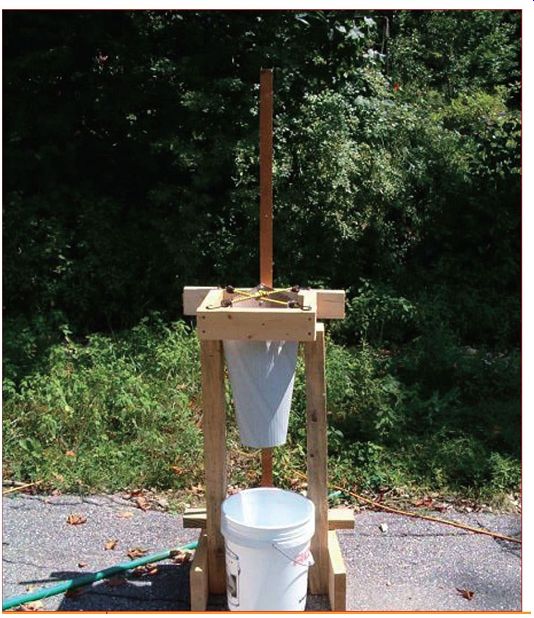
----------- A killing cone. They don't need to be this elaborate.
Usually, you should not carry a bird by its feet due to the potential for spinal damage, but for purposes of slaughter it is acceptable if done gently. Catch the bird by its feet and immediately hold it upside down. Swing it a little on its way to the killing cone, and it should settle down. Provide support for its back while carrying if needed. Then insert it head down in the killing cone.
The proper way to slaughter a bird, except for farmers whose religions specify another method, is to cut off the bird's head while the bird is either hanging from its feet or inserted upside down in a funnel-type device called a "killing cone. " Use a good, sharp, strong knife for this. Put a leather glove on your weak hand, and grab the bird's head, holding its beak closed. Then, take the knife and cut off the head in one smooth motion. Once the head has been removed, any squawks or twitches observed thereafter are a result of pattern generating neurons in the spinal cord and not conscious volition. I checked with my local veterinarian on this, and he assured me that cutting off the chicken's head is entirely humane. When the head is cut off, the neck will flex all over the place, splattering blood everywhere. I put a piece of Plexiglass in front of the killing cone to avoid getting blood on me. The bird should bleed out in 65 seconds or less, but it doesn't hurt to leave it for a couple of minutes because you don't want to scald a bird if it still has a breathing reflex because it could inhale water while being scalded.
Hanging the bird upside down or using a killing cone is important for two reasons. First, it helps remove the greatest possible amount of blood from the bird's tissues, which presents a more appetizing appearance. Second, it helps keep the bird from struggling and hurting itself.
Blood collected from the bird can be added to the compost pile. If a killing cone isn't used, a noose can be used to hang the bird upside down by the feet.
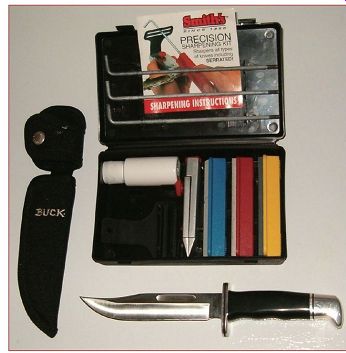
--------- A proper knife makes slaughtering easier.
A killing cone, mentioned previously, is a funnel-shaped device with a large hole on the top into which the bird is inserted headfirst.
The hole in the bottom is large enough that the bird's head and neck stick out, but nothing else. The entire device is usually about a foot long. Killing cones can be purchased via a number of poultry suppliers, just be sure to order the correct size for the birds being killed. They are simple enough that anyone can make one from sheet metal and rivets, and many people have improvised by cutting the top off of a small traffic cone.
Once the bird has been killed, it needs to be scalded and then plucked. In scalding, the bird is dipped and then moved around in hot water for 60 to 90 seconds to break down the proteins that hold the feathers in place. Commercial processors use rather elaborate multistage arrangements for this process, but a mini-farmer simply needs to have a bucket of water of the correct temperature ready.
Most on-farm slaughtering processes for chickens and guineas use what is called a hard scald that loosens the feathers and removes the outer layer of skin. For this, the water temperature should be between 138 and 148 degrees.
This temperature range is sufficiently important that it should be measured with a thermometer.
For a small operation, the easiest way to get the right temperature is to fill a five-gallon bucket half full of water and insert a thermometer . Slowly add boiling water from a large pot on the stove until the temperature of the water in the bucket is on the high side of the recommended range. Then, once the bird has been killed, grab it by the feet and hold it under the water for 60 to 90 seconds, sloshing it up and down slightly. The timing on this has some room for flexibility, so you can just count. If more than one bird is being processed, keep an eye on the temperature and add boiling water whenever the thermometer drops close to the low side of the recommended temperature range. The water should be replaced every dozen chickens, any time it has been allowed to sit unused for a half hour or more, or any time the water has obviously been contaminated with feces. In the case of broilers, this is usually for every chicken.
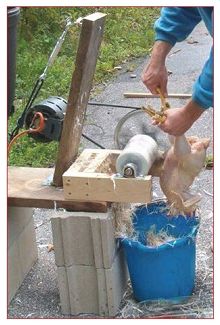
----------- The first incarnation of the the Farm chicken plucker.
Once the bird has been scalded, the feathers are removed in a process known as plucking. It is easiest to hang the bird by its feet and use both hands to grab the feathers and pull them out. If the bird was killed and scalded correctly, this shouldn't take long, although it is messy. The feathers can be added to a compost pile and are an excellent source of nitrogen. A few small "pin feathers" will remain on the bird, and these can be removed by gently pressing with the back side of a butter knife. A few hairs will also remain, and these can be singed off by going very quickly over the carcass with a propane torch. If you process a lot of chickens, you might consider an automated plucker that is easily made at home.
The most impressive homemade plucker is the Whizbang Chicken Plucker, designed by Herrick Kimball, and the plans are in his book titled Anyone Can Build a Tub-Style Chicken Plucker . We have designed a less expensive table-style chicken plucker and have included complete plans, parts list, and photos in the next section.
The bird's entrails should now be removed in a process called evisceration.
1. Loosen the bird's crop, which is between the breast meat and the skin, by following the esophagus down to the crop and loosening it. As you'll note, we wear disposable gloves for processing.
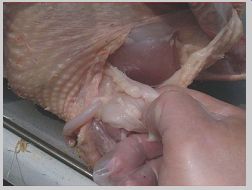
---------- In this photo, the trachea is on the left and the esophagus
is on the right.
2. A sharp knife is used to carefully (so as not to puncture any intestines and contaminate the meat) make an incision from the vent in the skin of the abdomen up to the breast bone. There will likely be a layer of fat there, which you can carefully pull apart by hand.
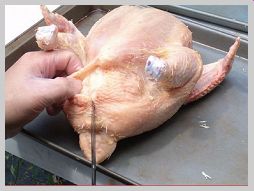
---------- Opening the abdominal cavity.
3. The viscera are carefully removed by hand. With the breast facing up, just reach your hand into the body cavity as far as you can.
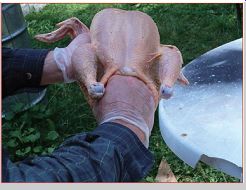
------- Reach your hand deeply into the cavity.
4. Gently grab a handful of viscera, and pull it completely out of the body cavity. Then scrape the lungs off the backbone. (They are bright pink.) Some people save the heart, liver , and gizzard. If you do, separate them from the rest of the viscera and refrigerate them immediately.
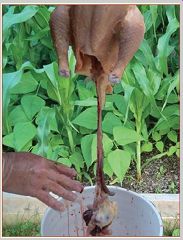
----- You may need to remove a couple of handfuls of entrails.
5. Cut out the vent, being careful not to contaminate the bird with the contents. Use a garden hose to wash out the body cavity afterward.
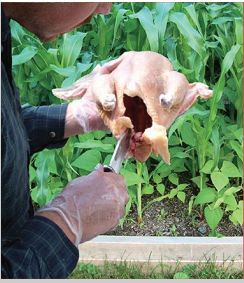
------ Carefully cut out the vent.
6. Turn the bird on its back and cut off the neck. A lot of folks use the neck for making chicken stock, so if you do, it should be refrigerated immediately.
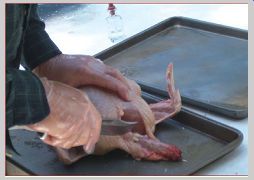
------ Put the bird on its back and cut off the neck.
7. Turn the bird right-side up and cut off the oil gland.
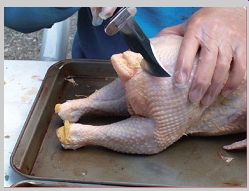
------- Don't forget to remove the oil gland.
8. Now, give the chicken a thorough inside and out rinse with the garden hose and put the completed whole chicken in a tub of ice water . Make sure to keep an eye on the ice and keep it cold! We add a tablespoon of bleach (to kill germs) and a cup of salt (to pull residual blood out of the meat) to the water , but neither is strictly necessary. If you can keep the water ice cold for four hours before freezing the bird, it will be more tender than it would be if frozen immediately.
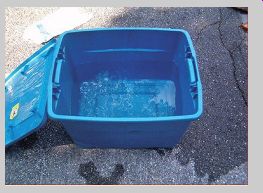
--------- Monitor the ice water to make sure it remains icy.
------
Bird blood, feathers, entrails, and other parts can be composted just like anything else, although many books on composting say to avoid it. Many authors counsel to avoid animal tissues in compost because they can be attractive to stray carnivores and rodents and because in a casual compost pile, sufficiently high temperatures to kill human pathogens may not be achieved. But if you make thermophilic compost, the only precautions needed are to make sure that any big parts of the bird are cut up and that the parts are buried in the middle of the pile with plenty of vegetable matter . In this way, the compost itself acts as a biofilter to stop any odors, and the high-carbon vegetable matter , combined with the high-nitrogen bird parts, will form seriously thermophilic compost in short order.
Consequently, the nutrients that the birds took from the land are returned to the land in a safe and efficient manner.
--------
----