If you live in a cold climate, you probably spend something like two-thirds of your energy dollars on heat. Your old furnace or boiler chugs away burning the gas or oil like there’s no tomorrow. So should you rush right out and buy a new super-efficient one? Not necessarily.
Insulating and tightening your house is the best way
to reduce home energy use.
Replacing your existing heating system with one that’s more efficient may well be a wise step, but it shouldn’t necessarily be your first step. You should first try to lower your heating requirements. Tighten up. Weatherize. Insulate. By reducing your heating needs, you may be able to get by with a significantly smaller—and less expensive—furnace or boiler.
The same arguments hold true with air conditioning. If you live in a warm climate with high cooling requirements, it makes a lot of sense to tighten up the house to reduce your cooling load before investing in new air conditioning equipment.
A tight, well-insulated house not only saves energy and allows you to get by with smaller-capacity heating and air conditioning systems, but it is also more comfortable. No more cold drafts at your feet while temperatures at head level are a sweaty 80°F With less of this temperature stratification during the winter months, you’ll even find yourself comfortable at a lower thermostat setting than you’re used to.
In the next few pages, we’ll take a look at some of the measures you can take to improve the energy efficiency of your house and when it makes sense to consider such projects.
CONSIDER AN ENERGY AUDIT
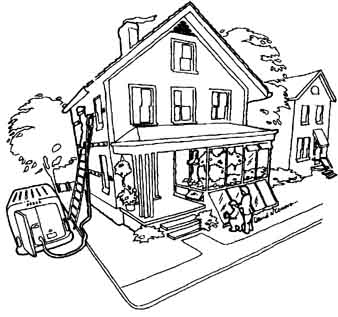
Find out from a pro where heat is being lost through your home’s shell and what you should do about it. Energy auditors may use sophisticated equipment, like a blower door and infrared camera, to help pinpoint air leaks and areas with inadequate insulation, or they may simply make a thorough visual inspection. Trained energy auditors know what to look for in older houses, and the $50 — 100 investment in their time is usually well worth the cost. Depending on the service, you may be able to have your heating or cooling system cleaned, tuned up, and tested at the same time (see sections 4 and 5). Some full- service house doctoring companies will even perform caulking and weatherstripping.
Check with your utility company to find out if it offers this ser vice. Some utility companies provide energy audits free of charge. Others charge a modest fee-still well below standard rates. If you don’t have luck with the utility company, call your state energy office for a list of companies that can provide the type of audit you need.
If you are a renter, encourage your landlord to have an energy audit conducted and follow through on the recommended energy improvements. You might offer to help your landlord by arranging for the audit and even doing some of the work in exchange for rent. After all, if you pay for heating, air conditioning, and electricity, energy improvements are very much in your interest. Even if your landlord won’t pay for energy conservation projects, many of the suggestions in this section are inexpensive enough that they’ll pay for themselves in just a year or two, justifying your out-of-pocket expenditures.
Have an energy audit done on your house to find out
where the heat really goes—and what you should do about it.
FIND and SEAL AIR LEAKS
Hidden air leaks are among the largest heat loss sources in older homes. Some of the most common air leakage sites are listed below:
• Plumbing penetrations through insulated floors and ceilings
• Chimney penetrations through insulated ceilings and exterior walls
• Along the sill plate and band joist at the top of foundation walls
• Fireplace dampers
• Attic access hatches
• The tops of interior partition walls where they intersect with the attic space
• Recessed lights and fans in insulated ceilings
• Wiring penetrations through insulated floors, ceilings, and walls
• Missing plaster
• Electrical outlets and switches, especially on exterior walls
• Window, door, and baseboard moldings
• Dropped ceilings above bathtubs and cabinets
• Kneewalls in finished attics, especially at access doors and built-in cabinets and bureaus.
What you should use in sealing these hidden air leaks depends on the size of the gaps and where they are located. Caulk is best for cracks and gaps less than about 1/4” wide. In choosing caulks, read the label carefully to make sure that the caulk is suitable for the material to be sealed. Look for caulks that remain flexible over a 20-year lifetime. If the caulked joint will be visible, choose a paintable caulk or one that is the right color. In general, you should avoid the cheapest caulks, because they probably won’t hold up well.
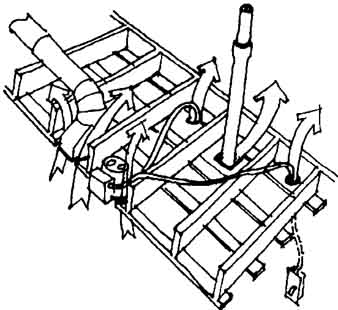
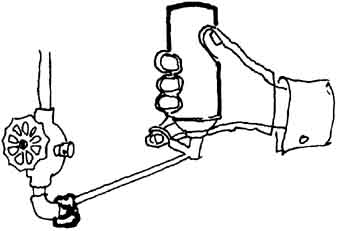
Watch for hidden air leaks around pipes— and seal them up.
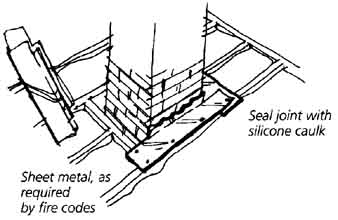
A tremendous amount of heat can escape around the chimney
if it Isn’t properly sealed. Seal a joint with silicone caulk
Expanding foam sealant is an excellent material to use for sealing larger cracks and holes that are protected from sunlight and moisture. One-part polyurethane foam is commonly avail able in hardware and building supply stores, Look for foam sealant without ozone-depleting CFCs (chlorofluorocarbons). Only buy products that are labeled as safe for the ozone.
Backer rod or crack filler is a flexible foam material, usually round in cross-section (1/4 to 1” in diameter), and sold in long coils. Use it for sealing large cracks and to provide a backing in very deep cracks that are to be sealed with caulk.
Use rigid foam insulation for sealing very large openings such as plumbing chases and attic hatch covers. Fiberglass insulation can also be used for sealing large holes, but it will work better if wrapped in plastic or stuffed in plastic bags, because air can leak through exposed fiberglass. Don’t use plastic in places where high temperatures may be reached, and always wear gloves and a dust mask when working with fiber glass.
Sheets of polyethylene can be taped over large holes to block air flow in some situations, but this is usually a fairly temporary measure, since the poly may disintegrate over time if not protected. Specialized materials such as metal flashing and high-temperature silicone sealants may be required for sealing around chimneys and flue pipes. Check with your building inspector or fire marshal if unsure about fire-safe details in these locations.

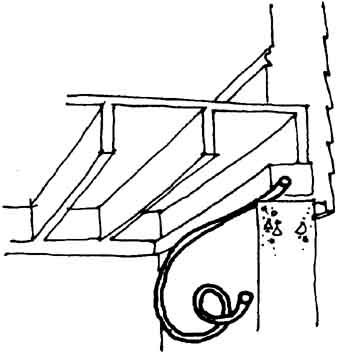
Get rid of drafts along the floor by caulking along the
sill and band Joist from the basement.
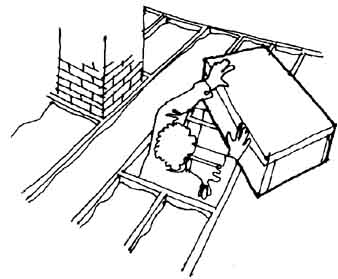 If you have an attic hatch, make sure it has a tight-fitting,
insulated lid.
If you have an attic hatch, make sure it has a tight-fitting,
insulated lid.
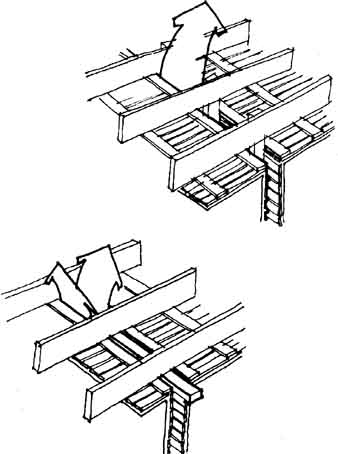
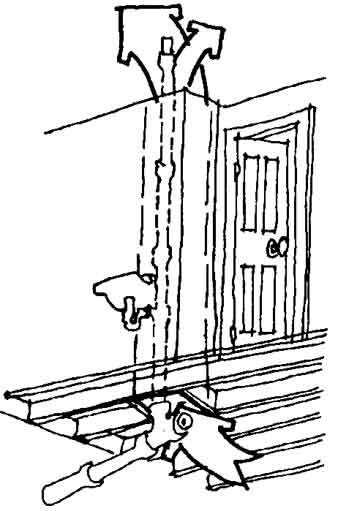
Depending on the way your house was framed, a lot of warm
air can escape into the attic through the partition wails. Seal from the
attic.
Recessed lights and other penetrations In Insulated ceilings
can result in a tremendous amount of heat loss.

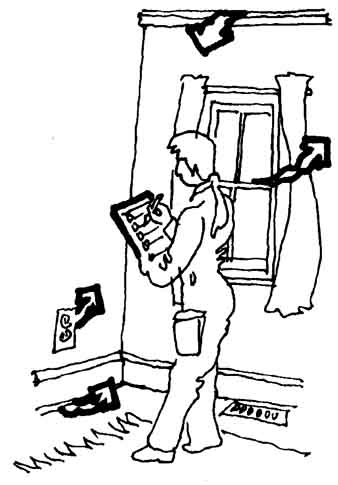
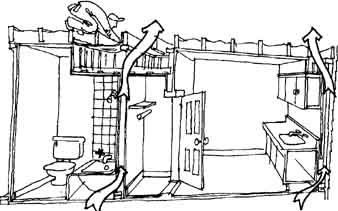
On a windy day, or with a window fan operating, feel for
air leaks around windows, fireplaces, electric outlets, recessed lights, and cabinets.
Drop-ceilings above closets, showers, and cabinets can
be among the worst offenders when It comes to air leakage.

Caulk is your number-one helper In sealing small air leaks,
such as cracks around bathtubs.
Expanding foam sealant works best for sealing somewhat
larger gaps—over W’ wide.
Backer rod or crack filler can also be used for sealing
deep cracks or as a backing for caulk.
UPGRADE INEFFICIENT WINDOWS and DOORS
About one-third of the home’s total heat loss usually occurs through windows and doors. In fact, the total energy lost through windows and doors in this country is about as much as the amount of energy we get from the Alaska Pipeline! Windows deserve the most attention because they outnumber doors. To reduce heat loss, you can either fix up your existing windows, or replace them with new energy-efficient units. Which choice you should take depends on a number of factors.
If the existing windows have rotted or damaged wood, cracked glass, missing putty, poorly fitting sashes, or locks that don’t work, you may be better off replacing them. The next section discusses the exciting advances in new window technology. But if the windows are generally in good shape, it will probably be more cost-effective to boost their efficiency by weatherstripping, caulking, and fitting them with storm panels.
New replacement windows will typically cost from $200 to $400 apiece, including labor. If you are going to the expense of installing new windows, be sure to spend the few extra dollars necessary to buy high-performance units with low-e (low emissivity) glass and argon gas fill between two or more panes of glass. The next section describes features of new windows in greater detail.
If your existing windows are in relatively good shape, it may be hard to justify the expense of window replacement. In that case, there are a number of ways to improve their energy efficiency. The quickest and least expensive option is to weather strip all window edges and cracks with rope caulk. This costs less than $1 per window and only takes a few minutes. Rope caulk may be taken off, stored in foil, and reused for two or three seasons, but once it hardens you should discard it.
A more permanent solution is to weather-strip the windows. This is more time-consuming and expensive than installing rope caulk ($8 per window), but it only needs to be done once, it permits you to open the window, and the weatherstripping is out of sight. The type of weatherstripping to use depends on the type of window—both compression-type and V-strip weather stripping are widely available in building supply stores, You usually get what you pay for with weatherstripping products so spend the few extra dollars necessary to get a top-quality product that is likely to hold up over years of use. With double-hung windows, if you don’t need to open the upper sash, you can permanently caulk them closed.
The next step in improving window energy efficiency is to install some type of storm window. If you have single-glazed windows, storm panels will double their energy efficiency. if you heat with oil, the improved energy efficiency in a cold climate will save about a gallon of oil per square-foot of window per year. (That’s an awful lot of oil that is otherwise leaking out of your house and adding to our air pollution woes.) With gas heat, the savings can top 1 therm per square foot per year.
The simplest type of storm window is a plastic film taped to the inside of the window frame. Inner storm window kits are readily available from hardware stores. They cost just $3 - $8 per window and typically last for one to three years. Some are made of special shrink-tight plastic that you heat with a blow dryer after installation to get rid of wrinkles. These inexpensive plastic films are especially suitable for apartments and condominiums where exterior improvements are not allowed, or not practical.

A tremendous amount of cold air can leak in through old
windows.
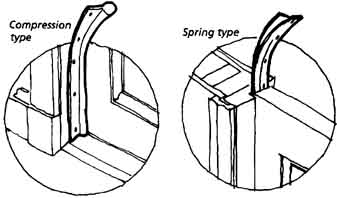
Weatherstripping Is the most permanent way to cut air leakage
through windows and doors.

Storm windows can be installed on the Inside or outside.
Removable or operable storm windows with glass or rigid acrylic panes generally make more sense if you plan to stay in the house for more than a few years. Both exterior and interior storm windows are available, though exterior units are far more common. Most people choose aluminum-framed combination storm/screen windows, which are very convenient to operate.
Be careful, though. There are big differences among products on the market, especially relative to air tightness. The tightest units have air leakage rates as low as .1 cfm/ft, while the worst are over 1.5cfm/ft. Don’t settle for anything higher than .5 cfm/ft. Also look for units with low-e coatings on the glass to improve the energy performance.
Storm windows typically cost between $50 and $120, depending on size, quality, and labor for installation—far less than replacement windows. Before buying new storm windows, though, check to make sure you don’t already have a stack in a dusty corner of your basement or attic. If these are older wood-framed storm windows, they probably just need a coat of paint. Although they aren’t quite as convenient as combination storm/screen windows (they have to be taken down and put up each year and separate screens are required), wooden storm windows are often more energy efficient.
If aluminum combination storms are already in place, examine them to make sure they are tightly sealed where mounted to the window casings; if not, caulk all cracks (but do not seal the small weep holes on the bottom edges).
Finally, you can boost the energy efficiency of windows by installing insulating curtains or drapes on the interior, These can be closed at night to significantly cut down on heat loss. They can also be closed on hot summer days to keep out unwanted heat gain. Look for shades or drapes that fit into tracks to keep air from passing around the edges.
Don’t forget about your doors. As with windows, make sure your doors are in good shape. Weather-strip around the whole perimeter to ensure a tight seal when closed. Install quality door sweeps on the bottom of the doors if they aren’t already in place. On an old, uninsulated metal or fiberglass door, a storm door probably isn’t cost-effective. In fact, a glass storm door may damage the plastic trim on some metal or fiberglass doors by trapping heat.

Insulated window shades or blinds cut nighttime heat
loss.

Install door sweeps to reduce air flow underneath doors.
INSULATE
Insulation is your primary defense against heat loss through the house envelope. However, putting insulation into a house after it is built can be pretty difficult. Because of the large area involved, walls are most important. You can probably tell if the walls are insulated by removing an outlet cover and peering into the wall cavity. Another way to check for insulation is to find a closet (or cabinet) along an exterior wall. Drill two 1/4 holes into the wall about four inches apart, with one hole above the other. Shine a flashlight into one hole while looking into the other, and any insulation should be apparent. If there isn’t any insulation, the best option is to bring in an insulation contractor to blow cellulose into the walls.
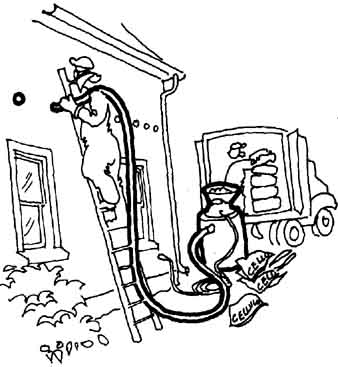
Cellulose Insulation can be blown into uninsulated walls
by an Insulation contractor.
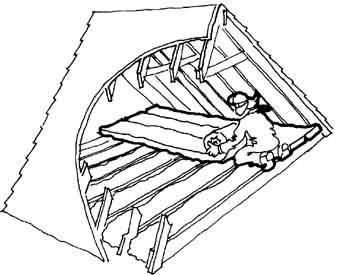
Adding more attic insulation is easy and can be done by
homeowners.
Adding insulation to an unheated attic is usually a lot easier. If there is no floor in the attic, simply add more insulation, either loose fill or unfaced fiberglass batts. If the existing insulation comes up to the top of the joists, add an additional layer of unfaced batts across the joists. This helps to cover gaps between the first layer of batts. If an attic floor is in place, you may need to remove that floor before adding insulation (be very careful not to step through the ceiling below!), In most of the country, a full foot of fiberglass or cellulose insulation is cost- effective in the attic floor.
If the attic is finished with a sloped cathedral ceiling, adding extra insulation is much more difficult. If there is no insulation there at present, it may be worth pulling off the drywall, insulating and installing a new ceiling. Or, if you will be re-roofing in the near future, consider adding a layer of rigid foam insulation and decking on top of the existing roof and then shingling over that. In either case, it’s a major project, and you will probably have to bring in a contractor to do the work. If there is already some insulation in the roof, it may be hard to justify the cost of this work, in which case you can focus your energy efforts else where.
Heat loss through foundation walls is often neglected even in new houses. But in fact, in an otherwise well-insulated and tight house, as much as 20% of the total heat loss can occur through uninsulated foundation walls, insulating the foundation or floor can easily save several hundred gallons of oil or several hundred therms of gas per year in northern climates.
If the basement or crawl space is unheated and you don’t have plans to fix it up, you will do best to insulate between the floor joists instead of around the perimeter walls. Use unfaced fiberglass batt insulation supported from below with wire or metal rods if necessary. Fluff the insulation to ensure that it fills the joist cavities, Cover the underside of the joists with a moisture-permeable air barrier, such as Tyvek® or Typar®. In crawl- spaces, cover the ground surface with 6-mu-thick polyethylene to keep moisture from getting into the crawl space from the ground.
Insulating a sloped ceiling in a finished attic can be
done from the inside, or by installing foam and new roofing on the outside.

To reduce heat loss to an unheated crawl space or basement,
insulate between your floor Joists. If pipes in the crawl space could
freeze, Insulate around the perimeter, as shown in top illustration.

The best way to Insulate a basement wall is to build a
2 x 4 frame on the inside and insulate with fiberglass.
If the basement is heated and used, you need to insulate the basement walls instead. The simplest method is to build 2 x 4 frames against the concrete foundation walls, insulate with fiberglass, and cover with drywall. Before doing this, you may need to correct drainage problems on the exterior if water leaks into the basement. Hire a reputable contractor who understands foundation drainage, or, if you do the work yourself, consult a good do-it-yourself manual.
ECONOMICS
The economics of all these energy improvements will depend on where you live, how large your heating or cooling requirements are, and how much you pay for energy. Most measures described in this section will pay for themselves in five years or less if you heat with gas or oil. If you have electric resistance heat, the payback will generally be much faster. Do-it-yourself energy improvements pay for themselves the fastest because the labor cost is eliminated—but make sure you know what you’re doing!
PLANNING ENERGY IMPROVEMENTS
Some of the more involved energy improvements mentioned here, such as window replacement and insulating, make the most sense when you are planning other remodeling work. If you are going to extend a wall out to enlarge your kitchen or put in a larger dormer for a master bedroom expansion, by all means boost energy efficiency at the same time. Rebuild walls with high insulation levels. Put in high-performance insulating windows.
As long as you’re ripping out walls, take advantage of the mess and go a little further, boosting the efficiency of some of the adjoining walls and windows as well. With a small addition, some of this work might even pay for itself right away if it means, for example, that you can get by without adding a separate heating system or expanding your current heat distribution system.
NEW CONSTRUCTION
If you are building a new house or a major addition, you can do it right the first time, saving money and the environment for decades to come. Today’s state-of-the-art energy-efficient houses typically require less than a quarter as much energy for heating and cooling as most existing houses. There are thousands of homes in the northern United States and Canada with yearly energy bills that total just $200 to $300.
These homes cost more to build than a standard house, but not that much more. You might spend an extra $5,000—$10,000 to build a super-efficient house with R-30 wails, R-38 ceilings, R-19 foundations, R-3 windows, and very low air leakage. But that extra cost will usually be recovered in just five to ten years through energy savings. Plus, you’ll be more comfortable and you’ll have the satisfaction of knowing that your house is dumping less pollution and carbon dioxide into the atmosphere.
Once you get an idea of what you want, contact builders or architects in your area and find out how experienced they are with energy-efficient construction. Special skills are required to build high-efficiency houses and to install features such as heat- recovery ventilation systems, You may need to spend a little extra time looking for the right builder, but the time and effort will be well worth it.Next: New Windows