Before you start, you need to decide where you will position your partition wall. The technique shown here uses guide lines to mark where the centers of studs will sit. If you want them to mark the edges, draw them to one side of the joists or studs into which you will drive nails or screws. If your stud wall is to have a doorway, lay a full sole plate as shown, and later cut away a section of it to make the doorway (see step 5A). You may need somebody to hold the ceiling plate in position while you fasten it in place.
TOOLS AND MATERIALS NEEDED: SEE BASIC TOOLKIT AND THIS SECTION
1. Layout
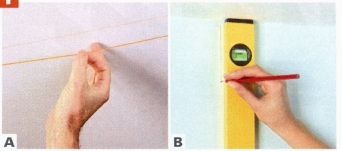
A. Snap a chalk line across the ceiling to mark either the center or one edge of the ceiling plate’s position. Remove the chalk line. B. At one end of the ceiling line, use a long level and a pencil to draw a line on the wall, all the way up from the floor. Repeat on the other wall.
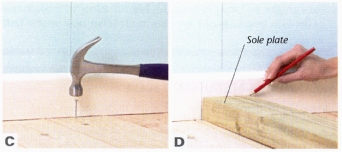
C. Drive a nail into the floor at the base of each wall guide line. Attach and snap a chalk line across the floor to draw a guide line. D. Where the wall guide lines meet the floor, mark a section of baseboard on each wall equal to the width of the sole plate.
2. Installing the Floor Plate
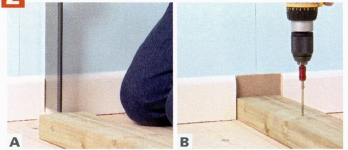
A. Cut away the marked sections of baseboard on both walls, taking care to saw accurate vertical lines. Pry the waste sections away from the wall with a pry bar if they stick. B. Cut the sole plate to fit across the room where the baseboard has been removed. Position it along its guide line, and secure it to the floor.
AN ALTERNATIVE TO CUTTING BASEBOARD
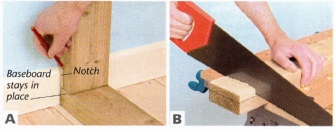
A. Mark a notch (area to be cut away) on the wall plate so that it will sit over the baseboard and lie flush on the wall. B. With the wall-facing side upward, saw along the guide line to the depth marked by the pencil lines on the edges.
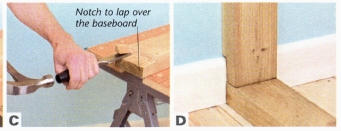
C. Use a bevel-edged chisel and a hammer to remove chunks of wood, working down to the depth required. D. Position the plate against the wall and secure as normal.
NAILING A STUD WALL TO A CONCRETE FLOOR
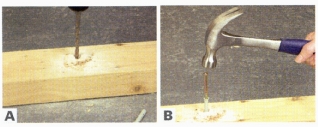
A. Use a masonry drill bit to drill through the sole plate and into the concrete floor. This will guide your fasteners into place. B. Use hammer-in fasteners through the drilled holes to fasten the sole plate securely into place.
3. INSTALLING OTHER PLATES AND TRIMMER STUDS
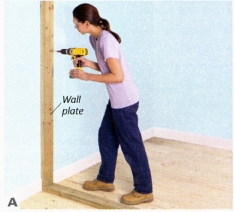
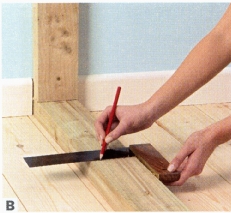
A. Cut the ceiling plate to length. Position it along the guide line, centered along it if necessary, and secure it to the ceiling. This will be easier if two people work together. Cut the wall plates to length and secure them to the walls. B. Mark the door position on the sole plate, allowing for the door plus its jamb. Mark positions for other studs, usually 16 or 24 inches (405 or 610 mm) on center.
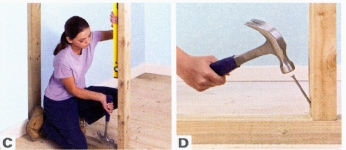
C. Cut and position a stud on one side of the doorway, using a level to keep it vertical and securing it as shown in the next step. D. Keeping the stud vertical, secure it to the ceiling and sole plates with 3-in (70-mm) nails inserted diagonally. Nail two or three nails this way at the top and bottom of every stud.
4. INSTALLING THE DOOR HEAD
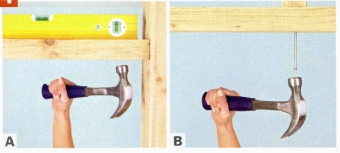
A. Cut blocking to the width of the doorway plus 1/2 in (12 mm). Secure to the door studs at height required for top of door jamb, using a level to make sure it's precisely horizontal. B. Cut a stud to fit between the top of the doorway and the ceiling plate. Secure it at the center of the doorway’s width.
5. FINISHING THE FRAME
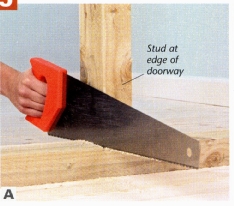
A. Saw through the sole plate just inside the doorway studs and remove the offcut, so that the doorway is clear Be careful not to saw into the finished floor The frame is now ready to be covered
Overview
Click images above for full size.

