Door casing, or trim, finishes the look of a newly installed door and updates the style of an older doorway. Care must be taken when installing casing, as the main purpose isn't decorative, it's functional. Casing conceals gaps between the door jamb and the rough opening. If you are installing a new door, the casing may come mounted on one side of a pre-hung door. If you choose to replace existing trim, you will need to remove it with a pry bar and a hammer.
Tools and Supplies needed:
Basic tool kit and items on this page.
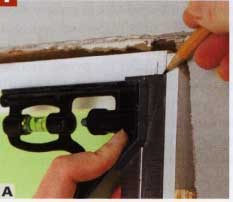
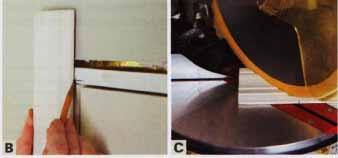
1. Measuring


A. Mark 1/4 inch (6 mm) from the inside of the door frame. This will
be your guideline for installing the trim. B. Place a piece of trim
on each side of the side of the door, aligned with the 1/4 in (6
mm) mark. Transfer the mark onto the trim. C. Cut each piece to length,
mitering each end at 45 degrees.
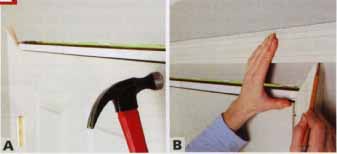
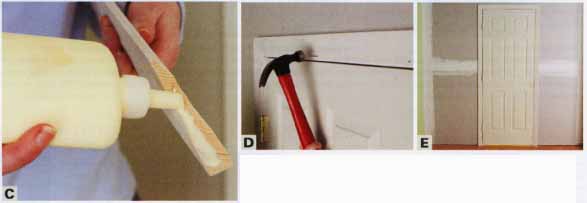
2. Attaching The Trim

A. Nail each side casing in place, starting at the top. B. Mark and cut
the top piece to length, mitering each end.

C. Apply a line of wood glue to the end of each miter to help secure
the pieces of trim to each other. D. Starting at the top, nail the
sides in place, then fasten the top piece in position. E. Fill the
nail holes with spackle. Let dry and sand smooth.
Adjusting the Miter

The most important part of installing door casing is making sure that
you cut the miters so that they fit together at the corners. Some DlYers
choose to install the top piece first, making sure it's level and on the mark, before installing each side piece. With the top in place,
you can use the top miters to mark the side pieces.
If you need to make adjustments, use a sanding sponge to gently remove material and shape the miter.
Further Information
Design options: Casing is available in a variety of design styles and profile options, from square-edged designs to colonial-style molding. Rosette blocks, decorative squares that butt the casing pieces at the top corners of the door, are a great Victorian-style option that eliminates the need to miter the ends of the trim.
Painting before installation: If you are using paint-grade door casing, you may want to paint the pieces before you cut to length and install. Use semi-gloss paint for door casing. Flat paint is harder to clean, and flat painted casing will show any dirty fingerprints.