

Knowledge of joining wood will allow you to design and construct customized shelving or other forms of storage. Understanding how to make common woodworking joints will also enable you to carry out repair jobs on items such as doors, windows, stairs, kitchen cabinets, and other furniture. Choosing which joint to use in any situation involves weighing strength, looks, and ease of construction. Biscuit joiners give the option of easily making joints.
Choosing a Suitable Joint
The complexity of any joint is determined by the strength and quality of finish required. joints hidden from view do not need to be decorative, and a butt joint will usually do.
Some joints are made for strength: for example, a lap joint is much stronger than a butt joint, and a mortise-and-tenon joint is stronger still. Your skills and experience may also affect your choice of which joint to use.
BUTT JOINTS
To make these simple joints you need only be able to measure lengths accurately, and make clean, straight cuts. Nails or screws should be slightly angled so that they cannot pull apart. Butt joints are commonly used in hidden frameworks such as stud walls.
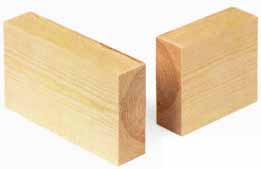
Above: Simple butt joint: In the most simple type of butt joint,
the face of one piece of lumber meets the face of another at a right
angle.
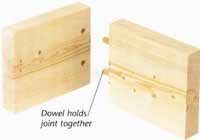
Above: Doweled butt joint: Strengthen butt joints by inserting ready-made
dowel pegs into the joint. Mark and measure carefully, so that the
dowel aligns with the hole: one option is to drive pins into one side
of the joint, at the dowel positions, and use them to create an impression
in the other side of the joint. Drill holes half the depth of the peg,
then glue and insert the dowel. Dowel holds joint together
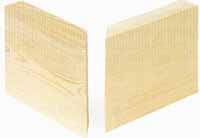
Above: Mitered butt joint: This is similar to the other butt joints,
but the ends of both lengths of lumber join at an angle, normally 45
degrees. This gives a more visually pleasing finish. Cutting guides
can help you make angled cuts easily and accurately.
LAP JOINTS
A lap joint is stronger than a butt joint. Each piece of lumber has half its depth removed so that it overlaps and interlocks with the other piece. A cross-lap joint (see below) creates a cross or T-junction rather than a right angle. For both, accuracy in measuring and marking up is essential.
MAKING A LAP JOINT

A. Use a marking gauge to make identical cutting guides on each section of lumber to be joined.
B. Cut a rabbet with a circular or tenon saw, making the cuts first across the grain, and then along the grain.
C. Attach the joint as required; screws are used here. Use wood glue as well if you want extra strength.
MAKING A CROSS-LAP JOINT

A. Mark the dimensions and position of the joint. Make several cuts across the grain, to the required depth, in the marked area.
B. Chisel away the waste wood from between the cuts, working slowly and carefully.
C. Slot the two notched lengths of wood together. Attach them with wood glue and/or nails or screws.
HOUSING AND RABBET JOINTS
These two joints are useful for cabinet and shelving construction. Both are easiest achieved with a router, a power tool that cuts a rabbet to a set size.
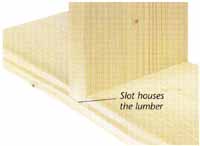
Above: Dado joint: This is used to create a T-junction between
wide boards, often in shelf construction. Cut a slot with a router
or use a tenon saw and chisel as shown opposite bottom. Push the lumber
into its slot and attach with glue and screws.
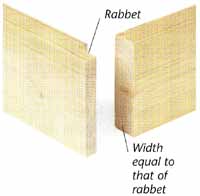
Above: Rabbet joint: This is similar to a dado joint but
the lengths of lumber are joined at their ends. It can also be used
to join wide boards at a right angle. Cut a rabbet at the end of one
length with a tenon saw (below). Glue and screw the joint. Width equal
to that of rabbet.
MAKING A MORTISE-AND-TENON JOINT
Mortise-and-tenon joints join pieces of wood very strongly and cleanly. The end of one length of lumber is cut away on two, or all four, sides to make a peg. A peg-sized hole is then cut out of another piece of wood, and the peg is inserted. Joints connecting the stiles of doors with the rails are often made in this way.
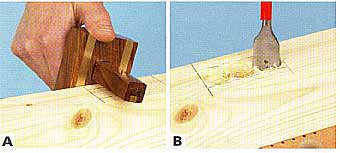
A. Mark the cuts needed for the peg and slot on two lengths of lumber. Cut the peg with the wood grain as shown for a lap joint.
B. Drill overlapping holes to the depth required for the slot with a flat bit. Remove as much of the waste wood as possible with the bit.
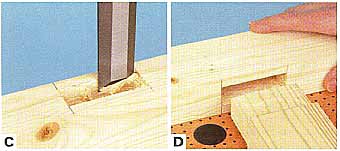
C. Neaten the edges of the slot hole using a hammer and chisel.
D. Insert the peg into the slot to check the fit. Then apply wood glue to the inside of the slot, and make the joint.
JOINT BRACKETS AND BLOCKS
There are a number of plates that can be used to repair existing wooden joints, or create new joints. To attach a bracket or block flush to wood, draw around it, and use a chisel and hammer to create a shallow rabbet.
Plates
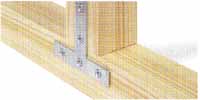
Tee plate: Flat plate used to strengthen a T-shaped joint.
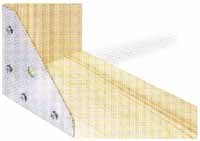
Corner plate: Used to strengthen corner joints.
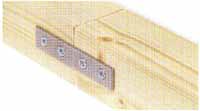
Mending plate: Straight, strengthening plate.
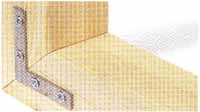
Angle plate: Strengthens any right-angled joint. Often used as a repair
option on the corner of window casements.
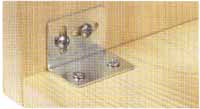
Stretcher plate: For internal joints. Has elongated attachment holes
used to adjust position.
Braces
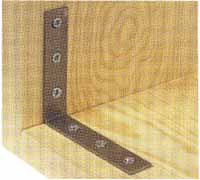
Corner brace: Flat plate bent to form a right- angled brace to strengthen
a joint.
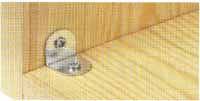
Angle brace: Small corner brace, commonly used to hold down kitchen
countertops.
Joints

Assembly joint (joint block): Used to strengthen a right-angled joint,
commonly in kitchen units.

KD joint: Used to strengthen a right-angled joint. Comes in two sections.
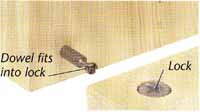
Cam dowel and lock: Used in furniture for joining flat sections or
panels.
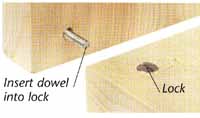
Cross dowel and insert: Used to create joint between panels or sections
of a framework. Commonly used in self-assembly furniture such as beds.
Previous: Custom Shelving Next: Planning a Closet