Skill level:
Provide a sound, level base and anyone will be able to erect a garden shed - though an extra pair of hands is essential for lifting the panels into place.
Safety:
Have a steady pair of stepladders for working on the roof--and get someone to help you lift the heavy wall and roof components into place.
Intro:
In the long run, it pays to buy a quality shed which, with routine maintenance, will provide a dry, sound facility for storing tools, materials, garden furniture and other equipment.
Never skimp on the size of shed you buy. Get the largest that will suit your garden - extra space is invaluable as not only can you store more, but the shed will be easier to organize and items will be more accessible
2--Planning
You can buy a shed to suit whatever amount of storage space you need, from a mini-store for a few sun-loungers to 12ft long (3.7m) buildings that can double as workshops.
Some sheds have to be ordered as they are not kept in stock.
Planning permission is not normally needed for a prefabricated shed to be built in your back garden.
Think about access for getting the panels from the delivery lorry into the back garden. If you have side access to the rear garden there should be no problem, but taking them through the house could be difficult.
If you intend to use the shed as a workshop, a bright spot in the garden with a pleasant view from the window would be advantageous. Also if you intend running an electrical supply it would be sensible to have the shed as near to the house as possible.
3--Looking for quality
Don't select a shed from a brochure - go and see it for yourself so you can judge its construction and quality of fittings.
Check the thickness of timber used for wall panels and look for solid construction such as shiplap and overlap cladding.
With shiplap the tongues and grooves of the planks slip into one another. With overlap each plank overlaps the one below it.
Most sheds are made from pine or deal. Some are factory treated with a preservative. If not it is well worth applying a coat of preservative and repeating the treatment each year to prevent decay.
Check the quality of the floor, a poor-quality floor will flex with your movement and will not be suitable for a workshop.
Garden sheds comprise a number of pre-fabricated wall panels and roof sections that are simply joined together to form the structure.
4 - Roof styles
The traditional garden shed has a pitched roof with the two panels rising from the side wall panels up to a central ridge.
Here you have plenty of headroom in the middle of the shed but less at the sides.
A single-pitch roof, also called a pent roof, has virtually the same headroom inside all round. There is a slight slope on the roof to ensure rainwater flows away.
If you plan to work in the shed you may find a pent roof more suitable with the highest part by the windows where the workbench is normally sited.
Usually the roof is supplied with roofing felt already attached - all you have to do is fix the panel in place. Sometimes the roofing felt is supplied separately for you to attach.
The only way to judge whether the proportions are going to be adequate for your needs is to visit the supplier and stand inside the shed.
5--Doors and windows
The door comes ready fixed to the door frame and assembled within the panel.
Window frames are fixed similarly to doors.
The glazing is usually secured using strips of timber pinned to the frame. To ensure a window is weatherproof run a bead of frame-sealing mastic around the glass.
6 – Base
It is essential to have a level and dry foundation. It is impossible to erect a shed on an uneven site as screw holes connecting the wall panels will not line up. For a lightweight shed it may be sufficient to use some paving slabs laid on heavy-duty polythene sheeting to act as a damp-resisting barrier. For larger buildings especially where the shed is to be used as a workshop a concrete slab is best. The slab needs to be just smaller than the floor area of the building so that rainwater running off the wall panels does not drip onto the concrete.
A concrete base needs to have a 75mm (3in) base of compacted hardcore. The base can be level with the ground or raised above it. If it is to be level you will need to excavate 150mm (6in) to allow for the hardcore layer and 75mm (3in) thickness of concrete.
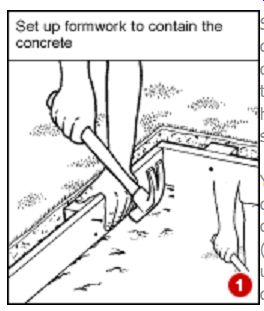
Set up leveled formwork to contain the concrete and check diagonals (1). Then lay thoroughly compacted hardcore and cover with sand.
You can mix your own concrete using one part cement to five parts ballast (which is most economical) or use bags of dry-mixed concrete to which you add water.
The concrete should be kept on the dry side - not too much water or it will be sloppy.
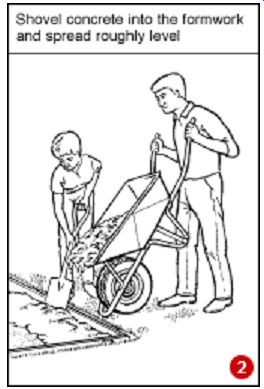
Spread the concrete slightly proud of the formwork (2), then level it off with a long plank resting on the formwork using a sawing motion (3).
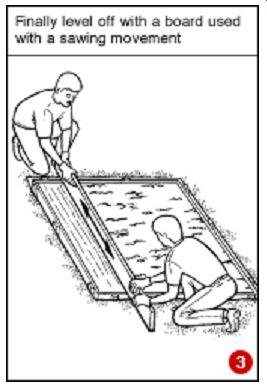
If rain is expected cover the concrete with polythene for 24 hours. In warm weather cover it with wet sacks and sprinkle them with water over the 24 hour period. The base is then ready for the shed.
7 - Erecting the shed
The floor will comprise boards fixed to bearers. It is simply laid in place and will be held there by the weight of the shed. Check with a spirit level that the base is horizontal (4).
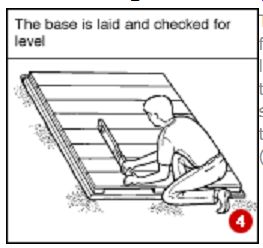
Check each panel to ensure you will be fixing them in their correct positions - doors and windows in the right place (5).
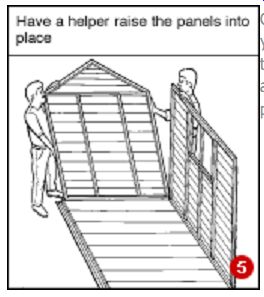
The panels are joined to each other through pre-drilled holes, using screws and washers or nails (6). It is usual to start with a side and back panel, then to add the other side panel, and finish with the door section.
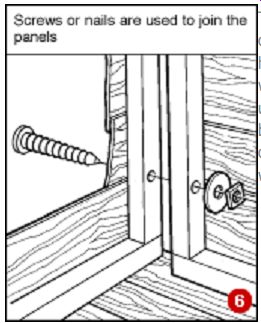
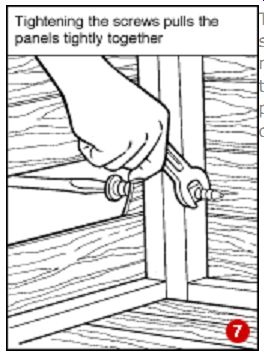
The action of tightening the screws or banging home the nails draws the wall panels together (7). Subsequent panels are secured to each other.
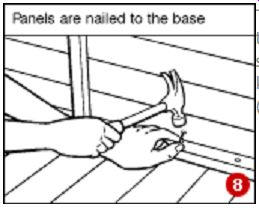
The wall panels are secured to the floor joists using screws or nails (8). If nails, knock them in at an angle (skew nailing).
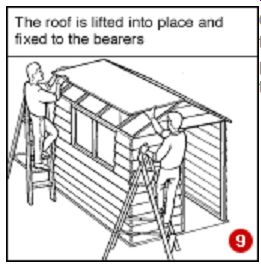
Once the walls are erected, fit the roof (9). The panel or panels are usually fixed to the walls with nails.
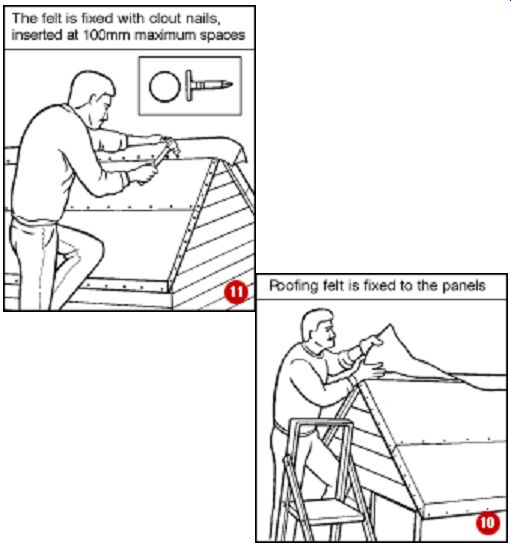
If not already fitted, cover the roofing panels with strips of felt, overlapping 50mm minimum. These are always fixed from the lowest part of the roof, working upwards (10). This ensures that rainwater running down the roof does not seep under overlapping edges. Clout nails are used to secure the felt (11).
Some shed kits come with corner strips and fascia boards for finishing edges.
8 - Insulation and power
Some shed wall panels come lined with building paper to keep out draughts. For better insulation to protect equipment and tools from rusting line the walls with glass fiber loft insulation or expanded-polystyrene slabs covered with sheets of wallboard or hardboard.
If power and lighting is to be added to the shed cables will need to be buried in the ground or run overhead supported by a wire cable at a safe height. Cables must never be trailed along the ground or run along a wall or fence. Employ a qualified electrician to do the work.