Ortho Home Improvement books
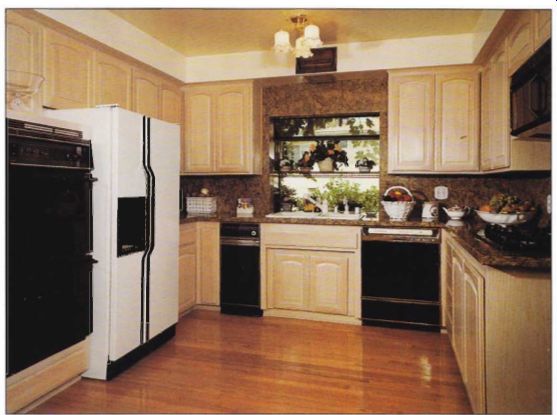
The degree to which the new kitchen suits your needs depends largely on how well you put together the fixtures and appliances. As with the construction elements, there is a range of type and quality of fixtures and appliances to meet every budget. Kitchen fixtures include cabinets and the myriad fittings within them, countertops, and sinks and faucets. Major kitchen appliances are the large appliances--the dishwasher, cooking appliances, refrigerator, and freezer. Less glamorous--but equally necessary--are the garbage, recycling, and ventilating systems included in a well-designed kitchen.
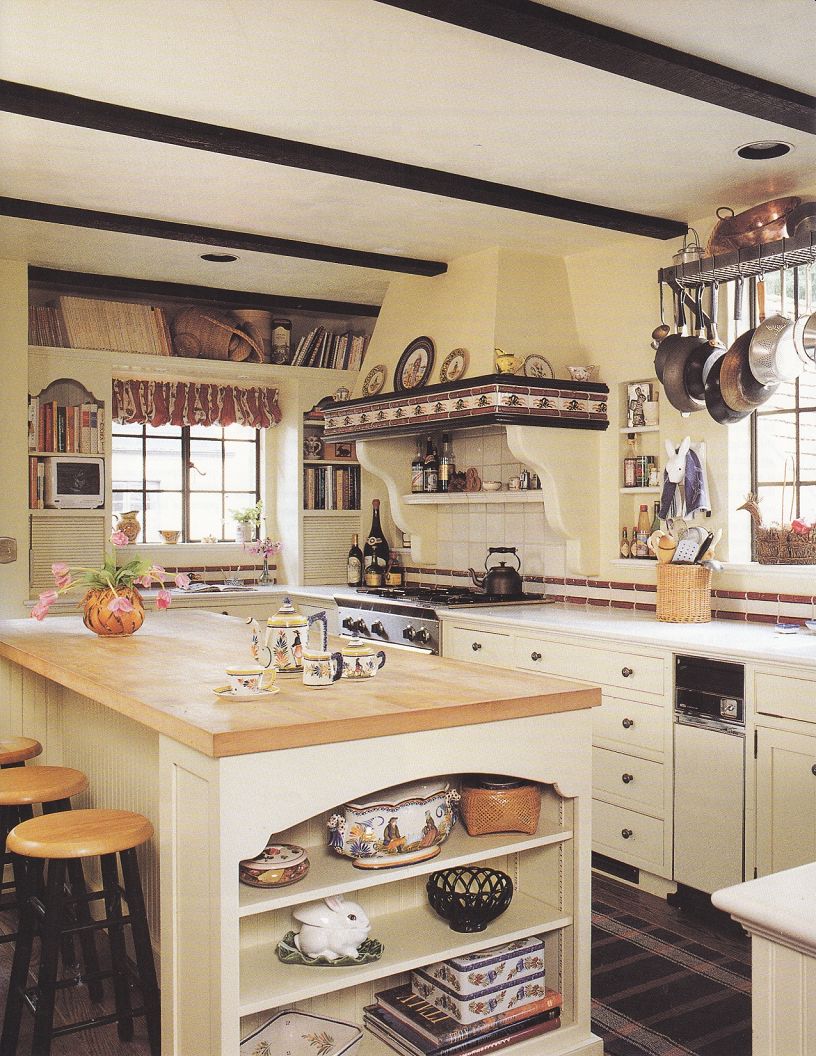

--------- Base your choices for cabinets, fixtures, and appliances
on how each suits your kitchen style and theme, the measurements of the
preliminary floor plan, your maintenance requirements, and your budget. The
traditional country charm of this kitchen, also pictured earlier, is enhanced
by open shelves, which display collections and cooking items.
++++++++++++
CABINETS
Think of cabinets as furniture for the kitchen. They should be a pleasure to look at and comfortable to live with. More than any other fixture, the cabinets will express the style of your kitchen. Their locations and features will also determine whether the kitchen is an organized and convenient place to work.
Choosing Cabinets
There are several different sources for new cabinets. You can buy them from stock, order custom modular units, or have cabinets built to order. The type of manufacturer you choose will determine the price range, type of construction, waiting period, and amount of customizing available. Use the following procedure for choosing new cabinets.
. Evaluate your storage needs.. Assess the amount of storage capacity desired.
. Measure the space avail able for different storage areas.
. Decide on the type and quality of cabinets that you can afford.
. Pick the exterior style and finish of cabinets.
. Choose the interior features you need.
. Select the hardware that will work best for you, the cabinet type, and the kitchen look.
As you shop, you will come across various design terms from different manufacturers.
What is significant in choosing cabinets is not the name of the design but how it its your kitchen.
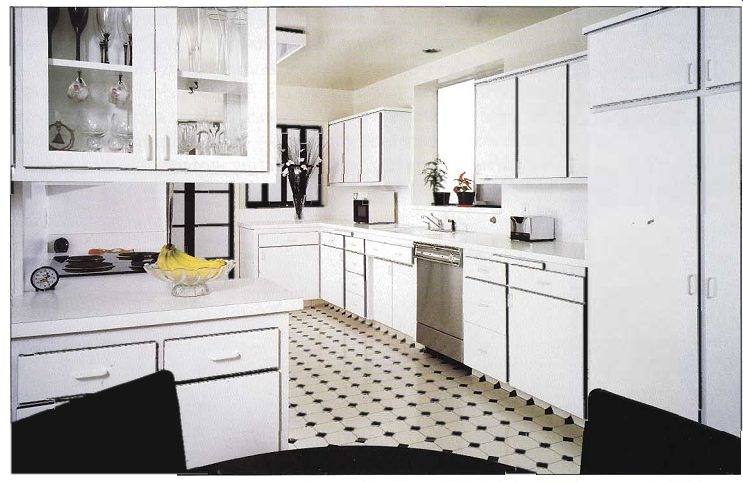
------ Use the principles of design Io coordinate elements in
every price range. Although the materials in /his kitchen are not the most
expensive, the design is appealing because of the manner in which they have
been combined The black edges of these refaced cabinets match the accents
of the resilient flooring.
For added visual rhythm the doors to the dining room and pass-through (behind the flowers in the background) have been painted black and while.
Stock Cabinets
Also called ready-made, knock down, or ready-to-assemble, stock cabinets are made in large factories on an assembly line. The units are shipped in car tons and put together on site; some are totally unassembled and packed flat. They come in standard sizes and shapes to suit most basic kitchens. While no custom orders are taken, you can choose from a large range of styles and materials. Stock cabinets have a short or der period and are sometimes available immediately. They are your least expensive option and can offer quite a bit of style for the money. The price and quality of cabinets vary widely; pay close attention to the following construction details.
. Are joints both glued and screwed, or connected with other secure special-purpose fasteners?
. Is the wood grain well matched? Are the edges clean and smooth?
. Is the surface laminate durable and of high quality?
. Is the core material of adequate strength for your needs?
. Are the interiors finished neatly?
. Are doors and drawers straight and even? Are cabinet frames square?
. Is the hardware strong and skillfully installed?
. Are shelf supports adequate?
. How much assembly will be necessary?
Custom Modular Cabinets
Also called special-order cabinets, custom modular cabinets are factory-made to your specifications. You choose the type of wood or laminate surface, the door and hardware styles, and the cabinet sizes and con figurations from the standard range offered by the manufacturer, and your set of cabinets is built to order.
The advantages are that you get exactly the combination of features you want and, since the cabinets are all built at once, possible variations in wood grain, finish, or laminate color are controlled. You can special order custom cabinets in odd sizes or equipped with features not found in stock lines. The large factories that make these cabinets have sophisticated joining equipment, and their finish application is generally superior to that of smaller shops. Both the quality and price of custom modular cabinets tend to be higher than for stock cabinets, but they vary widely. Order time is longer; it can range from 5 to 15 weeks.
Built-to-Order Cabinets
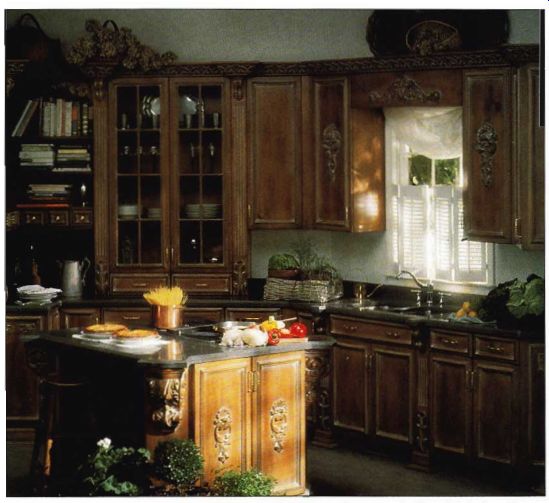
----------- Specifying built-to-order cabinets allows flexibility in
your floor plan and gives you freedom of choice in styling the room to your
heart's desire. A traditional kitchen with a Roman theme is achieved here
by heavily detailed wood cabinets and solid-surface-material countertops made
to look like natural marble.
Also called custom-made cabinets, these are the ne plus ultra of kitchen fittings. Like fine custom furniture, these cabinets are individually built of the finest materials to your ex act specifications-no modular sizes or standard materials inhibit your desires. Many built fo-order cabinets are fashioned of fine hardwood, or they may have a unique design or finish available no other way. The cabinets may be extended to include a coordinated dining buffet, wine bar, or stereo center in an adjoining room. These cabinets may be imported, domestic, or made by a local shop.
The fabricator's representative--or the cabinetmaker will come to your home to measure the kitchen and will work closely with you during the design process. The advantage is that you end up with one-of-a-kind kitchen furnishings perfectly suited to your needs and style. Of course, all this perfection comes at a price.
An economical alternative to a built-to-order kitchen is to in stall custom modular cabinets, and have a particular show piece or unique functional item built to order. Depending on the size of the job, its materials, and the order backlog, fabrication time can be many months.
Cabinet Construction
The construction of a cabinet entails more than meets the eye.
Along with deciding on a look that fits your kitchen, you must select the type of frame, door style, construction material, interior design, and hardware.
Frames
Despite the countless styles available, there are only two types of cabinet construction: frame and frameless. In frame construction, the body of the cabinet is formed by a wood skeleton enclosing thin wood panels; the doors are usually frame-and-panel too. The frame provides rigidity and support for the cabinet and its contents. Frame construction is a traditional cabinetmakers' art and lends a note of grace to any cabinet style. A common variation is /ace-frame construction, in which only the front of the cabinet has a frame, and the sides, top, bottom, and back are assembled with dado joints.
Frameless construction, sometimes called European style, is a newer technique in which the sides, top, bottom, and back of the cabinet are joined with special fasteners to form a box. The doors completely cover the front of the box. This makes a smooth, clean-lined design that lends itself to modern styles and the use of laminate surfaces.
Doors
The way a door or drawer face is fitted to the cabinet deter mines to a great degree the overall look of the cabinet, There are three basic door fit tings: overlaid, flush, and partially inset.
Frameless cabinets always have an overlaid door, in which the entire door panel rests against the front of the cabinet. The hinges are hidden, and rows of doors form an al most seamless, smooth facade a very sleek and modern look.
On frame cabinets, overlaid doors will usually show the outline of the face frame, a somewhat rustic, boxy look.
Flush doors it entirely in side the face frame when closed, forming a flat surface that reveals the frame and hides the door edges. This can provide a smooth, simple facade, but often the hinges are partially exposed.
Partially inset doors have a lip along their edges that over laps the (ace frame, although the main body of the door fits within the frame. The door appears to overlay the frame, but in a slimmer, lighter way.
All three styles can be equally sturdy and efficient; how well they perform is dependent on the quality of the hardware. All three types are available in designs to it almost any kitchen. Overlaid doors are generally modern, flush doors may be modern or traditional, and partially inset doors come in the widest range of modern and traditional designs.
Wood cabinets bring a natural warmth to every style of kitchen. Here a glass-panel floor within n run of cabinet: and the inlay of contrasting wood below the countertop edge add interest to the beautiful wood cabinets.
Door Fronts
All door styles are available with different designs on the front face to it different looks.
For a modern kitchen, choose a door with a smooth, flat-front panel, with either veneer or laminate surfaces, per haps with continuous wood or metal pulls across the tops or with wood or metal edging on a least two edges.
For a traditional look, choose a door with dimension-horizontal rails and vertical stiles around an inset pane) that is raised, flush, or recessed. The panel may be solid wood, veneered plywood, or glass. Its top can be arched or square. The top rail above the panel might be carved or stenciled.
Materials and Finishes
Along with the strength of the joints and hardware, the overall quality of the cabinet is a combination of the grade and thick ness of the core and surface materials.
Core Material
The cabinet core material will usually be particleboard, plywood, or metal. Particleboard is stiff, smooth, warp resistant, and very heavy. ]t is made in many different grades for different applications; a board rated 45-pound commercial grade is excellent for cabinets.
Plywood makes a stronger, more warp-resistant cabinet than solid lumber does. First rate cabinets use a high-quality, solid-core plywood with a knot-free surface. The ultimate is a furniture-grade solid hardwood plywood with a fine hardwood veneer. Check the inside and back of the cabinet when investigating the quality of materials.
Metal cabinets are recommended mainly for families with special needs, such as construction-material allergies, or to attain a unique look.
For a frame cabinet, the minimum thickness of wood based core material should be 0.5 inch; for a frameless cabinet, 5/8 to 3/4 inch is recommended.
Laminate
Although usually a very thin layer, the surface material is what gives a cabinet its feel, its sense of weight, and a large degree of its style. It must also be durable enough to with stand daily bumps, scratches, and scrubbing.
Laminates, referred to by designers as mica, have a smooth, seamless surface that lends itself to modern, clean lined cabinet design. They are manufactured in several performance levels. Pay attention to prices when shopping for laminate cabinets; those that are much cheaper than average probably have a less-durable laminate, but the trade-off may be worthwhile if the cabinets are well constructed.
High-pressure laminate (HPL) is the thickest, most durable and the most commonly used; it is also expensive. Because it can imitate natural wood grain, a lacquer finish, or even metal, the look of laminate is an attractive design statement on its own, and HPL boasts hundreds of colors and textures. The same high pressure laminate can be used for both cabinets and counter tops for a simple, unified, custom look.
Low-pressure laminate (LPL), also known as melamine, has a base of paper or polyester and usually comes heat-fused to a light substrate material. Although not so thick or durable as HPL, it is cheaper and may well meet your needs. Economically between HPL and LPL is continuous high performance laminate (CHPL), which is similar to HPL but is thinner and softer. While it performs almost as well as HPL, it is less expensive.
Wood
A well-made set of wood cabinets will have a coordinated grain pattern and color. The very best-and most expensive--will have a grain that continues unbroken across the line of cabinets or that is mirrored symmetrically in an effect called tabling or booking.
Hardwoods are usually used for kitchen-cabinets. For cabinets that will be left natural or stained, use oak-the most popular-maple, cherry, walnut, mahogany, teak, or pine.
For cabinets that will be painted, choose ash, beech, birch, or poplar, which are smooth and not highly grained.
When specifying a species of wood for your cabinets, be sure you know whether it is a color or a grain pattern you are after. For example, oak, a relatively cheap hardwood, can be given a walnut stain, satisfying your desire for walnut cabinets at a lower price.
Most wood cabinets are de livered prefinished. When buying stock cabinets, check that the color and level of gloss is consistent. When buying custom modular and built-to-order cabinets, request your preference of stain color and level of gloss in the clear finish.
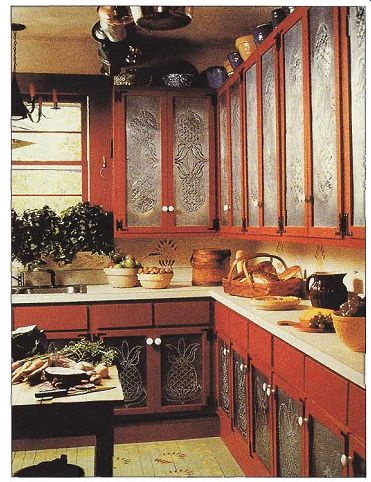
------- How many pineapples can you find in this kitchen? The traditional
Hawaiian symbol of welcome is pressed into fin door fronts and stenciled
onto the floor and backsplash for a united design motif.
Interior Design
Most people complain now and then that their kitchen cabinets don't have enough space, but storage problems are often caused by the inefficient use of adequate cabinet space. When designing your cabinet locations, keep in mind that hard to-reach storage space simply won’t be used.
In general, drawers and rollouts of various widths and depths offer more accessible storage in base cabinets than do shelves. All shelves should be adjustable in height. Frameless cabinets have more accessible interior space-side to side than frame cabinets, so these may be a sensible choice if cabinet space is tight.
Some of the most remark able changes in kitchen design have been in the fittings inside cabinets. Spend time figuring your needs and look through cabinet catalogs and in show rooms for features that will in crease the efficiency of your storage. Some of the novel it tings available foe inside of cabinets include:
. Swing-out spice rack with shelves behind
. Revolving lazy Susan for corner cabinets
. Pull-out towel bars
. Door-mounted racks
. Vertical tray dividers
. Roll-out trash and recycling bins
Hardware
A multitude of hinges, pulls, and glides, designed especially for kitchen cabinets, provides specialized function as well as style.
Visible hinges and pulls should coordinate with the look of the kitchen cabinets and may be a notable design highlight for the room. In general, a modern cabinet calls for hinges and pulls of simple design and material: a plain laminate cabinet with continuous brushed-aluminum pulls, for example, or a plastic or steel C pull, A traditional cabinet calls for dressier hardware, such as a frame-and-panel cherry cabinet with visible bronze or brass hinges and a polished brass handle with a backplate. A period cabinet should have historically correct hardware.
Black wrought-iron surface hinges and latches complement a Colonial-style cabinet.
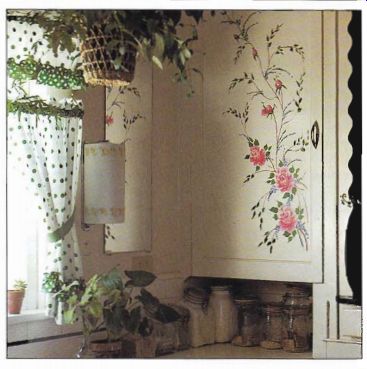
------ Personalize cabinets inside and out. Decoratively painted cabinet
doors (above) can be achieved through stencils or artistic talent. Space-saving
interior hardware (below) is available for drawers, wall cabinets, and
base cabinets.
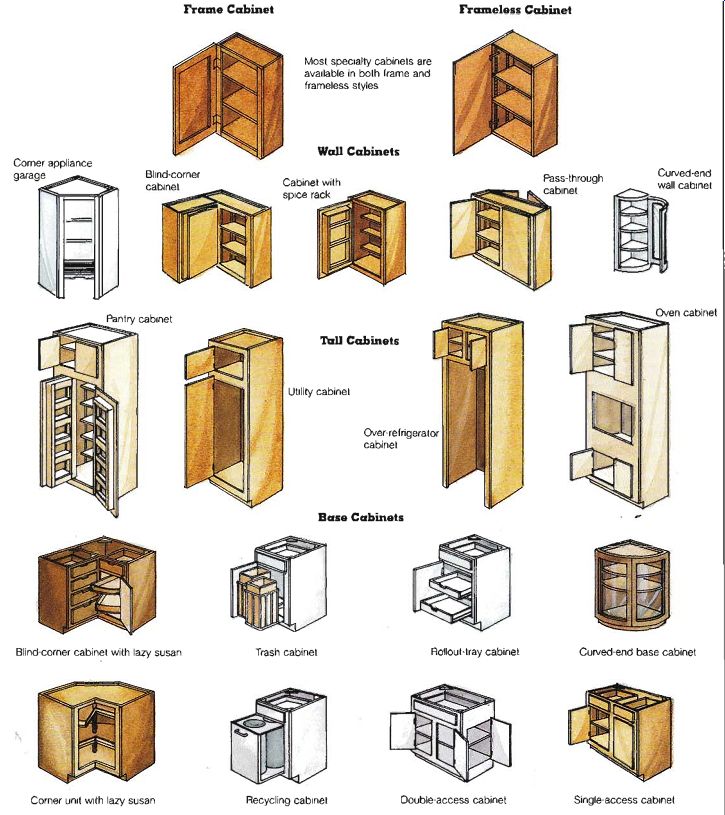
---- Specialty Cabinets: Double-access cabinet; Single-access cabinet;
Trash cabinet;
Recycling cabinet;
Rollout-tray cabinet;
Curved-end base cabinet;
Cabinet;
Blind-corner cabinet with lazy;
Susan Corner unit with lazy susan
Frame
Cabinet
Frameless
Cabinet
Most specialty cabinets are available in both frame and frameless styles
Tall Cabinets
Utility cabinet
Over refrigerator cabinet
Base
Cabinets cabinet
Comer appliance
Pass-through cabinet
Curved-end cabinet
Wall
Cabinets
Pantry
Blind-corner cabinet
Cabinet with spice
---------------------
Hinges
A new cabinet-door hinge is a complex little machine that steadies the door when open, pulls the door snug against the cabinet when closed, and adjusts to straighten a sagging door. Hinges may be hidden, partly exposed, or surface mounted, depending on the cabinet style. Hidden hinges are most often used in a modern style, where a smooth, unbroken surface is desired.
Check hinge quality care fully when cabinet shopping.
Kitchen-cabinet doors take a lot of abuse.
Pulls
A pull may take the form of a knob or a handle, a finger notch recessed into the cabinet face, or a continuous wood or metal strip mounted on the top or bottom of the door. Its function is as much design as utility. When choosing a pull style, take into account the size of the smallest drawer and largest door and pick a pull that suits both in scale. Height and width of door and drawer rails, stiles, and panels-and ease of use determine the horizontal and vertical placement of pulls.
Choose a pull color that blends with or contrasts the cabinet color or as an accent to bring out a color used else where in the kitchen.
Remember to include the protrusion of the pull when measuring cabinet clearances.
Always try a pull before buying to be sure it its your fingers (and fingernails.,).
Glides
Totally hidden and absolutely vital to an effective storage system, glides support drawers and roll-out shelves, allowing them to slide effortlessly in and out without wear. A typical glide, mounted on the side or bottom of a drawer, has a metal track that moves along nylon rollers. A stop at the front of the track keeps the drawer or shelf from falling out; it can be depressed for removal.
Most frame cabinets have wood drawers with slides mounted on the side or bottom.
Frameless cabinets have glides as an integral part of the drawer side. Some glides have an extension that allows a heavy drawer to be palled out all the way. A small drawer may have simpler glides or none at all.
Check glide quality with the drawer carrying a full load, if possible. Also check the ease of removal and reinsertion. Mote whether glides have rough metal edges or are smoothly coated so they won't cut your fingers

------- Because tambour doors, seen here on the island, behind the
desk, and covering the corner appliance garage, provide interior access
without having to allow (or door swing, they are a good choke for light spaces,
Specialty Units
Cabinet manufacturers--and certainly cabinet craftspeople produce specialty units for particular needs. New designs are introduced every year. Their appropriateness for your new kitchen is a matter of personal judgment; check your wish list to see how suitable these and other specialty units would be to you.
Open display shelves co ordinated with the cabinets give the kitchen a cohesive appearance and can be purchased to it perfectly between units.
Appliance Garage
An appliance garage clears counters of the array of small appliances taken for granted in the modern kitchen. The garage usually consists of an oversized built-in cabinet covered by a tambour door, which rolls over the garage space and down to the countertop to hide small appliances, a television, or a microwave oven. If you plan an appliance garage, in stall appropriate electrical receptacles at the back of it so appliances can remain plugged in between uses. Make sure the height will accommodate your tallest appliance, the depth will accommodate your deepest, and the counter space remaining in front will be sufficient.
Pull-out Counters
A pull-out counter hidden behind a drawer front can be extended to provide extra counter space, a chopping block, or small table. Some styles sit on legs. Others pull away completely from the cabinet /ace or box and can be rolled around for portable use.
These countertops are handy for discrete tasks, such as Tolling out dough or using a food processor. They do not have to be installed at countertop height, and can be placed in the middle of the run of drawers for use by children or some one in a wheelchair.
Ironing Cabinets
Ironing board cabinets are avail able in several styles. Some pull out from behind a drawer front;
others fold down from a wall or tall cabinet. Some contain only the board; others provide storage for clothing items, starch and supplies, and the iron itself. Re member that you need to plan an electrical receptacle near the ironing area and sufficient work space on one side of the board.
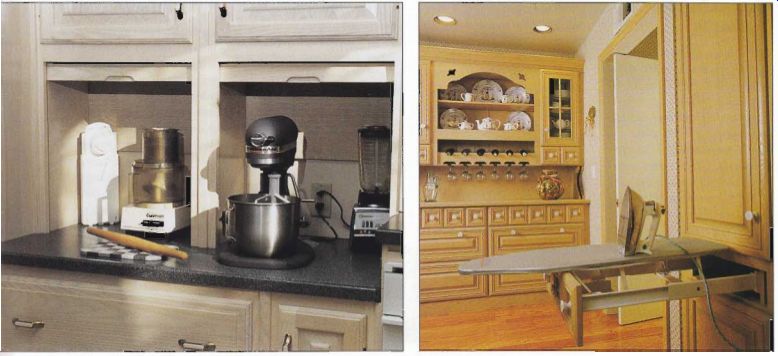
------ Find specialty units to satisfy kitchen activity desires.
Appliance garages (above left), often recessed into otherwise unused wall
space, keep small appliances handy yet hidden. Space-saving ironing board
cabinets (above right) have resurged in popularity as home square footage
declines. Desk units (below) made to match other kitchen cabinets arc available
from many manufacturers.
Specialized Drawers
Specialized food drawers are deeper than standard, lined with metal, and have sliding lids to keep bulk dry goods easily accessible. Some have a perforated bottom for ventilating root vegetables.
A sink-front bin is a hinged drawer front that opens to ac cess a tray for sponges and scrubbers. This tilt-out, occupying a formerly wasted space, hides the most common, least attractive sink accessories.
Desk units that match kitchen cabinets may contain file drawers and computer component shelves. Cabinets above may have pigeonholes or drawers and shelves. Often covered by a tambour door, these units look and work like a roll-top desk.
Bar units can include bottle drawers and stemware racks.
Plan plumbing for a bar sink and ice maker, and receptacles for a refrigerator to complete the party center.
Measuring for Cabinets
Cabinets are made in standard dimensions that comply with architectural design standards and appliance sizes. This enables you to assemble your cabinets building-block style.
Most American-made cabinets increase in 3-inch width increments, starting as narrow as 9 inches to more than 60 inches.
Some frameless and all European-made cabinets are based on the metric system. When you choose metric cabinets, carefully verify that appliances will it with them.
Each manufacturer offers a specific range of cabinet sizes; not all styles may be available in all sizes. Ask for a specification sheet.
Base Cabinets Standard base cabinets are 24 inches deep and 34.5 inches high, including a 4- or 4 1/2-inch toe kick. Some European styles have higher toe kicks. A conventional countertop substrate of 1 1/4 inches brings the countertop height to 36 inches. You can customize the countertop height by building up or cut ting down the toe kick; making the countertop substrate thicker; or adding a narrow plinth, filler strip, or row of shallow drawers along the top of the cabinets under the counter. Keep in mind that the standard range or dishwasher is made to it a 36-inch-high countertop. Of course, custom cabinets can be made for specific needs.
Wall Cabinets
Typically, wall cabinets mea sure 12 to 13 inches deep and 12 to 36 inches high, although standard cabinets come as high as 42 or 48 inches. Custom units can be built for special uses. Widths range from as narrow as 9 inches to more than 48 inches. Even if you modify the height of the base cabinets, the wall cabinets should be set 15 to 18 inches above the counter top, 25 inches above an island or peninsula, and 27 to 30 inches over a cooktop. A 15 inch-tall cabinet fits over a standard refrigerator; an 18 inch cabinet goes over a hood/vent.
Tall Cabinets
Pantry and broom-closet cabinets are usually 84 inches high and 12 to 48 inches wide. Some manufacturers offer this cabinet at 96 inches high. Tall cabinets are also made to fit microwaves and single and double wall ovens. Remember that if you raise or lower the height of the wall cabinets, you must also modify the tall cabinet accordingly, so its top will line up.
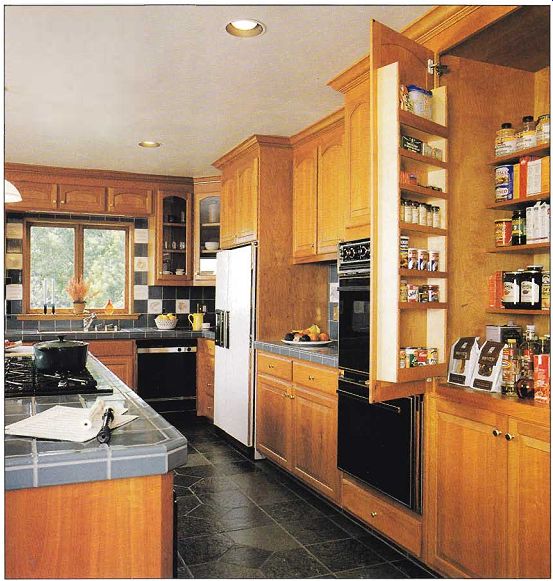
------- If your wish list includes a pantry but your floor plan doesn't
allow space for one, consider n tall pantry cabinet equipped with door
shelves, which handles dry storage needs in a minimum of space.
===========
Reusing Existing Fixtures
One way to keep your costs down is to retain and refinish the existing cabinets, fixtures, and appliances.
Cabinets
There are several options for using your existing cabinets, all of which will save you money compared to buying all-new ones. Also consider retaining the cabinet body and replacing only the doors. You may be able to buy several all new cabinets with some matching doors for the existing cabinets. If the existing cabinets won’t work in the new kitchen, keep them to use in the pantry, garage, laundry room, or other storage area.
Before deciding to retain existing cabinets, check their construction. Are they solid and well joined? Is their core material-whether hardwood, plywood, or particleboard still in fair condition? Do the joints need reinforcement? Measure the cabinets to deter mine where they will fit in your new design.
Your refinishing alternatives depend on the cabinet material. Fine hardwood, hard wood veneer, or pine cabinets meant for a natural finish can be stripped of varnish; dark stained wood can be bleached lighter. The wood can then be re-varnished with a semi gloss polyurethane, or oiled, or pickled with a pastel wash that allows the grain to show through. If the cabinets have inset-panel doors, the panels can be replaced with clear or stained-glass panes, pierced tin, or even shirred fabric. Oil plain, lat doors, the addition of decorative molding provides a provincial detail. A flat band of wood applied as a frame around the door edges gives the illusion of a panel door.
Metal and paint-quality wood cabinets can be stripped and repainted.
The easiest way to change the look of your cabinets is to install new hardware. Different knobs, pulls, and hinges may be all the refurbishing your cabinets require.
Countertops
Most countertops consist of a sturdy substrate, usually plywood, tile-backing board, or particleboard, sheathed with a surfacing material, commonly laminate, ceramic tile, or butcher-block wood. If you plan to leave the counter in place, you can resurface the countertop, but if you plan to replace the base cabinets, there is little reason to save and re finish the countertop. Be sure the substrate is sound before considering refinishing rather than replacing a countertop Cover a laminate counter top with either a new laminate, a stone slab, or ceramic or stone tile. Ceramic tile will last for decades. If you like the look of the existing tile and the original installation is still in tact, you can simply clean and regrout the tiles. Tile can be re-glazed a new color by a professional using spray equipment. The disadvantage of this is that the grout ends up the same color as the tile. Wood countertops can be sanded and oiled or covered by laminate or stone slab.
Sinks
Whether or not you plan to relocate the sink, you can retain the existing fixture so long as it is structurally sound. If you are satisfied with the size and configuration of the existing sink, by all means dismount, refurbish, and reuse it.
The most common problems are chips, worn spots, and stains in the porcelain or enamel coating. Stainless steel sinks are virtually indestructible, although they may sustain dents or scratches, or the surface can develop rust stains or water spots. You can buff a stainless steel sink with special cleaning compound to restore the surface. Porcelain and enamel sinks can be professionally touched up, or refinished in a new color to match the new kitchen.
If you plan to install a new sink, save money by using the old one in the laundry room, gardening area, or bar as a utility sink. If you decide to retain and spruce up your old sink, remember that a new faucet or other fixture must it the existing accessory holes.
Cooking Appliances
The expected life span of a range, cooktop, or oven is 15 years. If you are satisfied with your existing appliances, there is no need to discard them simply because the finish is worn or you don’ t like the color. Cooking appliances can be refinished by a professional porcelain/enamel repairer.
Chips in porcelain can be filled with a durable resin that matches the original color, or the entire appliance can be re-enameled in any color you choose. This is especially re warding if you wish to restore a vintage range.
Chrome replacement parts for newer appliances can be ordered from the manufacturer, or parts can be re-chromed at an auto-body shop. Having a range painted at an auto-body shop is not recommended because automobile-exterior paints are not healthy for use inside the home.
If you like your current range, but also like the idea of a component cooking system, plan to keep the range and add other cooking appliances to the kitchen. If your range is electric, consider adding a gas cooktop, which would be especially convenient if the electric power went out.
Refrigerators If your refrigerator and freezer are sound and fulfill your cold storage needs, include these appliances in the new design.
If you hope to purchase a larger unit in the future, allow space for it when planning the new kitchen.
It is possible to refinish refrigerators and freezers. They can be painted, and doors can be fitted with panels that match cabinets.
If the appliances no longer work well, be sure to dispose of them properly.
==============
+++++++++++++++
COUNTERTOPS
Because a typical kitchen countertop must withstand a range of abuses from vegetable chopping to plant potting yet remain smooth and sanitary with the wipe of a sponge, different work centers may call for unique surfaces. Consider the alternatives, then tailor each countertop to its specific purposes.
Choosing Countertops
There are several ways to purchase countertops, depending on the material and your bud get. Some laminates are avail able pre-fabricated in standard sizes; however, most counter tops are built to spec.
When choosing new countertops, be sure to cover all of the following points.
. Choose the type of sink.
. Calculate the square foot age of countertop surface.
. Decide on the best material for each work center.
.Consider the maintenance of various materials.
. Figure in backsplash and edge-treatment designs.
. Determine the materials you can afford.
Materials
All the countertops in the kitchen can be made from the same material, which gives the room a cohesive look, or the countertop material can vary depending on its intended use.
Reconcile multiple materials with coordinated backsplash and edge treatments.
When choosing the right countertop material, keep in mind initial costs, ease of maintenance, and life span of the material, as well as how it suits the look of the kitchen.
Laminates
Basically a plastic material, laminates for countertops are made in several grades. Only one type, high-pressure laminate (HPL), is durable enough to stand up to the punishments borne by kitchen countertops.
This sandwich of paper layers, saturated with resins, and fused under heat and pressure, forms a sheet .05-inch thick less than 1/4 inch. (Some laminates are thinner, but grades less than .04-inch thick are not suitable for countertops.) Waterproof and easy to keep clean, HPL is ideal as a general countertop material. It comes in a seemingly limitless range of colors, textures, and patterns, and can be matched to laminate cabinets. Older-style laminates have a dark-colored core, which can be unsightly at edges; newer-style Laminates, however, carry the surface color through the entire sheet.
Laminate is easy to cut and install, even on curves, and can be heat-formed on site. Its resistance to stains and wear is excellent, but knives scratch it, so it should not be used as a cut ting surface. laminate is much less expensive than stone, butcher block, and solid-surface material and is somewhat cheaper than ceramic tile.
Laminate can be purchased in sheets, usually 4 by 8 feet, to cut on site; or you can order custom sizes from a factory or supplier. Laminate can also be preinstalled on a substrate to be set onto the base cabinets.
Such countertops are sold in standard sizes or can be special ordered to it your kitchen, and usually have an integral back splash and front edge over which the laminate is curved to shape using heat, a process called post-forming. If you are special-ordering, let the dealer take the measurements, including sink and cooktop cutouts, preferably after the base cabinets have been installed, al though a skilled individual can work from precise counter specs and room dimensions.
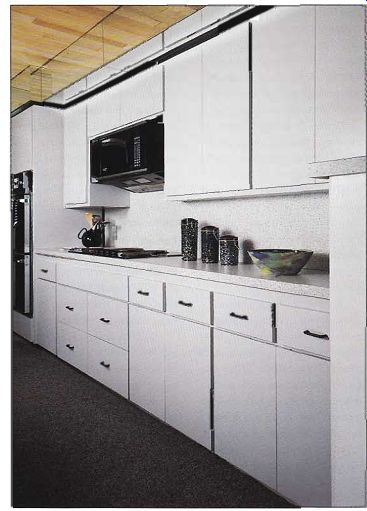
-------- This kitchen features refaced cabinets. The watching laminate
countertop and cabinet surfaces present a unified look, and the contrasting
drawer pulls keep the white from becoming overwhelming. A clever illusion,
the mirrored soffit area makes the ceiling seem higher.
Ceramic and Dimensioned-Stone Tile
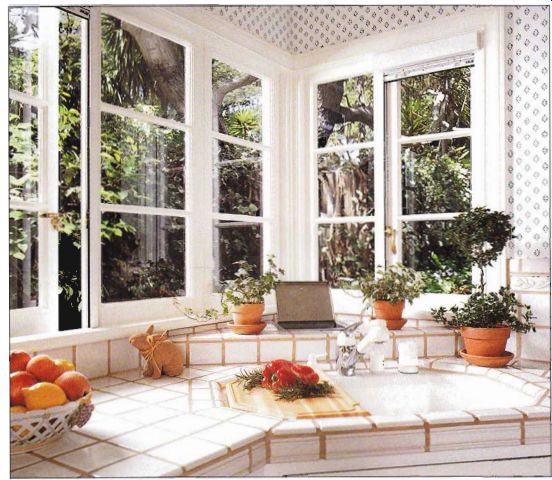
Available in thousands of colors, textures, and sizes, ceramic tile has a chameleon-like ability to blend with any kitchen style while making its own strong statement. Newly popular as a design element, tile has traditionally been prized in the kitchen (or its durability, resistance to moisture and heat, and sanitary, easy-care surface.
Installing tile is simple but requires patience and careful preparation. Although more costly than laminate, tile is less expensive than any other high quality countertop material.
Thin cuts from natural marble, granite, or slate are called dimensioned-stone tiles. They provide a rich surface that is fairly stain resistant and can be used as a cutting surface.
The tiles are usually 12 inches square and are installed in a manner similar to ceramic tile except that the grout joints are narrower. Stone tiles generally cost more than ceramic tiles but are less expensive than a slab countertop. Choose stone tiles 3/8- or ¼-inch thick and be sure to check the color variety and graining of the natural product, as each piece is unique.
Both types of tile countertop have four main elements: the substrate, or base; the adhesive; the tiles; and the grout.
When buying ceramic tile, choose a high-fired tile, 0.5-inch thick, with a shiny or matte glaze finish. A vitreous or semivitreous tile has the necessary water resistance. Ask the tile dealer to direct you to those tiles specifically recommended for countertop use. Tiles with a raised pattern or a painted design will not wear well, but can be used as trim. The size and shape of the tile you choose will be integral to your kitchen design, but square tiles 4.5 by 4.5 inches or 6 by 6 inches are easiest to install, and fit the scale of most kitchens. Smaller tiles, called mosaics, measure 1 by 1 inch or 2 by 2 inches, and come pre-positioned on mesh backed sheets that are 1 foot square. They are very durable.
Ceramic-tile countertops require a trim treatment on edges, along the backsplash, and around the openings for such fixtures as a sink or cook top. When choosing tile, make sure that all the matching trim tiles you’ll need are available. A tile countertop can also be edged with a strip of hard wood. The wood is screwed to the substrate and well sealed against moisture before the tile is layed.
When purchasing any type of tile, order at one time all the product needed, and check that any shade variations are not too extreme, although tiles always vary slightly. To figure the quantity,
divide the total countertop area by the single tile area, then add 5 percent for waste and repairs. Purchase trim tiles based on linear measurement.
Grout is a cement that ills the space between tiles. As part of the countertop surface, it must be durable and attractive.
The grout joint should look proportional to the tile size and style; a wider joint gives a rustic look, and a narrower joint a sleek look. The joints will form a pronounced geometric pat tern; consider whether this would clash with other pat terns in the kitchen flooring, wallcovering, or fabrics. You can downplay the joints by choosing a colored grout that matches the tile! Many shades are available, and the dealer will have samples.
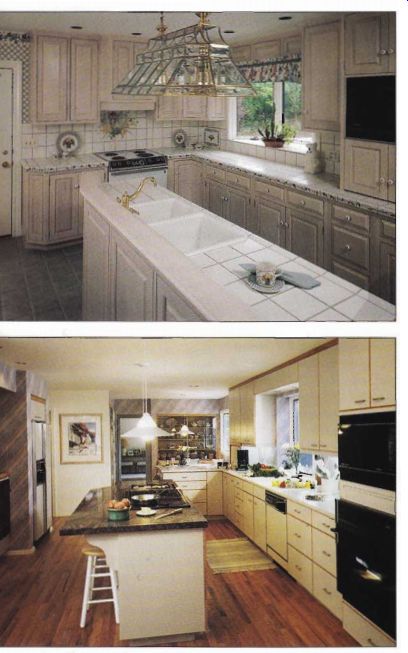
---------- Install one type of countertop treatment throughout the
room, such as the beautiful ceramic tile (above), for a traditional style,
or combine various materials, like solid-surface-material sink treatment
and a dimensioned stone tile island (below) for a modern look.
Stone Slab
Earthy, luxurious stone presents a rich look when used on kitchen counter-tops. The stone types commonly used are marble, granite, and slate.
Stone-slab countertops fit any kitchen style, adapting to both traditional and modern designs. However, the sheer weight and size can overpower a small space, and slabs are quite expensive. Consider using stone slabs for one counter top and coordinating other materials to it. Because store slab is stain resistant, perfect for rolling dough, suitable as a cutting surface, and easy to clean, it’s a stunning counter part to butcher block.
Marble is a traditional countertop material, especially useful to bakers because of its cool smooth surface. It comes in several colors and natural vein patterns, though while is most common tor utilitarian kitchen use. Despite its seeming hard ness, however, marble is porous and fairly soft, and it stains and scratches easily. A marble countertop can be fragile and difficult to maintain; it must be coated frequently with a penetrating sealer. Though an entire countertop can be made from a single marble slab, a recommended use for marble in the kitchen is as a countertop insert in the baking center. So-called cultured marble, made of marble chips and dust in an acrylic base, is not durable enough for kitchens.
Granite is growing increasingly popular as a countertop material. Harder than marble and far less porous, granite doesn't stain. It can be used like marble for baking and candy making, and hot pans will not damage it. Granite has a confetti-like variegated grain in any combination of white, black, gray, pink, and some times other colors. For a countertop, the surface should be highly polished. A 1.25-inch granite slab is strong enough to form a 12-inch overhang with out needing extra support.
Slate also makes a durable and dramatic countertop if you wish to make a strong design statement. Although always dark in color, slate comes in shades of black, brown, green, blue, and gray. Slate absorbs heat and can become hot to the touch. Its rugged surface can not take a high polish.
All stone-slab countertops are cut to order and finished by the dealer. Because of its great weight, a stone-slab countertop may require extra support bracing in the base cabinets-ask the cabinet dealer. Slabs typically come in thicknesses of 0.75 inch or 1.25 inches; there is a considerable difference in weight, although not in cost.
To make a thin countertop look more substantial, an extra strip can be glued along the bottom of the front edge. Stone-slab countertops are an expensive investment and should be in stalled by an expert.
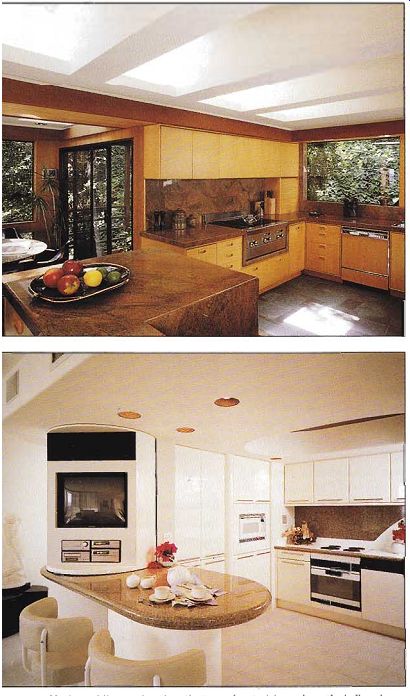
-- Horizontal lines rather than the type of materials used arc the hallmark
of the modern-style kitchen. Natural granite countertops and backsplashes
(above) fit the bill as perfectly as ones made of manufactured solid-surface
material (below).
Solid-Surface Material

---- Countertops and backsplashes provide ample opportunity for
self expression. Ceramic-tile murals (above) bring seventeenth-century charm
to a twentieth-century room, and an expansive butcher-block island countertop
(below) provides a space for budding artists to create while dinner cooks.
Known by brand names, such as Avonite and Coian, solid surface material (SSM) was in vented as a substitute for stone, but its practicality, beauty, and versatility have put it in a class by itself. A dense slab of poly ester or acrylic, SSM is non porous, waterproof, resistant to chemicals, and does not stain.
Because the color and material go all the way through, little scratches and minor bums can be sanded out although hot pans will cause damage. Its un usual properties give SSM unique design potential; it can be cut and routed, or healed and bent, to any custom shape.
Where two pieces are joined, the seam is almost invisible.
Liquid plastics can be applied to form intricate " inlayed" pat terns in contrasting colors.
Unlike laminates, SSM is waterproof at the edges and can be used around under mounted sinks. It can also be cast in one piece with an integral sink, a sleek look that is also easy to keep clean.
Solid-surface material comes in thicknesses of 1/2 inch and 3/4 inch.
Either can be used for a countertop; an edge band of like material can be applied to make it look thicker, ft is manufactured in a wide variety of faux-stone finishes and colors.
Depending on your kitchen design, the fabricator may have to complete the installation on site. Some manufacturers re quire that a certified fabricator both measure and install their product before honoring the warranty. SSM is more expensive than laminate or tile, but less than stone slab. When considering an SSM countertop, be sure to include the cost of installation.
Wood
Warm and natural, wood makes for a quiet and forgiving countertop. Because of its soft and porous surface, wood requires more diligent upkeep than most countertops and it should not be used around sinks. Even a small area of wood countertop, such as an island or a cutting-board inset, will warm up the kitchen de cor. Butcher block is the wood surface most often seen in the kitchen, because it makes a durable cutting surface that won’t dull knives. It consists of narrow strips of maple, oak, or ash, or small blocks of wood set end-grain up, which are laminated together, it is available in a 25-inch width for counter tops, and is usually 1.5 inches thick. The edges can be cut or routed to suit the line of your kitchen. If you intend to pre pare food on butcher block, finish it only with mineral oil or other food-grade oil.
Other types of wood make attractive countertops, although they should not be used for a cutting board. Materials to consider include high-quality, ¾-inch hardwood-veneer plywood, hardwood planks glued side by side, and even tongue-and groove hardwood flooring over plywood. These must be hand crafted and will make your kitchen one of a kind. If you enjoy woodworking, you can design and make these yourself; otherwise, have them custom made by a professional.
Backsplashes
A backsplash protects the wall above the countertop from heat, water, and spills. It may be 4 or 5 inches high or extend all the way up to the wall cabinets. The backsplash is often an integral part of the countertop and made of the same material, but it doesn't have to be. Be cause the wall space it covers is usually small, you can get away with making a strong design statement in this area. Highly textured wallcoverings, such as cork or grass cloth, un pain ted or rough-sawn wood, and textured paint are too hard to clean or are too delicate for a backsplash.
The most popular material for a backsplash is ceramic tile because it is both decorative and durable. Here you can indulge yourself in hand-painted tiles that would be too fragile for the countertop.
Laminate is effective only with a countertop of the same material. Likewise, stone and solid-surface backsplashes are generally used only with a countertop of the same material. Use stainless steel in gourmet-theme kitchens. Use mirror in small kitchens to give the illusion of depth in the room. Paint used on the back splash should be gloss latex or alkyd; any wallcovering should be scrubbable or protected by a clear acrylic sheet.
The backsplash height is a design consideration. The continuous horizontal line of a short backsplash can draw together various kitchen design elements. Coordinate its height with that of windowsills,
wainscoting, chair rails, and other kitchen features. Extending the backsplash to the bottom of wall cabinets gives the area a cohesive look, eliminates the need to paint that small awkward space, and facilitates cleaning.
The backsplash can become a functional storage element, as well. Frame a backsplash out from the wall several inches to form a ledge on which you can set plants, spice jars, or small appliances. Recess a box between studs in the backsplash, build shelves, and finish it for spice or utensil storage or an appliance garage. Cut slots into the ledge to store knives safely and within reach.
Edge Treatments
Some countertop edges are an integral part of the countertop surface, such as the curved edge of post-formed laminate;
others are an applied piece of the same material, such as the V-caps edging ceramic tile.
The edges of most countertops are built up by adding a support strip along the bottom for the edging material, giving the illusion of a thicker, more substantial surface.
Stunning effects can be achieved by using a contrasting material to edge a countertop.
Wood trim adds a note of warmth to laminate,
tile, and SSM countertops. Wood edging can be shaped with a router if a rounded edge is desired. To tie several different countertop materials together, use the same edge treatment.
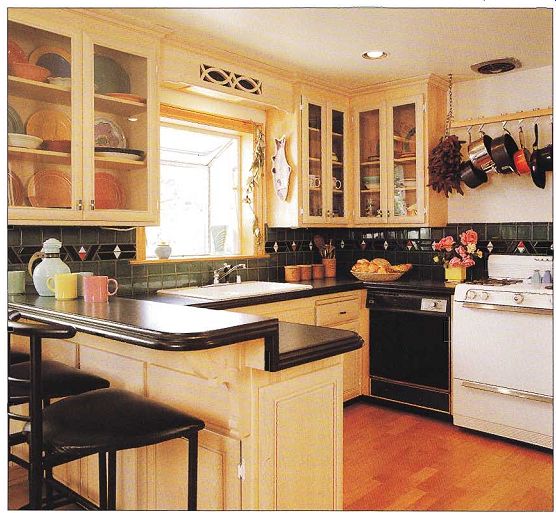
---------- Contrasting the countertop and backsplash materials can
be very effective ns m this kitchen, where laminate countertops are backed
by ceramic tile. The accent tiles replicate a Native American design, which
fits the southwestern theme of the kitchen.
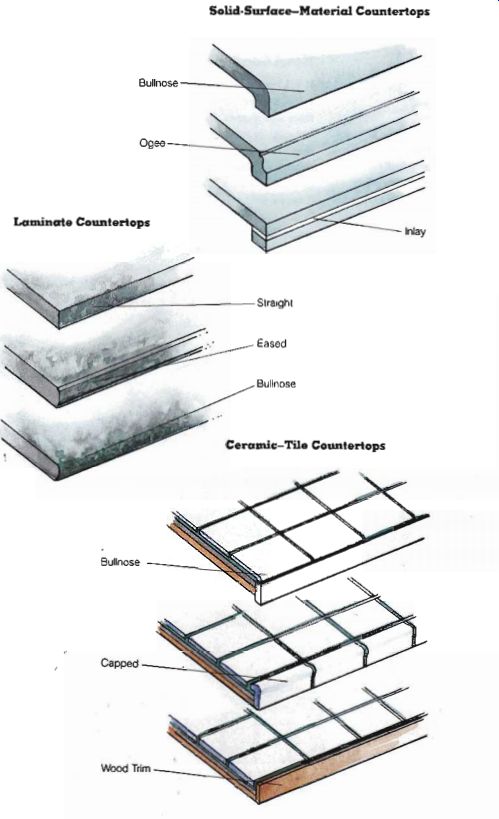
-------- Countertop Edge Treatments
Solid-Surface-Material Countertops Bullnose Capped Wood Trim Laminate
Straight; Eased Bullnose
Ceramic-Tile Countertops
-------------------
Measuring Countertops
Cabinets, appliances, and countertops must fit the kitchen-and each other-like pieces in a giant jigsaw puzzle; therefore, even countertop dimensions are standardized. A countertop is 25 inches deep, including the backsplash. This allows for a 1-inch overhang at the front and open ends of framed cabinets, ,A inch or less for frameless cabinets with 1/2 inch or thicker doors. The over hang where the countertop meets an appliance is 1/2 inch.
Normal countertop height is 36 inches, but this can be customized by adjusting the height of the cabinets or other supports.
The best general-purpose height for an individual is 2 to 3 inches below the elbow; for baking, 5 inches. When measuring countertop-material depth, allow for whether the backsplash will be attached on top of the countertop or behind it. For countertop length, take wall-to-wall measurements in several places and cut according to the longest result.
In calculating precisely for tiles, be sure to include the width of the grout lines. Some tile pieces will need to be cut, especially around curves or along angles.
For safety and convenience, minimum counter widths are required around appliances. Allow 12 inches between a side wall and a gas cooktop, 9 inches for an electric cooktop, and 3 inches for an under counter appliance. There should also be 12 inches be tween a range or cooktop and a door. Allow 24 inches between a dishwasher and a counter at a right angle to it, 12 inches between a dishwasher and an angled comer sink. There should be 12 inches of counter be tween the sink and refrigerator, and between the sink and a right-angled counter. For an is land or peninsula with a cook top, allow a counter depth of at least 31 inches.
+++++++++++++++++
SINKS AND FAUCETS
Homely and utilitarian for years, the kitchen sink has blossomed into a design focal point, with colorful finishes, futuristic shapes, and versatile accessories. Because the sink is the center of kitchen activity / time invested in evaluating different style and function combinations is well spent.
Choosing Sinks
Sink manufacturers have paid close attention to the many uses their product has in the kitchen. The result is a wide array of sink sizes, shapes, and specialized designs for every function.
Make the following determinations before choosing a sink:
.How you use your sink
.The size and configuration that suits your needs
. The mounting method that best suits your countertop
. The material and finish that fit your design concept if you can’t think of one design that would suit all your needs, consider installing two sinks, especially if you are planning a laundry area or bar.
When choosing a sink, especially a large or unusual style, look at a sample, or a similar sink, to ensure that it suits both you and the space you’ ve planned for it. Reach into the bowl to make sure its depth is comfortable; reach forward to check that the faucet position is convenient.
Before ordering the sink, you must first choose accessories and faucet and valve configurations. Most sinks come with predrilled holes for accessory installation.
While unused holes can be plugged, adding additional ones is often impossible. Be cause the sink is only a part of the cleanup center, it’s important to coordinate the new sink with the dishwasher and drain choices, disposers, and trash and recycling bins in order to maximize the useful ness of the sink and the clean up center as a whole.
Bowl Configurations
A kitchen sink may have one, two, or three bowls of various sizes and shapes, though they are usually rectangular. Bowl depths range from 6 to 15 inches; 7 inches is typical. For general chores, a shallow bowl is easier to reach into. A deeper bowl is better for washing large items, filling tall containers, and preventing splashes from messy jobs. Most sinks measure 22 inches font to back, to fit a standard countertop. They have a typical 3.5-inch drain hole that can accommodate a garbage disposer. Some sinks have an integral dish-draining surface, called a deck, on either side or on both sides. In sink dimensions, the width in inches is stated first, followed by the measurement front to back.
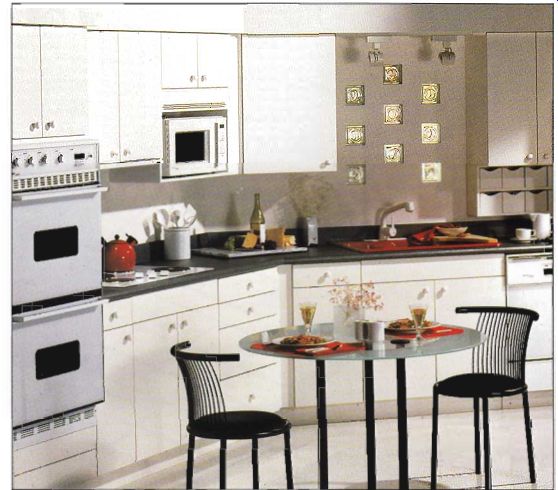
--------- The sink is often the hub of kitchen activity centers. Make
if the visual focal point as well, by choosing a high contrast color unit
in the manner of this red knockout.
Standard Single Bowl
This most-common sink measures 25 by 22 inches, although models may be as small as 15 inches font to back, or up to 33 inches wide. A secondary version, often called a bar sink, comes as small as 12 by 15 inches rectangular or 15-inch diameter round, with a 2-inch drain hole. Some small sinks are available with a 15-inch deep bowl.
Double-Bowl Sink
The most popular configuration, a double-bowl sink allows you to do food preparation and cleanup at the same time. Typically 33 by 22 inches, it may measure up to 48 inches wide.
One of the bowls is normally fitted with a disposer. The bowls may be the same size, but often the disposer bowl is smaller and shallower.
Triple-Bowl Sink
This type of sink configuration has two typical bowls with a small, shallow disposer bowl in between. A standard triple bowl sink measures 43 by 22 inches, but may be 60 inches wide or more. You can mimic the triple-bowl effect, and achieve the exact configuration you desire, by combining a standard sink and a small double sink to your own specifications.
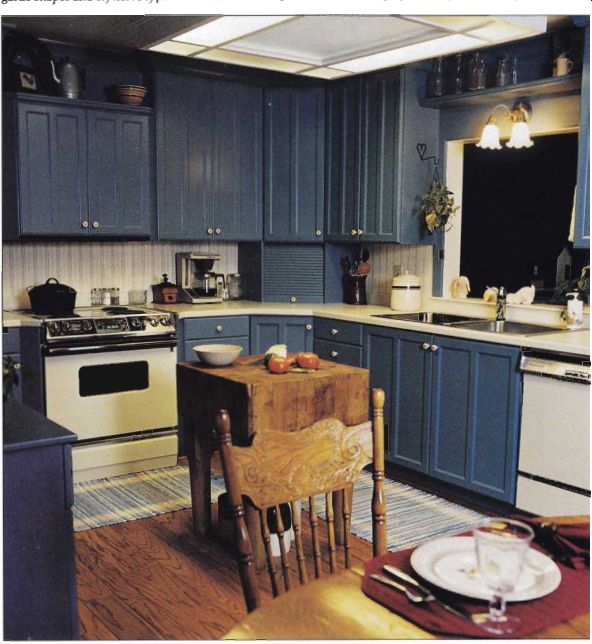
------- When well designed, manufactured materials- can be effective
in even a traditional kitchen with n country theme.
Here a double-bowl stainless steel sink has a self-rim mount that has been installed over a solid-surface-material countertop.
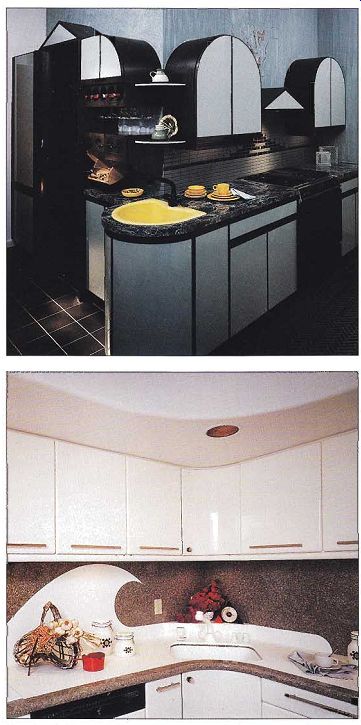
---- Plan the sink location, size, and mounting method prior to ordering
countertop materials because each decision will affect the others. The
yellow sink (above) has a self-rum mount that sits on top of the slab countertop.
The recessed sink (below) is installed from below and held in place with
clips attached to the underside of the countertop. Note the stripe around
the sink that matches the countertop edging material.
Corner Sink
Also called a butterfly sink, an L-shaped sink designed for a corner has two bowls set at right angles to each other, and the faucet positioned between them. It may have a shallow disposer bowl in the center. If your countertops are short, the corner sink can free them up by occupying otherwise wasted corner space. Since the two bowls are not side by side, however, transferring wet items from one bowl to another can cause drips on the floor or countertop.
Designer Sinks
Also known as European sinks, designer sinks come in avant garde shapes and styles. A typical example is a double sink with round, half-round, or oval bowls. Another configuration combines a small hexagon shaped bowl and n large rectangular bowl. Such a sink adds a touch of excitement to the kitchen, and makes even a modest room look more upscale.
But try out a designer sink in the showroom before you buy one. An unusual shape can be hard to work with; square pans and conventional sink accessories may not fit it. You also lose countertop space when using a designer sink: A 15-inch round bowl holds less than a 15-inch square bowl, while taking up virtually the same space.
Mounting Methods
The rim of the sink meets the countertop in one of several ways: with a self-rim, surface mounted, flush-mounted, recessed, or under-mounted.
The sink may also be part of an integrally cast unit. The method you plan to use must be specified when you order the sink.
Each mounting method has a different look; choose the one that best its the countertop material. A self-rimming sink has a lip that fits over the countertop. The sink is simply dropped into the opening. A bead of caulk under the lip seals it, arid several clamps un der the countertop secure it.
A surface-mounted sink has an edge that fits within the opening, flush with the surface of the countertop. A flat metal rim seals the joint, and clips underneath it hold the rim and the sink in place.
A flush-mounted sink often used with a tile counter top-also fits within the opening but rather than sealing with a metal rim, the joint is grouted.
A recessed sink fits within the opening below the counter top surface. It is held in place by clips, or set on a rabbeted edge cut into the opening. This mount is used most often with ceramic-tile countertops; a cove-tile edging finishes the joint. With an under-mounted sink, the joint is caulked. Both of these styles can be used with solid-surface-material counter tops. Stainless steel sinks are not recommended for these mounts if the countertop is tile, because steel expands and con tracts more than tile.
Integral sinks are made from the same material as the countertop. The most common is solid-surface material.
Materials
Choose a sink material based on the look you want for your kitchen, the upkeep you are willing to do, and, of course, your budget. All materials vary in quality; check the specifications and the manufacturer’ s warranty.
Stainless Steel
Preferred by the great majority of homeowners, a stainless steel sink is light, durable, and inexpensive. It is easier to bore additional accessory holes in stainless than in other materials, and it has a slightly flexible, forgiving surface if items are dropped into it. Steel with a gauge-or thickness-of 20 is adequate; the thicker 18 gauge is stronger and quieter, the 22 gauge sounds tinny and can dent. A high nickel content in the steel helps prevent corrosion, and a high chrome content improves the finish-get the highest of both that you can afford. A brushed finish hides scratches and water spots, while a mirror finish emphasizes them. Stainless steel sinks are available with an undercoating that muffles the din of the disposer and splashing water.
Enameled Steel and Iron Enamel is a porcelain-like synthetic coating that is smooth and easy to clean (though abrasives should never be used). High quality enamel resists chipping and staining. The traditional enameled cast-iron sink is heavy, durable, and expensive.
Accessory holes are drilled be fore coating. An enameled steel sink is lighter and cheaper, but may have a less-durable finish.
Enameled sinks come in dozens of rich colors from pastel to bold, and can be a dramatic focal point in your kitchen. De pending on the style, they can fit any kitchen decor.
Solid-Surface Material
Made of the same dense sub stance used for countertops, a solid-surface-material sink has stain and chemical resistance, repairability, and beauty un matched by other products, making it an excellent, though very expensive, choice. A top of-the-line SSM sink is molded in one piece with the counter top, forming a sleek, seamless, and easy-to-clean surface. Separate sinks made of SSM can be top-mounted, flush-mounted, or under-mounted. Accessory holes can be dilled through the SSM.
Light Composites
Sinks composed of various materials such as resin, ground quartz, acrylic, or silica are the newest innovation to hit the market. Some composites are color constant throughout, others have a coating over another material. They have many of the same attributes as SSM sinks, are very expensive, but as yet do not come in a wide variety of colors or styles.
Most have a thin flange for an over mount, fitting well into existing sink spaces.
Designer Materials
Sinks are also made from brass, copper, cultured marble, and specially glazed or painted ceramic. These are delicate and require diligent maintenance.
They are recommended only as small accessory sinks in an entertaining center.
Faucets and Valves
Certainly functional, faucets and valves have become a design accent as well. The faucet is the pipe through which water flows into the sink. The valve or valves are the mechanism by which water is turned on and off.
The standard system has a spout plus separate valves for hot and cold water; the valves can be fitted with a variety of handles for easier adjustment and different styling. The standard system requires three holes in the sink deck. The single-handle, or mixer, valve allows one-hand temperature and volume control and re quires only one hole in the sink deck. Standard faucet valves tend to last longer and are easier to maintain than mixer valves. Handles may be made of chrome, brass, wood, or porcelain, and many are enamel coaled in fashion colors.
There is almost no limit to the faucet styles available. A rinsing faucet has a stem that can be pulled up for filling tall containers. The gooseneck style of a high-arc faucet serves the same purpose and has an at tractive flair as well.
Most faucets are brass with a chrome finish. Less-expensive faucets may have chromed plastic parts, which do not hold up as well as all-metal versions.
Plain brass faucets are making an elegant comeback, and cop per and nickel finishes are also available. Uncoated brass faucets require regular polishing.
The latest design trend, faucets enameled in vivid colors often finished to match the sink-make an exciting accent.
Be sure to test faucets, valves, and handles in the showroom prior to purchase.
The style you think looks best may not be the best choice for your kitchen-especially if you have trouble using your hands.
Remember all the people who need to use the sink before deciding. Consider how convenient the handles are to reach and operate, how easy it is to move large items under the faucet, and how well the valves adjust water flow and control temperature.
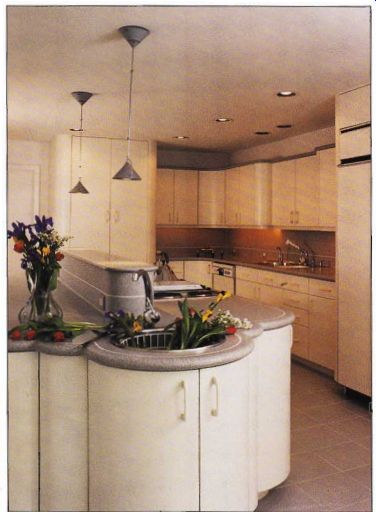
-------- If your plan calls for a secondary sink, consider a different
faucet than for the main sink to fulfill different activity needs. The
faucet for the primary sink includes n detachable sprayer, which makes dish
rinsing easier. This second faucet is a tall gooseneck model designed for
filling large pots and vases.
Decide on the style of faucet and valves before ordering the sink, because the installation holes are factory-made and usually cannot be changed. The common number of holes is three or /our, although some contemporary stainless steel sinks come with only one for a single-lever mixer faucet. Extra holes can be used for accessories, such as a soap dispenser, or filled with plugs. Some sinks do not have a rear deck for a faucet; in this case, the holes are made in the countertop.
Sink Accessories
An increasing variety of convenience gadgets are made for the cleanup area. Like the faucet, several accessories can be in stalled through holes in the sink ledge, and they must be specified before you order the sink. Any of these can also be installed through the counter top. Accessories include a hose sprayer, dishwasher air gap (sometimes required by code), water purifier, or dispensers for detergent, lotion, and instant hot water. The water accessories will require simple plumbing connections; in addition, the hot-water dispenser requires an electrical outlet.
Water purifiers are available for installation under the sink.
Sink manufacturers offer a number of custom-fit food preparation accessories. A cut ting board provides an extra work surface; other items available include a colander and a draining basket.
Measuring Sinks
For a sink, allow at least a 114 inch setback at the front edge of the countertop, but no more than 3 to 4 inches.
You'll need room behind the sink for faucet clearance.
Leave at least 12 inches of countertop on one side of the sink and at least 24 inches or the other. Follow the manufacturer’s instructions for what size to cut the countertop opening; this involves tracing the outline of the sink or a tem plate onto the countertop.
If you want a sink-front bin, be sue to allow clearance for that as well.
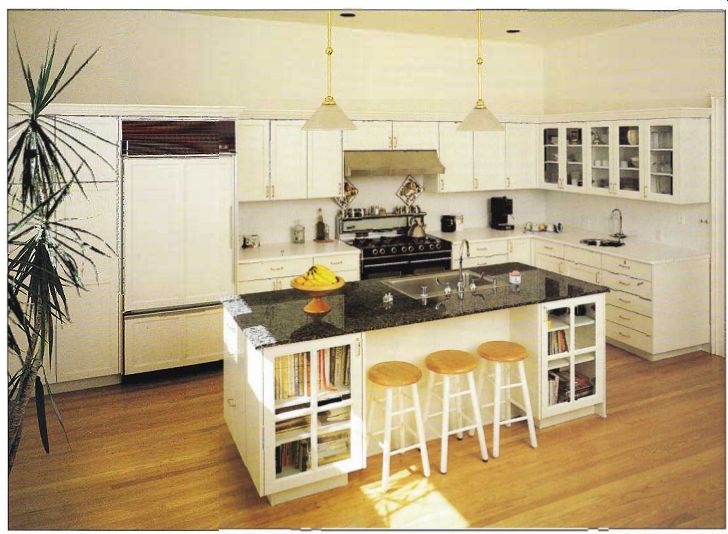
----- Check local codes before choosing sink accessories. Some codes
disallow a hose sprayer, for example, in order lo save water: Others require
dishwasher air gaps-seen here on the deck of the island sink-for sanitary
efficiency.
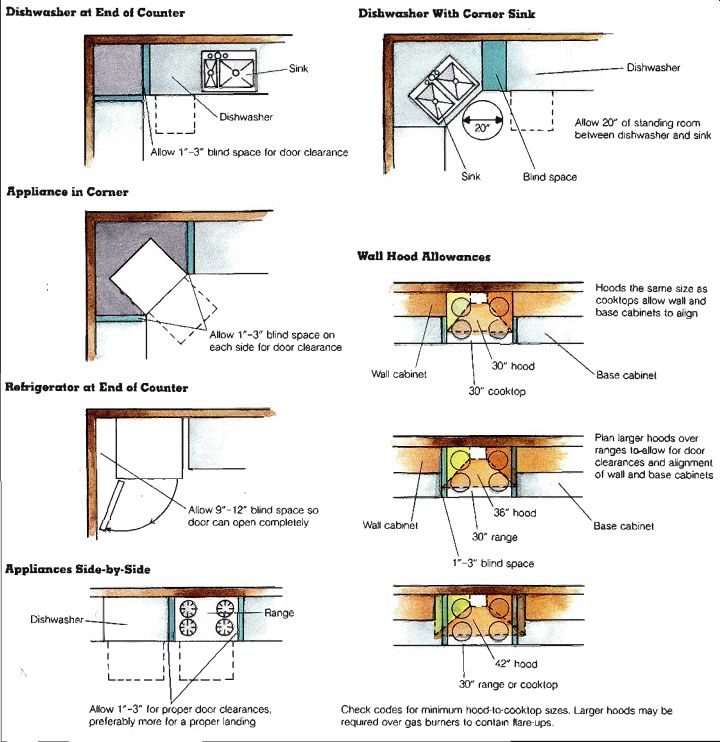
------------- Avoiding Common Placement Problems: Use the measurements on
the manufacturer's specification sheets not advertising brochures-for dimensions
and door clearances.
Common location-oriented problems can be avoided by using the techniques described here.
Dishwasher at End of Counter
Dishwasher With Corner Sink
Dishwasher
Allow 1"-3" blind space for door clearance
Dishwasher
Allow 20" of standing room between dishwasher and sink
Sink Blind space
Appliance in Corner Wall Hood Allowances
Allow 1"-3" blind space on each side for door clearance Refrigerator at End of Counter Wall cabinet
| 30" hood 30" cook top
Allow 9"-12" blind space so door can open completely Wall cabinet Appliances Side-by-Side
Dishwasher -
Hoods the same size as cook tops allow wall and base cabinets to align
Base cabinet Plan larger hoods over ranges to-allow for door clearances and alignment of wall and base cabinets
Base cabinet
Allow 1"-3" for proper door clearances, preferably more for a proper landing Check codes for minimum hood-to-cooktop sizes. Larger hoods may be required over gas burners to contain flare-ups.
-----------------
++++++++++++++++++++++++++++++++++++
DISHWASHERS AND DISH DRAINS
Once considered a luxury, the dishwasher is now standard equipment in all modern kitchens. Energy-efficient models use less water than washing by hand, and a setting required on all machines allows dishes to air dry without using the electric heating element.
Choosing Dishwashers
As with all major appliances, when purchasing a dishwasher you need to balance style and quality with cost. Check machine styles and features; be especially concerned with capacity, durability, energy efficiency, and sound insulation.
The capacity of a dish washer should be at least a meal’s worth of dishes; for maximum energy efficiency it will hold a day’s worth, so that you need run it only once in the evening. Capacity is deter mined not just by size, but by rack configuration. Check display models for a flexible arrangement that its the type of dishes you normally use, whether roasting pans, cookie sheets, or goblets. Look for racks that are removable or adjustable. If your family is large or you entertain a lot, consider installing two dishwashers.
The durability of a dish washer is relative. A single person may use a dishwasher a hundred times in a year; a large family, a thousand times or more. Not everyone needs top of-the-line quality. Check the warranty and consult the dealer about which model best matches your needs and your budget.
Given both the ecological and economical benefits of con serving fuel, energy efficiency is a definite plus in any major appliance. Is the new dish washer officially rated for energy efficiency? Does it have a built-in water heater, allowing the house water heater to be tuned down? Does it have an automatic air-drying cycle? The sound insulation of the dishwasher will affect the comfort level of the kitchen and surrounding rooms. Noise levels range widely. If you plan lo work or entertain in the kitchen while running the dishwasher, choose the quietest model possible. This can be difficult to check in the store; listen to friends' machines, and consult a consumer rating magazine.

--------- Installing a front panel on the dishwasher to match the
surrounding cabinets produces a cohesive design line, which is perfectly suited
to this modern kitchen.
Machine Styles
Portable dishwashers roll up to the sink and connect to the faucet. These are inconvenient to use; a remodeled kitchen should have a built-in dish washer. If you already own a sound portable, you may be able to install it as a built-in using a conversion kit; ask the manufacturer whether your model is convertible.
Standard built-in dishwashers measure 24 inches wide, 24 inches deep, and 34 inches high. They fit under the countertop and open from the front.
They differ mainly in the features they offer.
A compact dishwasher, suit able for a small family or as part of a bar, is only 18 inches wide.
An under-sink dishwasher, in stalled with a particular shallow sink, concentrates cleanup chores into a smaller area.
Dishwasher doors are either finished to match other major appliances or designed to be fitted with a front panel that matches the cabinets.
Features
Interiors are made of plastic, porcelain on steel, or stainless steel. Washing mechanisms are one or two rotating wash arms, or one arm with two levels. A floor strainer collects food, some models have a self-cleaning filter, or even a disposer, so that hand-rinsing off dishes is not necessary, although dishes must be scraped. An electric heating element, sometimes with a fan, dries the dishes.
A variety of automatic cleaning cycles allows you to personalize your dishwashing methods but avoid paying for features you won’t use. Controls are dials, push buttons, or a touch pad; the latter is the easiest to wipe clean. The door lock and operation switches should be easy for you to use and read.
Placement
Figure out on which side of the sink you want to locale the dishwasher by considering both the available space and the way you prefer to wash dishes. In general, right-handed people will want the dish washer to the right of the sink and left-handed people will want it on the left. Also consider the dishwasher in proximity to where dishes and flatware will be stored. The standard dishwasher is positioned next to the sink, although it can be up to 6 feet away.
The dishwasher needs its own electrical receptacle and in the majority of cases its own circuit as well-consult local codes. Its double receptacle may be shared with the disposer. Most codes require an air gap to prevent back-siphoning; this is mounted on the sink ledge or countertop. The dish washer drain hose runs through the air gap to the disposer.
For a corner sink, allow at least a 12-inch clearance so you can stand at the sink with the dishwasher open. Allow 24 inches between the dishwasher and a corner cabinet. Avoid positioning it next to the refrigerator, since it radiates heat. If that is the only place available, add insulation between the two appliances.
A dishwasher may be mounted a foot or two above floor level to accommodate people who cannot bend over.
A modified tall cabinet provides a sufficient installation.
Support the machine with a framework of 2 by 4s.
Dish Drains
Most people still hand-wash some dishes, but with counter space al a premium, it can be difficult to drain them. Suspended over the sink, a wall cabinet or shelf that drains dishes can free up the counter and double as a storage rack.
Popular in Europe, drying cabinets have slotted wood shelves and may or may not have doors. They are available in a few imported cabinet lines, or you can make your own by modifying an existing cabinet.
Another built-in drainage idea is a rack made from wood dowels or vinyl-clad shelving located above the sink. Wet dishes are placed on the rack, and the water drips back into the sink. In any case, be sure to plan a location for drainage near each sink.
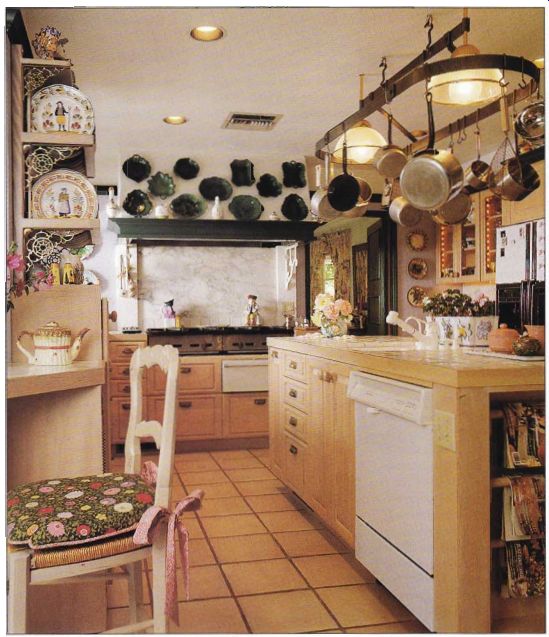
------- When planning a dishwasher located within an island cleanup
center, he sure lo incorporate power needs, including a convenient location
for the on-off switch, and to account for enough aisle room for traffic
even when the dishwasher door is open. Another view of this kitchen appears
here.
+++++++++++++++
WASTE-MANAGEMENT COMPONENTS
Local regulations may require that refuse be separated for collection and recycling.
Health-conscious cooks and gardeners have rediscovered the benefits of composting.
Thus, the lowly kitchen garbage can must be replaced by a waste-management system that handles all these needs efficiently and discreetly.
Garbage Cans
The kitchen stays tidier if waste receptacles are convenient. Plan space for small wastebaskets under the sink, at the communications center, near cutting boards, in the laundry room, and at the bar. Some cabinet manufacturers produce pull-out or tilt-out garbage bins as part of a cabinet line; the drawer or door fronts match the other cabinets. A plastic liner inside each bin can be removed for emptying and rinsing.
Trash Compactors
A trash compactor employs a rammer that crushes refuse into a compressed cube-about one quarter of its original volume. It should be used only for dry trash, such as paper, boxes, bottles, and cans. Since these materials should be separated and recycled, the usefulness of the compactor is limited. In addition, compacting trash inhibits its natural breakdown, slowing landfill decomposition. But, a compactor can be a convenient energy saver for large or rural households that must transport their trash to the dump.
A typical trash compactor is 15 inches wide and its under the countertop. Some models are 12 or 18 inches wide, and freestanding or convertible models are also made. Most compactors use specially lined bags; some use grocery sacks.
Features to look for include a foot pedal for opening the drawer when your hands are full, and a key-operated switch and lock to protect curious children. Most compactors have a deodorant dispenser, others a charcoal filter. A removable rammer simplifies cleaning, and a bag caddy with handles makes it easier to lift out a loaded bag. Look for an anti-jam rammer mechanism and effective sound insulation.
Install the compactor near the sink in the cleanup or food preparation center. It requires a 120-volt electrical receptacle.
Disposers
Most kitchens today boast this handy little cleaner-upper.
All standard sink drains are designed to accept a disposer.
However, some areas of the country do not permit them and some septic tanks cannot accommodate them. On the other hand, some localities re quire disposers; refer to local codes. If you prefer to compost your food scraps, a disposer may not be necessary.
The disposer its between the sink drain and the drain pipe. It requires an electrical receptacle and minor plumbing connections. A disposer operates either as a batch-feed, which runs only when the lid is locked into the drain opening; or as a continuous-feed, controlled by a switch, which allows you to add waste while the machine is running.
---- A trash compactor to the left the sink, is a common element
of a coordinated waste-management system. Matching … presents a coordinated
look as well.
A quality disposer has a 1/4- or 3/4-horseepower motor, stainless steel interior parts, and sound insulation. Look for overload protection and an anti-jam design, as well as a dependable warranty.
Consider both convenience and safety when planning the location of the on-off switch, especially on an island sink; try placing the switch inside a cup board. To prevent accidental disposer ignition, always a possibility with a continuous-feed disposer, install a batch-feed model at the onset.
Recycling
The heart of waste management in the modern kitchen is the recycling area. The art of efficient household recycling is still being developed, so design your system based on local regulations and your family’ s life-style. Because recycling started as a grass-roots movement, you will find up-to-date ideas for kitchen waste management through community action groups. Recycling consists bf separating reusable solid waste from that destined for landfill, and composting food and other biodegradable waste for use in the garden.
Storage Bins
Plan an individual bin for each material that is to separated for collection. Many cabinet companies have heeded the call for convenient, attractive storage for recyclables. Commonly offered is an 18-Lnch-wide base cabinet with a pull-out drawer containing a pair of plastic bins. Most families will need at least two of these cabinets, side by side. Non-recyclable trash may also be deposited in one of these bins. Because recyclables should be clean and dry, the bins do not need lids. Drawers designed to hold stacks of newspaper are also available.
Don't forget a drawer for a can crusher, label stripper, binding twine, trash bags, and other relevant supplies.
If your local collector pro vides standard recycling bins, you may wish to order a specially designed base cabinet in which to keep them. Grocery bags measure 7 by Wh by 18 inches tall. A drawer 21 inches deep by 12 inches wide will hold three bags for sorting. Locate the storage area for recyclables near an exterior kitchen door.
Compost
Any solid food waste, with the exception of meat and fish, can be composted. A kitchen com post bin may be quite small, since it should be emptied every day to prevent vermin, mold, and odor. It should be made of stainless steel or sturdy plastic and located in the food preparation area, next to the sink or cutting board.
As with recycling, you'll have to tailor composting to your personal needs. One useful method is to cut a hole in the countertop, through which scraps are scooped into a dish pan or bucket clipped to the underside. Another is to pro vide access to the compost bin from both the kitchen side and from the outdoors. The hole for kitchen access should be covered securely; an insert made of the countertop material works best. Another method is to it the top drawer in a base cabinet with a stainless steel or plastic liner with a lid. When the drawer is opened, scraps can be wiped off the counter top into the drawer. At least one cabinet manufacturer offers a pull-out cutting board with a compost drawer underneath. A line of sinks is manufactured with a hole that empties into a pail beneath it.
A compost collector does not have to be built-in. Any sturdy container with a snug lid will serve the purpose.
-------- These homeowners never have to discuss who lakes out the
garbage. The clever waste-management component shown here features an above-sink
trap door leading to a trash bin accessible from the outside. More of this
kitchen is pictured here and is featured in the floor plan here.
Compost should be re moved to outside storage at least once a day to avoid odor and pests.
+++++++++++++++++
COOKING APPLIANCES
Until a few decades ago, a large wood-burning stove was the heart of the kitchen; it was used for heating the room, making hot water, baking bread, and frying the morning eggs. Now, cooking is faster and more modular, with each function performed by a specially designed appliance.
Choosing Cooking Appliance
Several decisions need to be made prior to shopping for cooking appliances. The procedure is to first make the following determinations:
The power alternatives available in your kitchen
. Whether you want to install a range or component cooking system
.The range, cooktop, and oven configuration that best suits your space, design concept, and cooking style
Power Alternatives
When choosing between gas and electric cooking appliances, consider fuel availability and cost in your area, the current utilities setup in your kitchen, and the cost of changing it. In some areas, either gas or electricity is the fuel of choice, due to availability and low cost.
Although cooking appliances do not use a great amount of either fuel, some utility companies give discounts for an all gas or all-electric home- If your home is not currently served by gas, you may not want the added expense of installing gas lines, or the unsightliness of a propane tank. Conversely, if all your present cooking appliances are gas, it may be prohibitive to upgrade service to the 240-volt, higher-amperage circuits required by an electric cooktop or oven. However, your first consideration will be your cooking preference. Most professional cooks swear by the fine control of gas cooktop burners, although electric ovens are most respected.
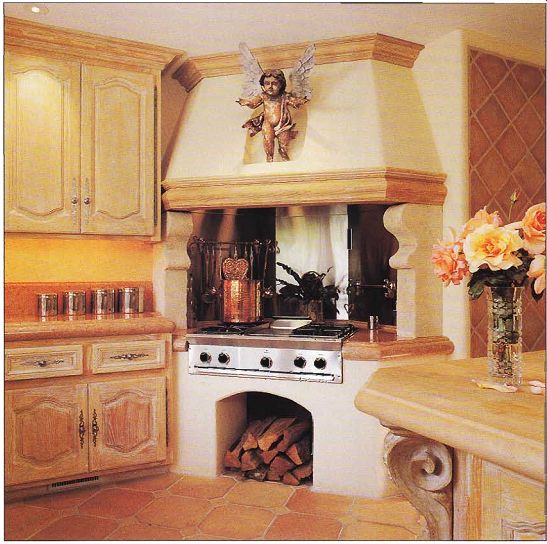
---------- Cupid oversees the activities- at the gas cooktop in this
fanciful kitchen, which is also pictured above on this page. The wood storage
is for the working fireplace on the opposite side of the peninsula.
Gas
All gas appliances function by burning either natural gas or propane fuel. Natural gas flows from the supplier through the meter beside your home into a supply pipe that goes to one or more appliances. An exposed pipe may be copper; a hidden pipe must be steel to prevent accidental puncturing.
Gas consumption is measured by the utility company in British thermal units,
or BTUs, generated in one hour. One BTU is the energy required to raise 1 pound of water 1° Fahrenheit. Ail major appliances are rated in BTUs and have a rating tag attached to them with all the necessary data listed on it.
The BTU rating of an appliance (that is, the volume of gas it uses to do its job) determines which diameter of supply pipe you need to install; a professional-style range may require one larger than the normal ¾” pipe. A shutoff valve must be located on the pipe near the appliance, usually within 3 feet. Some localities permit a flexible-hose hookup, which makes positioning the appliance easier.
All gas cooking appliances manufactured today have electronic ignition, so there is no pilot light, reducing cost and the indoor pollution caused by combustion. This means, how ever, that even gas appliances require a 120-volt electrical receptacle.
If there is no natural-gas ser vice in your are a, you need a propane-gas tank, which must be located outside the house.
The supply pipe is similar to that for natural gas, but the appliance must have a different orifice, which can be installed using a conversion kit.
Gas burners have various BTU ratings. A rating of 9,000 to 12,000 BTUs is normal for a residential burner; a rating of 15,000 to 20,000 BTUs is found in commercial burners. Such a powerful burner is called a superburner. Some cooks find it convenient to install one superburner for boiling water quickly, or for sautéing.
Electric
Each electric cooking appliance (except a microwave oven) re quires a service of 240 volts, at 30 to 50 amps. You must know where you intend to locate each appliance when indicating electrical needs on your final floor. Electric cooking produces no combustion. making it preferable for allergy and asthma sufferers and for tightly sealed homes.
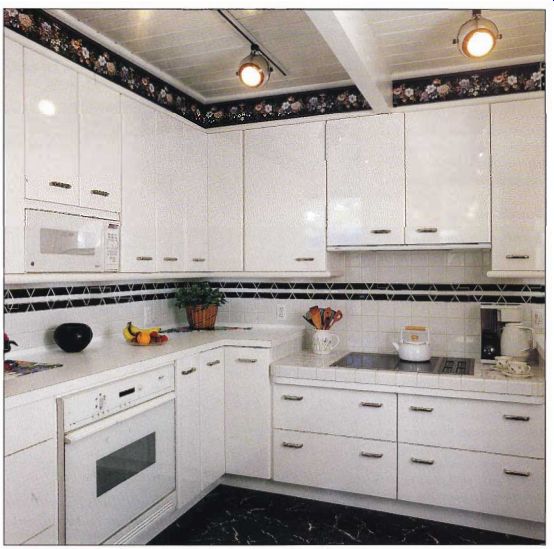
--- An induction cooktop, lowered here for convenience, offers
the heating quality of gas without the fear of combustion. The glass burners
magnetically heat metal only, while staying cool themselves, and the pots
and pans then heat the food. A paper towel left on the functioning cooktop
will not catch fire!
Components
In the same manner as putting together a component stereo system, arranging various cooking appliances allows you to choose the exact item to it your needs. You can mix power sources and brands. Above all, you can locate each appliance where it best suits your design.
Ovens
Consider a separate oven as part of a component cooking system or to provide auxiliary capacity to a range. A wall oven, as opposed to the oven section of a range, can be in stalled in a tall cabinet, either singly or paired with another oven or a microwave. It can also be installed in a base cabinet, under a countertop or cooktop, where two ovens can be positioned side by side.
Plan oven controls to be at eye level. The controls on most ovens are rotary, but touch pads are increasingly available and are easiest to clean.
Since an oven is not tended often during cooking, it can be located outside the main cooking area. An open oven door extends about 20 inches. Do not locate an oven where the open door will block a doorway or other heavy-traffic area. Position an oven at least 6 inches from a side wall. Provide a 15 inch landing on one side for setting down hot food.
The vast majority of ovens are electric, though gas models are made. If you opt for gas, look for one with pilotless electronic ignition. Each electric oven requires a 240-volt receptacle; a gas oven requires only a 120-volt receptacle for the accessories unless it is self-cleaning, in which case it too requires 240 volts.
The typical wall oven is 27 inches wide, though 24-inch and 30-inch models are avail able. Most ovens are 24 inches deep and require a couple of inches of air space at the back for venting. A pair of ovens, stacked, measures 50 inches tall. The typical oven interior is 19 or 20 inches wide. When choosing an oven, check its in side and outside dimensions.
According to one cooking expert, an increase in width of only 2 inches can make room for an extra dish on the oven rack. Extra insulation is more energy efficient and keeps the kitchen cooler, but it can re duce the interior size of the oven. However, you can add insulation yourself when in stalling the oven by including rigid fiberglass panels inside the cabinet and on the sides and top of the oven.
Ovens are 6nished to match other major appliances. Doors with a translucent area that serves as a window are gaining in popularity.
Balance special features between ease of use and your budget. Self-cleaning ovens use a special high-heat cycle to bum off food residue, leaving the oven spotless. When cleaning starts, the door locks automatically and cannot be opened until the oven cools. These ovens are very well insulated.
Continuous-cleaning ovens have a special coating that makes residue burn off gradually as you cook. This feature is not recommended; the oven is never fully clean, and the interior will be damaged if cleaned by hand.
Convection ovens have a fan that circulates hot air around the food while cooking.
This can cook foods up to one third faster, at a lower temperature. This type works best for roasting, baking, and browning, but has little effect on moist foods such as casseroles and vegetable dishes. Convection and microwave features are often combined in one oven: The microwave component cooks the food rapidly and then switches to convection to brown it (then again, you could just switch ovens). Other oven features include delayed cooking start, rapid preheat, meat thermometers, and rotisseries.
Cooktops
Burners set in countertops are a popular component of a modern cooking system, Cooktops are available in gas models, al though electric cooktops are by far the most popular because of their ease of installation and variety of features. The most common configuration for either type is four burners, two in front and two in back. Other arrangements include six burners, five burners, two burners, a single burner, and four in line burners. Specialty burners such as grills and griddles are also available. For cooks who like both gas and electric, units of both types can be installed.
Convertible cooktops offer a variety of specialty burners in a modular form. Gills, hobs, griddles, woks, and other cooking tools come as modules that snap in and out of the cooktop as needed. This saves counter space that would be required for permanent installation and makes the cooktop more versa tile. Consider carefully how often you would use these features, and whether changing and storing them would be worthwhile. If you choose a convertible cooktop, allow cabinet space close to the cooktop for storing the modules.
The typical two-and-two cooktop measures 20 by 28 inches, although other sizes are available. Cooktops drop into a hole in the countertop and hang from the flange around its edge.
The controls are usually top mounted, though some models have a separate control panel that can be mounted in the cabinet below the cooktop. All gas cooktops, and the better electric models, have infinite range control; some have thermostatic control for setting a specific temperature. An electric cooktop requires a 240-volt receptacle; a gas cooktop re quires a standard gas pipe with shutoff valve. Surface materials include stainless steel, enamel over steel in a range of colors; and glass-ceramic in black, white, and gray.
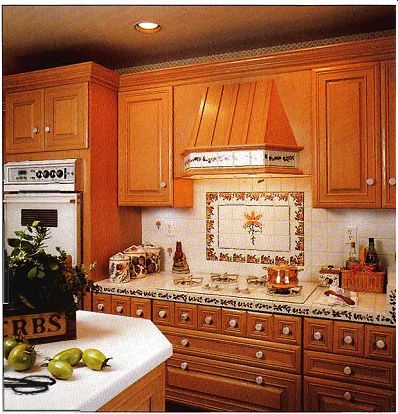
------ Individual burners can be aligned in different ways to
best serve your needs.
Four in-line and four in a square are the most common configurations. Here the back burners are offset from the front ones, which allows for large pots to be used without them overlapping the burners.
Electric burners come in four types: coil, solid disc, glass-ceramic (coil or halogen), and induction. Look for a cooktop that has coils that snap out easily for replacement.
Specialty coils include a dish shaped wok burner and an extra-large burner for a canning pot. Drip pans under the coils require constant deeming.
Solid-disc elements, called hobs, have electrical wires em bedded in a cast-iron disc. This produces very even heat, with slow warm-up and cool-down times. Some cooks feel the heat is not intense enough for sautéing. Choose discs that have a sensor in the center that indicates when the disc is hot, to prevent burns. The smooth disc surface is easier to clean than the drip pan under a coil, but may discolor over time.
Glass-ceramic cooktops have conventional coil elements un der a smooth ceramic surface.
Early glass cooktops earned a poor reputation due to discoloring and inefficiency, but many of those problems have been solved. A pattern on the glass surface indicates burner location; the pattern changes color when heated, but the change fades long before the surface is actually cool. Glass-ceramic cooktops are not quite as energy efficient as those with ex posed elements; some heat is lost to the glass, and the entire surface can become quite hot.
But spills and boil-overs are a snap to clean up, and the look is very sleek.
Halogen cooktops look like glass-ceramic cooktops but the burner heat source is a tubular light bulb filled with halogen gas. The bulb gives off more heat than light; its glow indicates it’s on. Halogen burners are more instantly controllable than electric elements, offering some of the cooking advantages of gas.
The halogen enables the tungsten filament to last far longer than an ordinary light bulb.
Induction cooktops also have a glass-ceramic surface, but there the similarity ends.
Under the cooktop are solid state, electronic induction coils that produce a magnetic field.
When ferromagnetic (iron or steel) cook ware is placed over the burner, this field passes into the cookware and makes it hot, cooking the food. The cooktop itself remains cool.
Non-ferrous cookware does not produce heat nor do small items such as flatware. Induction offers very fine temperature control with cooking times approaching those of gas. Although induction cooktops are expensive, they are very energy efficient, produce no combustion emissions, present little ire hazard, and are relatively safe for children.
Cooking tiles are another type of induction-cooking burner. They come in individual ceramic or glass 12-inch squares that can be arranged in unconventional ways, such as around a corner, along an is land, or side by side. The tiles are mounted flush with the countertop. Their controls, usually an electric touch pad, are powered by a separate unit, which can be mounted along side the tiles or in a separate area, such as in a drawer or across an island.
Gas cooktops are the standard among gourmet cooks.
The flame offers infinite control and instant on and off.
Pilotless ignition eliminates the pilot light and saves gas. Typical gas cooktops have the four burner configuration, although some have five, six, or eight burners. A griddle is commonly available. Single gas burners can be lined up in a row, or one can be used as an auxiliary burner.
Ranges
The original cooking appliance, a range is basically a cooktop and oven all in one. It is usually either all gas or all electric, though gas burners are avail able with electric ovens. There are four basic types of range: freestanding, slide-in, drop-in, and commercial. A freestanding range has finished sides so that it can be positioned any where in the kitchen, for example, at the end of the cabinets. It has four burners on top and one or more ovens-and often a broiler-below. A back splash displays controls or accessories; controls may be at the front. Some ranges have an upper oven as well, which may be a microwave. Many professional cooks recommend against an upper oven because its underside collects grease, the ventilation system is usually inferior, and it can interfere with looking into and stirring tall pots on the burners.
Freestanding Range
The typical freestanding range is 30 inches wide, though there are widths of 24 and 36 inches as well. The cooking surface is 36 inches tall, to fit a standard countertop, and 27 inches deep, which means it will protrude past the fronts of the base cabinets, especially if it is installed with space behind for the power connection.
Slide-in Range
A built-in range, also called a slide-in, is similar to a free standing model. It is of standard countertop height but has no side panels, so it must be installed between base cabinets.
It is designed with raised edges, allowing a more snug it be tween the countertop and surrounding cabinets.
Drop-in Range
A drop-in range is set into the run of cabinets and supported by the counter. Its front is flush with the cabinets, and the top has a flange that overlaps the countertop for a sleek, integral look. A typical installation puts a drawer below the oven for storing pots; this must be specified when ordering cabinets.
There is no backsplash, and the controls are at the front or on top, making the drop-in suit able for an island. It is usually 30 inches wide. Remember that the drop-in range is not as deep as a countertop, so the opening for it must be cut to size after the countertop is installed.
Commercial Range
A professional, or commercial, range has an aggressively low tech, powerful design that appeals to serious cooks and to anyone who believes in the axiom "Form follows function." A typical commercial range uses gas and has six large burners and an oversized oven. It may also have a grill or a griddle, which takes a while to sufficiently heat up. The burners are rated 15,000 to 20,000 BTUs, compared with 9,000 to 12,000 BTUs for a residential range. It is stainless steel, very heavy, and usually 33 to 36 inches deep. Before you consider this heavy equipment /or your kitchen, learn all you can about its installation requirements--the manufacturer will offer specifications.
Typically the model you choose must be approved for home installation by the manufacturer, the American Gas Association, and local codes. A professional range generates great amounts of heal. It requires a clearance from the walls and cabinets, and the floor and surfaces surrounding the range must be covered with tile or other fireproof material. Such a range may be too large to fit through a doorway, and its considerable weight may require ex Ira bracing of the floor joists.
Most commercial ranges require a larger-diameter gas supply pipe than a residential range.
Codes may require an elaborate ventilating system with special grease filters and a built-in fire extinguishing capability.
If a commercial range appeals to you based on style, there are several commercial style ranges manufactured for home use. These provide the high-BTU burners and large capacity needed for gourmet cooking without the commercial installation requirements.
Check the manufacturer's installation specifications to see whether a model is recommended for home use. You may find a happy medium be tween high-volume, gourmet needs and residential requirements.
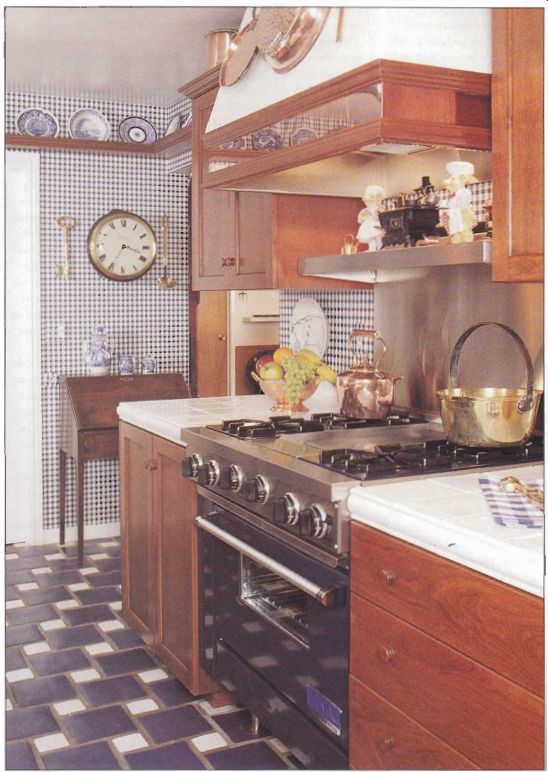
-------- Commercial-style ranges bring high-quality burners and oven
capacity to the home kitchen without the safety requirements of true commercial
ranges. Home gourmets have encouraged manufacturers to expand their product
lines to include a variety of sizes and colors, like the blue enameled
version shown here. This kitchen is also pictured on page 70.
Microwave Ovens
The microwave oven has redefined home cooking. With no muss or fuss, it makes a hot meal available almost instantly, any time of day. It produces no combustion and no heat, and plugs into a 120-volt electrical receptacle-preferably on its own circuit, although this is not required.
Microwave ovens range in size from less than a cubic foot, to the size of a standard oven.
A typical midsized oven measures about 20 inches wide, 15 inches tall, and 15 inches deep; power ranges from 400 watts to 1,000 watts or more. The appropriate size and power for you will depend on how you plan to use the oven.
There are several ways to install a microwave oven for a built-in look. Consider mounting it in a specially designed microwave wall cabinet, which includes storage; on a shelf beneath a short wall cabinet with a full-length wall cabinet along each side; as the upper oven of a two-oven range; in an oven cabinet as the upper unit of a double wall oven; or hanging beneath the wall cabinets using a bracket designed especially for that purpose. If hanging the microwave, remember to allow at least 12 inches of space be tween the bottom of the oven and the counter. A shorter space renders the countertop below the oven useless, al though it can be filled with a built-in drawer; this leaves the narrow strip of countertop in front of it unusable, however.
The oven door typically opens on the right side, though some open downward like a conventional oven.
for convenient use, position the microwave oven so that its floor height is between the el bow and shoulder height of the average cook.
Plan on cabinet storage near the microwave oven for the particular cookware it requires.
Allow a 15-inch landing on one side for setting down items hot from the oven.
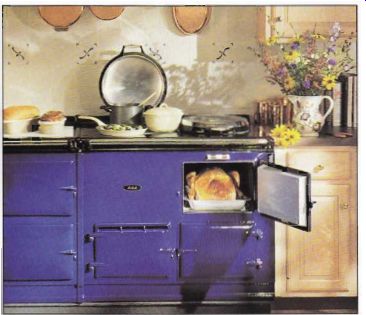
--- Deciding on the best cooking system for your kitchen depends
on your cooking style and the space requirements of the room. A range, like
the blue commercial-style one above, is the more traditional choice, but a
component system (below) will suit even the most traditional kitchen, when
as well designed as i/ is here.
++++++++++++++++
VENTILATION
The kitchen ventilating system is a major appliance, as important as any other, and must he chosen with great care. Proper ventilation keeps kitchen surfaces free of grease and rids the air of fumes, steam, and odors.
Determining Need
The system that works best for you depends on the size of your kitchen and the location of the cooktop. Where you position the cooktop will depend in part on the ease of running ventilating duct work to the outside.
Kitchen air should be ex changed every four minutes.
The ability of an exhaust fan to move air to the outside is rated in cubic feet per minute, or CFM. To figure the CFM capacity needed for the kitchen exhaust fan, multiply the square footage of the room by two. For example, a kitchen 10 feet by 12 feet would require a fan rated 10 times 12 times 2, or 240 CFM-more if the ceiling is higher than 8 feet. The mini mum CFM capacity for a hooded fan over a cooktop is 40 times the width, in feet, of the hood (50 times if the hood is over an island or peninsula).
For adequate kitchen ventilation, an auxiliary exhaust fan would also be needed. Do not over-ventilate, however. An overpowered exhaust fan can cause a backdraft in an airtight house, pulling in combustion fumes from the furnace, chimney, and hot-water heater, and radon gas from the foundation.
It will also cause excessive loss of heated or air-conditioned in door air.
Choosing Ventilating Systems
Often, ventilation is required by code, especially for indoor grills and gas cooktops. The code may dictate both the size and style of the ventilating sys tem for your kitchen.
Hood/Vent
A hooded exhaust /an over the cooktop, ducted to the outside, provides the most efficient kitchen ventilation. The hood collects rising cooking fumes so the fan can remove them; the fan does not "pull" the fumes up. The depth of the hood, front to back, determines how far above the cooktop it may be placed: a 16-to- 17-inch hood should be no more than 21 inches above the cooktop; an 18-to-21-inch hood, 24 inches; a 24-inch hood, 30 inches (which is the maximum for any hood).
At minimum, the width of the hood should match the width of the cooktop.
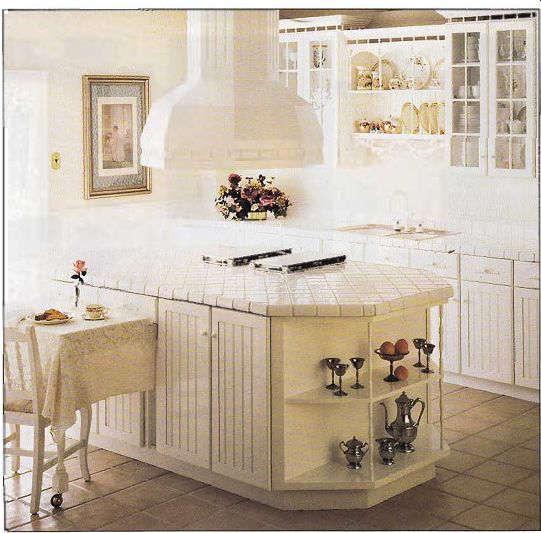
------------ Because of their she and central location, hoods over
island cooktops are a major design element. If your floor plan calls for
an island cooking center, such as this one, consider choosing a hood that
matches the cabinets.
Fans
The two main types of fan are propeller style and squirrel cage style. The cylindrical squirrel-cage fan is quieter and more powerful. The noise level of a fan is measured in sones.
Choose a fan rated at 8 sones or less, and try to listen to a fan before you buy it-a noisy fan will not get much use. Often, the fan is built into a metal hood assembly that includes a light and a removable filter, and may feature a warming lamp, It requires a 120-volt receptacle. The fan and filter may also be purchased separately, and the hood custom-built to match your decor. Some cabinet lines offer a unit that looks like a cabinet, but pulls out to form a ventilation hood.
Non-vented, or ductless, hoods have a fan that circulates air through a filler and then back into the room. A filter may help remove some grease, but it has no effect on heat, steam, or fumes. A ductless hood is not recommended except where ducting is impossible.
A wall or ceiling exhaust fan, ducted to the outside, can do an adequate job of exchanging the air in the kitchen, but it does not trap cooking fumes.
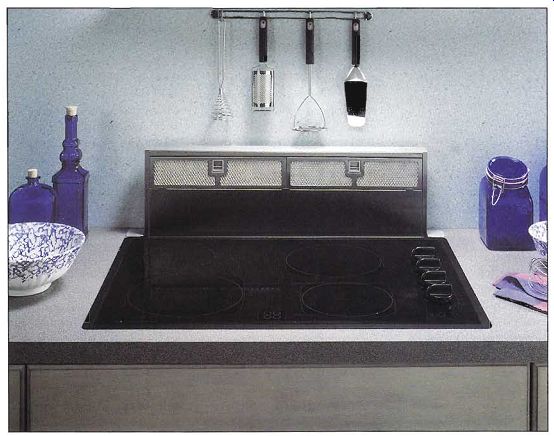
--------- Not all kitchen ventilation requires a ducted hood. An induct
ion cooktop can be vented by a backsplash fan (above). For safety’s sake
openable windows should never be located above a cooktop but are ideally located
over a sink (below).
Down draft Ventilation
The major alternative to a hooded exhaust fan is a down draft ventilating system. Found in many cooktops, especially those with grills, this system has vents at the center, sides, or back of the cooktop through which a fan exhausts fumes downward through a duct.
Downdraft ventilation can be effective under certain conditions: The fan must be on throughout the cooking pro cess, and pans must not block the vent. A downdraft fan is more powerful than a hood fan, and can cause backdraft problems. Its ducting must follow the manufacturer's requirements to prevent strain on the motor, which can cause automatic shutoff.
Ducting
Proper ducting determines whether an exhaust fan can work to its rated capacity. The shortest, straightest duct is best; try to plan cooktop placement so that the fan can be ducted straight out an adjacent exterior wall or through the roof. The fan manufacturer will specify the maximum allowable duct length; keep in mind that each turn is valued as 10 feet of ducting, and the number of allowable turns is limited, typically to a total of 180 degrees.
Duct size is also specified; this is usually 7 inches round or 3 1/4 by 10 inches rectangular (to fit between studs). A duct passing through an unhealed area must be insulated. Where the duel exits the house, a vent called a wall cap, eave cap, or roof jack must be installed. These incorporate a backdraft damper and a bug screen.
++++++++++++++++++
REFRIGERATORS AND FREEZERS
The electric refrigerator and freezer have done as much to change the family life-style as any technology of the twentieth century. By keeping food fresh for long periods of time, these appliances have revolutionized shopping patterns and purchasing power.
Choosing Refrigerators and Freezers
A refrigerator or freezer has a life span of 15 years, so consider carefully how your family's needs may change. A refrigerator can consume thou sands of dollars in electricity in its lifetime. In fact, the refrigerator is one of the largest energy users in the house, so compare the energy-guide labels, required on all appliances, to find the most efficient model. Each refrigerator or freezer requires its own 120-volt receptacle and probably its own circuit, deter mined by code.
The procedure for choosing a new refrigerator and freezer begins by making the following determinations:
. Your cold-storage needs
. The machine type that best fits the space
.The interior features that best suit your cooking style
. The style that complements the look of your kitchen
Machine Types
Refrigerators are manufactured in a gamut of colors. Most enameled refrigerators have a textured finish that disguises smudges. Commercial and professional-style refrigerators are finished in stainless steel.
Many have view-through glass doors-an incentive for neat ness! There are also special doors for barrier-free design.
Some manufacturers pro duce door panels that match the cabinets, giving a built-in look. The hardware for attaching the panels, called a trim kit, is provided by the refrigerator manufacturer, and the panels by a cabinet manufacturer.
Single-Door
The single-door refrigerator is the smallest and least expensive. Most have a mini freezer compartment inside that must be defrosted manually. There are 36-inch-wide machines available that are refrigerator only, and these are handy for extra Storage or paired with a separate freezer.
Two-Door
The two-door refrigerator/ freezer has a separate freezer, usually at the top. Some models have a bottom freezer that rolls open, bin-style, providing easier access to both freezer and refrigerator, as well as efficient cold storage. This model may have a double refrigerator door, called a French-door refrigerator. The freezer maintains a temperature of approximately 0° F, cold enough for long-term storage. Most models have automatic defrost. This style comes in total capacities up to 24 cubic feet.
NO FREEZERS
Side-by-Side
The side-by-side refrigerator/ freezer has a refrigerator on the right and a freezer on the left.
The narrower doors have a more compact swing, making this style ideal where space is tight. Children can reach the freezer easily. However, the deep, narrow shape of the interior makes food storage more difficult. Check to be sure that the occasional frozen pizza or holiday turkey will fit in the freezer. Countertop placement must allow the doors to open fully on both the light and the left in order to remove drawers and bins. All side-by-side models have automatic defrost. The freezer maintains a tempera ture of approximately 0° F. The total capacity is up to 30 cubic feet, with a relatively large freezer space. Some models have a small third door above the freezer compartment for often-used items.
Commercial
Commercial refrigerators aire gaining popularity among cooks who want large capacity and no-nonsense design. They may have one or two compressors, which can be located on top of the refrigerator or even in a separate area. These compressors can be noisier than those designed for home use.
Under-counter
Small, under-counter refrigerators, typically 36 inches tall by 24 inches wide, are handy for extra storage and can be an excellent option for a bar, apartment add-on, or as an addition to your main refrigerator.
Combination cooktop-under counter refrigerators and sink under-counter refrigerators are available from several manufacturers. While these will not meet the needs of a family kitchen, they are wonderful space-saving devices for apartments, office kitchens, and for entertainment rooms that are some distance from the main kitchen. Check manufacturer specifications for plumbing and electrical needs, and local codes for ventilation requirements.
Separate freezers
There are two types of separate freezers: upright and chest.
Of the two, the upright offers easier access to its contents and takes up less floor space; its size and shape resemble a refrigerator. If you use a freezer on a daily basis, this type may be worked in to the kitchen design, depending on space allotments. An upright may have automatic defrost.
The chest freezer opens at the top. Due to its shape,
it maintains cold more efficiently but, because of its bulkiness,
is best installed in a garage, basement, or utility room. Most chest freezers are manual de frost. Meant for long-term storage, they aren’t opened much, preventing rapid frost buildup.
A chest freezer is 36 inches high, and ranges from 27 to 32 inches deep and 32 to 72 inches wide. Because their contents are often valuable, chest freezers usually have a keyed door and a light to indicate that power is on. Also look for a defrost drain, deep- and quick freeze sections, an interior light, and sturdy rollers.
Interior Features
The interior design of a refrigerator determines how convenient the appliance is to use.
Look for adjustable shelves; glass is sturdier than wire, and catches spills. Drawers and door shelves should be wide and deep enough to hold the intended food items. For easy cleaning, as many parts as possible should be removable, in eluding door shelves that block drawer access. Controls should be readily accessible, and not in the way of the storage area.
Finally, make sure the refrigerator has smooth, sturdy rollers so it can be moved for cleaning.
An ice maker is practical enough to be considered a basic feature, though it is usually an option you must purchase separately. When figuring cost, include installation of the copper water-supply tube.
Some features that seem like luxuries are actually energy savers. Door dispensers, for example, serve up crushed ice, chilled water, and juices with out the need to open the refrigerator door. Some models have a small exterior compartment that can house milk cartons and soft drinks. One high-end refrigerator even makes ice cream and frozen yogurt.
Measuring Refrigerators and Freezers
Kitchen-design standards call for 10 to 12 cubic feel of interior refrigerator space for two people, plus 2 cubic feet for each additional person. Freezer space should be 2 cubic feet per person. The capacities claimed by manufacturers are not all usable space, however, so add 2 to 4 cubic feet to your estimate.
Bigger is not always better A refrigerator kept partially full uses more energy to cool.
To figure the placement of a refrigerator in your kitchen, measure the height, width, depth, airflow space requirements, and door swing.
The exterior of a full-sized refrigerator measures 24 to 60 inches wide and 58 to 72 inches tall. While some manufacturers make 24-inch-deep models to it between cabinets, most refrigerators are 30 inches deep.
The majority of modern refrigerators require just a 1-inch airflow space all around. Door swing ranges up to 35 inches out into the room, perhaps blocking traffic flow; the door must also have room to open wider than 90 degrees to make shelves and drawers accessible.
There should be 15 inches of countertop on the latch side of the refrigerator.
The awkward depth of most refrigerators requires some design ingenuity to achieve a built-in look. The refrigerator can be boxed by panels that match the cabinets, with full depth short cabinets above.
If floor space is plentiful, the adjacent base cabinets can be pulled out flush with the front of the refrigerator, and the counter made deeper.
Upright freezers can be built in as well, but lack of variety in colors and trim panels for most models makes them harder to coordinate with the kitchen decor.
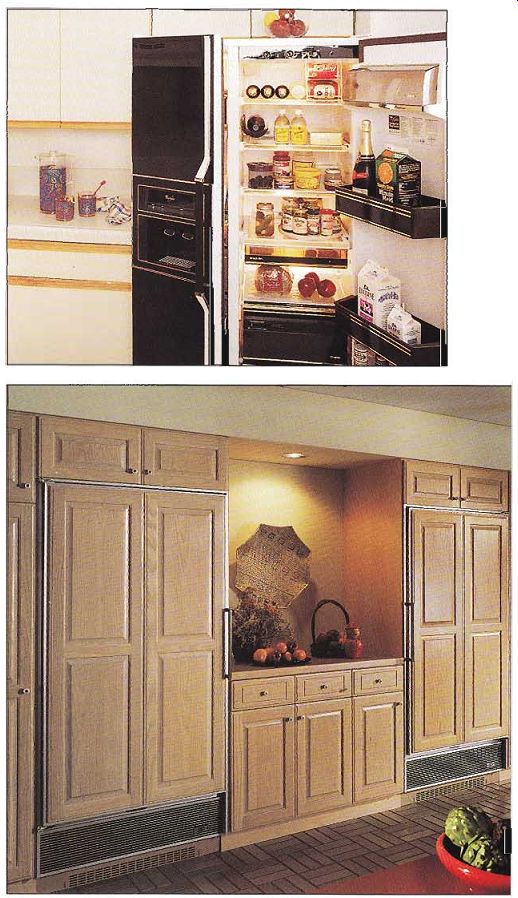
------------ Appliances must accommodate everyone in the family. The
narrow doors.
of a side-by-side refrigerator (above) are easy to open from n seated position, which is why it was chosen by a wheelchair user. Another view of this kitchen appears in section 1. The cold-storage requirements of a large family necessitate two refrigerators (below). Alternating the direction the doors open allows both appliances to share one landing.
================